Whenever I see someone throw away a chicken carcass after making a nice roast, I cringe a little bit.
Just because you’ve picked all the meat off, there’s no need to waste those bones!
Making and canning bone broth is a great way to become more self-sufficient. There’s a misconception out there that it’s difficult to do but that is simply not the case. This is something you can do easily in just an afternoon, allowing you to always have broth on hand for soups, stews, sauces, gravies, and more.
A great way to save money while also improving your health and self-reliance, learning how to make bone broth at home is a smart choice.
Here’s what you need to know.
What is Bone Broth?
You can make bone broth out of any kind of animal bones. I love making broth from all kinds of leftovers, including chicken carcasses, beef bones, and even, as I mentioned, leg of lamb.
Before we get started, it’s important to clear something up – the difference between stock and broth. The two terms are often used interchangeably, but technically, stock is made from bones while broth also includes meat and vegetables. Many people (myself included) use bones in their broth to ensure a thicker liquid.
Related: How to Safely Store Homemade Broth for 6 Months (No Canning or Freezing Required!)
In the steps below, I’ll walk you through making bone broth out of leftover chickens. I use pasture-raised birds to make my bone broth, though of course, this is not necessary.
The idea behind making bone broth is simple. You’ll simmer bones in water, add some herbs and vegetables, then let it simmer. You can leave the vegetables in once the broth has finished cooking if you want to make a complete soup with the broth, or you can strain them out (they’ll have imparted most of their flavor to the broth, anyway).
Bone broth is loaded to the brim with collagen, gelatin, and all kinds of vitamins and minerals to keep you healthy!
How to Make Bone Broth
Ingredients
● Cooked bones or carcasses (you can use the entire thing, even the feet, if you’re making broth out of chickens)
● Apple cider vinegar (helps to leach extra nutrients and minerals out of the vegetables and bones)
● Vegetables of your choice (carrots and celery are good options, as are onions and garlic – you can even use scraps and skins if you plan on straining your broth afterward)
● Herbs (basil, oregano, thyme, and rosemary are my favorite)
● Salt and pepper to taste
You will also need to have either a large stockpot or slow cooker on hand along with various cooking tools like a colander and wooden spoon (for tasting).
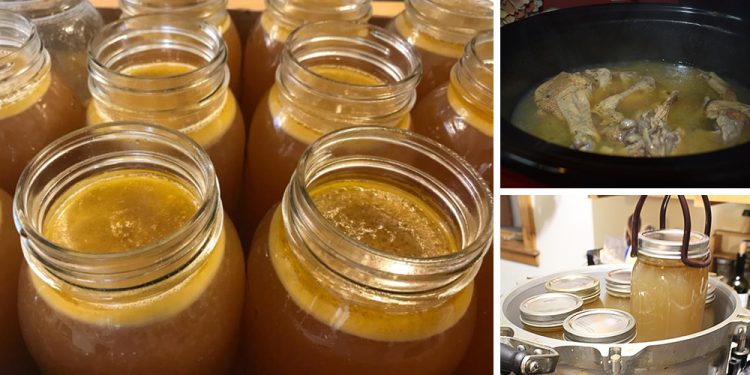
You’ll see in the pictures that are included that I typically make my bone broth in a slow cooker to save time (that way, I don’t have to constantly watch the pot). However, you can easily do this in a stockpot, too. The choice is yours!
I made my stock out of a chicken I had roasted the night before – see below!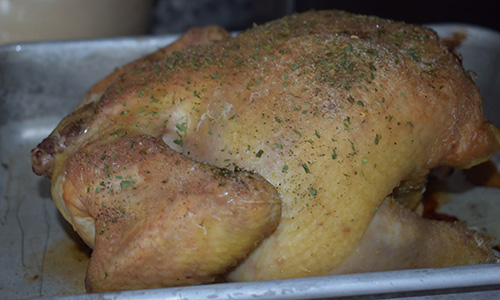
Instructions
1. Put your carcass or bones in your slow cooker, along with your vegetables and herbs.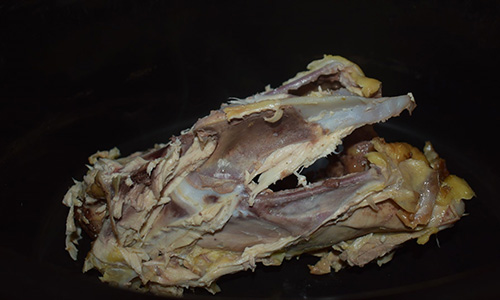
2. Cover everything with water and add a quarter cup of apple cider vinegar.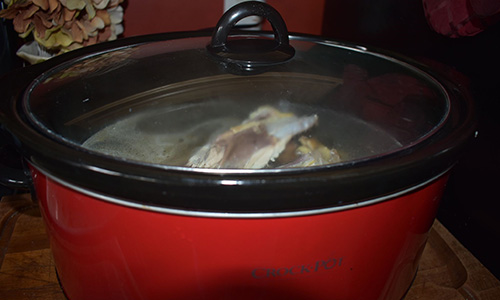
3. Bring the broth to a boil, then reduce it to a low simmer. If you’re working in a crockpot, you can do this by bringing the heat to high for about half an hour, then bringing it back down to low.
4. Keep it in the slow cooker (or on the stovetop) for about 12 hours.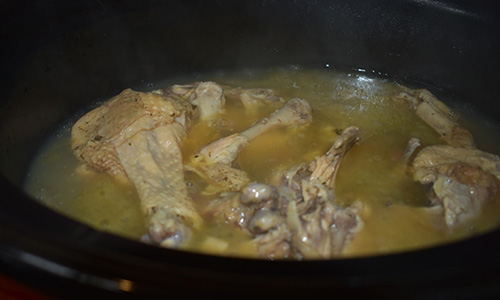
5. After 12 hours, you can strain the broth through a colander.
6. Put the broth in the refrigerator overnight (or for 12 hours). This will allow the broth to firm up and form a layer of fat. This layer of fat should be skimmed off before you process the broth in the canner.
7. Didn’t get as much broth as you wanted from the first batch? Go ahead and run it through another cycle of simmering. You can reuse the bones and carcass twice for a thicker, meatier broth.
How to Can Bone Broth
Bone broth must always be canned in a pressure canner – do not attempt to can it in a water bath canner, as this is unsafe. A pressure canner will warm the broth to much higher temperatures, making it safer for long-term storage.
Here’s how to make bone broth after you’ve made it according to the recipe above.
Supplies Needed
● Pressure canner with lid
● Canning funnel
● Pint or quart jars with lids and bands
● Jar lifter or set of tongs
● Spare kitchen towels
Instructions
1. Once you’ve prepared your bone broth according to the instructions above, the next thing to do is skim off the fat. Your broth will be chilled at this point, so you need to heat it back up. Bring it to a boil in a large stockpot. If you try to can cold bone broth, it might not get hot enough when you attempt to can it.
2. While your broth is boiling, fill the pressure canner with a few inches of water.
3. Wash your canning jars in hot, soapy water. You can sterilize them in the dishwasher, if you prefer, to save time. Make sure none of the jars have nicks or chips.
4. Ladle hot broth into the jars, filling but allowing for about an inch of headspace. This is where the funnel comes in handy!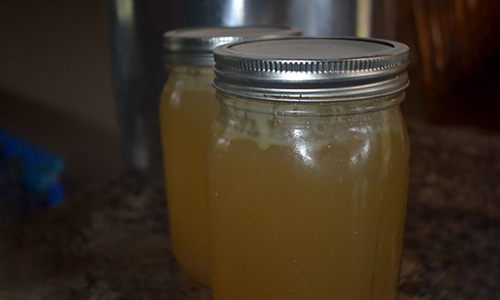
5. Then, wipe the rims of the jars with a clean towel to remove any residues.
Related: The Long-Forgotten Cheesecloth
6. Add your lids and bands, then tighten so that each is fingertip tight.
7. Use the jar lifter or tongs to load your jars into the canner. Cover the canner and secure the lid.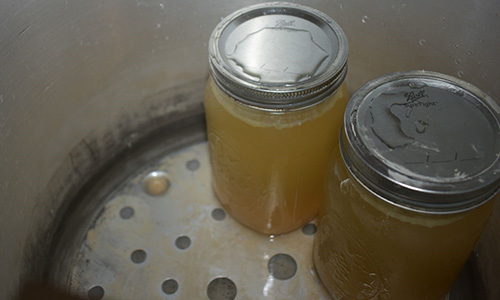
8. Turn the heat up to high and let the pot come to a boil. After a while, you will notice steam coming out of the vent. Let the steam escape for ten minutes or until the indicator pops.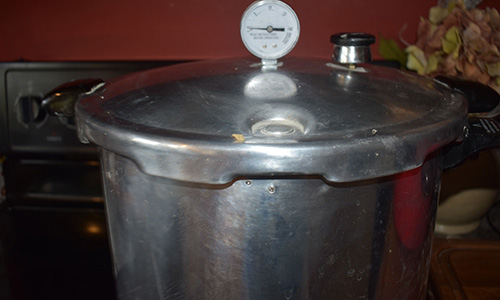
9. Next, put the weight on the vent. Let the pressure come to 10 lbs, then start your timer. You will need to be at 11 lbs of pressure for altitudes of 1000 feet above sea level or higher. You will need to adjust for altitude if that is not the case.
10. Watch the canner closely as you may need to adjust the heat if the pressure rises or falls. If it rises slightly above 11, that’s okay – just reduce the heat to relieve some of the pressure. If it dips below 11, however, you’ll need to restart the timer when you get the pressure back up.
11. Process the jars for 20 minutes for pint jars or 25 minutes for quarts.
12. When the timer is up, turn off the heat and let the pressure canner cool down on its own – do NOT attempt to remove the lid, as this can be dangerous. It can take up to an hour for the canner to cool.
13. Carefully remove the lid and turn it away from you when you do so that you don’t suffer a steam burn. Remove your jars with the jar lifter and let them rest on a towel.
14. Let the jars sit for 12-24 hours, then store in a cool, dark location. When you store them, check to make sure each one is sealed. Jars that did not seal will need to be tossed.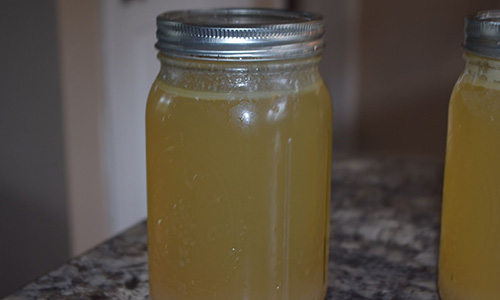
How Long Does Canned Bone Broth Last?
As you can see as indicated by the title of this article alone, canned bone broth has an impressive shelf life – you can expect it to last for at least two years.
That’s right – two years with no freezing or refrigeration necessary! So while you’ll have to put in a little bit of extra legwork in order to make the broth, trust me when I say – it’s worth it.
So what are you waiting for? The next time you have some extra bones left after dinner, don’t toss them in the trash.
Make and can your own bone broth for a self-sufficient pantry instead!
You may also like:
DIY Candle Lantern From A Soda Can
The Canning Mistake That Could Make or Break Your Supplies (Video)
Best Household Self-Defense Items You Probably Have In Your Home Right Now






you can use wine instead of vinegar to leach the minerals from the bones, if you wish–adds some flavor and the alcohol evaps off. also, you can add flavor by roasting the bones in the oven before simmering in liquid. if you roast until the bones are golden brown, the broth will be brown also. the roasting makes it easier for the goodness in the bones to end up in your broth.
Great point. Why not use both vinegar which is cheap plus wine if you have it?
Word of caution! Don’t give those cooked bones to your dogs. They shatter into very sharp pieces and I’m talking beef, pork and larger game. However the chickens will love to peck them to pieces without harm plus they get much needed calcium. By the way chickens love chicken too and poultry bones may be OK for them but I don’t. These already cooked bones are also good for many gardens.
When I make bone broth the bones are so soft that they will crumble in my hands. The problem I have with giving them to dogs is that too much will cause constipation. Chicken bones are easy to get to the crumble stage in a pressure cooker; beef and ham bones are more difficult. For sure if they bones are not crumbly, don’t feed to your dogs.
Question: My canning technique – which has worked for tallow, for example – is to put the open jars in the oven at 210. So, just before boiling. Make sure the oven is on long enough, at least an hour, for the cans and the contents to get to to temperature. Then, cover and seal quickly, making sure that after an hour the “pop up” part of the lid has been pulled down.
What do you think?
You need to process bone broth at 11 pounds pressure to kill botulism spores, 11 pounds is 240F, 212 is the max you can get w/o pressure. Not canning at 240 you could kill your whole family with dinner.
For fats you way is fine but not so safe for meats, broth, of most vegetables. You need the higher heat and pressures of the pressure canner.
What about simply setting my oven temp at 250 (so, 10 degree margin)?
As stated, water in broth will boil at 212 degrees, making a huge mess in your oven and steaming off your product you have worked to produce.
So many folks here in the city are paying big bucks for little cups of bone broth or collagen powder to stir into their lattes thinking it will rejuvenate them and make them youthful. I on the other hand, never let an opportunity to create a wonderful broth or hearty soup from the remains of a wonderful roast fall to the wayside. One thanksgiving, I even rescued a turkey carcuss at my sisters before she dumped it in the trash! She didn’t understand why I wanted it, until I brought her some soup. It’s good to know it can be bottled and placed on the shelf for a gift giving occasion! I never thought to do that, but now I will. Thank you for the article.
I can leftover chicken, turkey, ham, rabbIt, beef, pork, et. I also make broth from the bones, soups sometimes or at least a stock with the meaty bits in it for gravy or soups later.
canning bone broth is done using a 10 lb weight, once the canner reaches 10-12 lbs its 20 minutes. some of my broths were made in 2018 and are still just as good as the day they had been made
Weights and timing vary by altitudes. I mm I’ve at over 6000 so most things are canned at 15 lbs and 90 minutes time.
When I’ve added carrots, onion, etc. I puree these at the end of cooking and put them back in the broth.
Last year, I canned some turkey bone broth that I made after Thanksgiving with the leftover turkey. Good stuff!
Rosary, lol… I think you meant Rosemary. One of the plants that people use to make rosary beads is highly toxic.
Jack Kerouac mentioned in one of his works about hoboes eating “graveyard stew, mostly bones”. This kind of reminds me of that, good article.
Please, please, please. Read, understand, and follow your pressure canner’s instructions — exactly. There are two kinds: weight or dial. We prefer the weight as it is easier to hear what’s going on than constantly looking at the pressure dial.
We love to make this bone broth. Our grocery frequently has a sale on chicken leg quarters. we cut them up and freeze the legs and thighs, then toss the back parts into the pot with veggies. The chicken is dirt cheap and the broth is virtually free!
Don’t tell people how good leg quarters are, the price will go up!
JH- I think it just did!
Buy the whole chicken.
Has anyone tried to pressure can in an Instana Pot?
RidgeRunner,
You can make the bone broth in the insta pot. It’s a pressure cooker. NOT a pressure canner! 2 different products. Both have their place but NOT interchangeable.
Peace
MadFab
DO NOT use an Instapot to try and pressure can!! It is Not a pressure canner, it is a pressure cooker!! Two different appliances!
Great article and comments with a wealth of info…thanks to all!!!
Reminds me of a book my wife has that’s one of her favorites…titled “Two Old Women” by Velma Wallis
To who down voted my post…I meant no disrespect or ill will…the book I mentioned is about two old women who are abandoned by their tribe because they are old, complain all the time, considered to be a burden to the tribe and are thought certainly to die soon…instead they survive through determination and skills learned when they were younger by catching a rabbit and rationing the the boiled broth and meat…that’s why the article made me think of the book. It’s a short read but very touching book about difficult choices, struggle, determination, survival, sharing and forgiveness.
I hope you will consider reading the book.
Great Post.
I got a kick out of your listed herbs, one of which you state is ROSARY.
We all may well need one of those if we have to use this finished broth to help survival.
Can you “collect” bones and put them in the freezer until ready to make your bone broth?
Yes you can freeze the bones until you are ready to make the broth, I do it a lot myself. I even leave some meat and skin on the bones, so much added flavor! Like the author states, you need to let the broth cool and remove as much fat as you can, unless you are going to use it for soup right away.
Yes. Some save 3 in freezer to make large batch. Also save in freezer vegetable scraps to include in broth: onion ends and skins, carrot ends and if peeling the peels celery ends, etc.
There is nothing wrong with absconding with the bones from a holiday celebration at a friend or relatives house! I do it all the time. I took a smoked turkey carcass home one time even though I got a few scoffs. I used the broth to boil my beans in to make soup! Delicious! Love the comments on this subject!
Stay safe and God Bless…
Appreciate this article and the information provided by so many. My one question is why do you remove the fat? Is it just to remove fat or for preservation purposes?
Craig M,
You need to remove most of the fat for pressure canning the bone broth.
It may interfere with the sealing of the jar. You won’t get all if it and that’s OK, cause fat is flavour !
Don’t toss the fat ya skim. Chicken fat, aka schmaltz is wonderful!!
Hope this helps,
Peace
MadFab
Can you can it with a “hot water bath” instead of a pressure canning pot?
NO- read all the comments above on this question.
People, PLEASE: you MUST have a pressure CANNER, NOT a pressure cooker OR instant pot, NOT a water bath canner, NOT an oven…a PRESSURE CANNER. If you try any other method, oven, Instant pot, pressure cooker, you may very well get botulism, which WILL KILL YOU. Only pressure canners provide the correct heat and pressure to kill the botulism bacteria. None of the other methods will kill botulism.
Please, do NOT try this unless you have a pressure canner or do not plan to keep it shelf stable. You may freeze it or consume it within the time before it becomes rancid.
BE SAFE and follow proper pressure canning methods