Whether you spend a lot of time outdoors or you are in a survival situation, insect bites and small injuries are inevitable.
Unfortunately, some bites can be poisonous and some injuries can develop into serious infections, which is why it’s essential to have something on hand that you can use to quickly heal the affected area.
An anti-inflammatory charcoal poultice is one of the best treatments for these sorts of things. If you have the ingredients, you can make it in minutes. It can help “suck out” the infection, cleanse your wound, and reduce pain.
Activated charcoal is an amazing substance with a lot of uses, so you should already have it on hand if you want to be prepared for any emergency.
In this post, I will show you how to make a simple charcoal poultice, how you can use it, and how you can make activated charcoal yourself.
What Is A Poultice?
A poultice is a thick paste made out of water and healing ingredients, such as charcoal, powders, and herbs.
If you don’t have any herbs, it is a good idea to grow your own. Here is a kit that has everything you need to start your own medicinal garden, so you can later make your own herb poultices and natural remedies.
A poultice can be spread directly onto a cut or an insect bite. It also works well when spread over a clean warm cloth and applied to the affected area, which increases blood flow to the injury and helps promote healing.
Poultices have been around since the dawn of time when people would chew up an herb until it had a paste-like consistency and place it over their wounds.
Anti-Inflammatory Charcoal Poultice
To make the anti-inflammatory charcoal poultice you will need activated charcoal. I recommend purchasing it in bulk and stocking up on it in case of an emergency.
There is a way for you to make activated charcoal yourself, but it’s a lengthy and difficult process (more on that later).
Having activated charcoal on hand in an emergency is always a good idea since it has so many uses. I have a big jar of charcoal capsules that can be taken internally for digestive issues or cracked open and used as the powder for the poultice.
Charcoal Poultice Recipe
Here’s what you will need for this poultice recipe:
- 2 tbsp. activated charcoal powder
- 2 tbsp. flaxseed or flax meal (optional)
- a few tbsp. of clean, warm water
- a clean container to mix these ingredients
- clean cloth or bandage to wrap the poultice over your wound (optional)
The goal here is to create a paste using charcoal. The flaxseed is optional but it helps give the poultice a nice jelly-like texture which makes it easier to apply. However, this recipe will still work without the flaxseed.
This should be enough to cover a large wound or a rash. You can always make less or more, depending on your needs.
Related: 12 Native American Remedies That We Lost To History
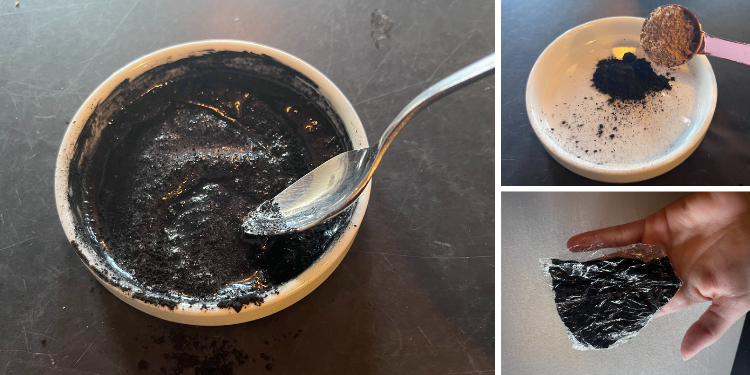
Follow these steps to create a poultice:
1. Mix the charcoal powder with equal amounts of flaxseed or flax meal powder. You can omit the flax if you don’t have any on hand.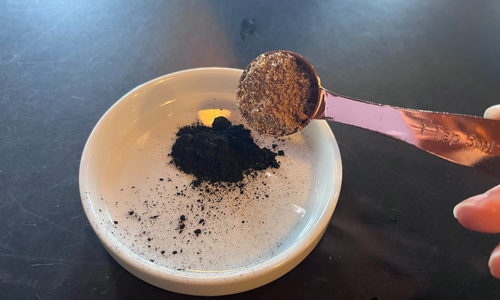
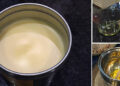
2. Add clean water one tbsp. at a time slowly mixing with the dry ingredients until it has a paste-like consistency. If you used flax, add a little bit of extra water because it will get absorbed by the flax meal.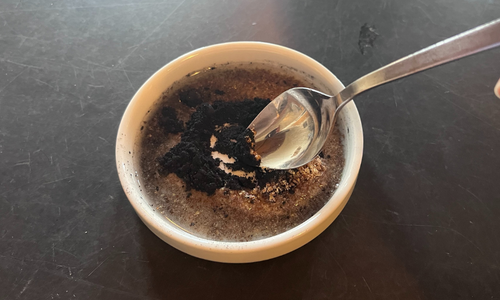
3. Wait 10-15 minutes. By this point, your paste should have a nice jelly-like consistency.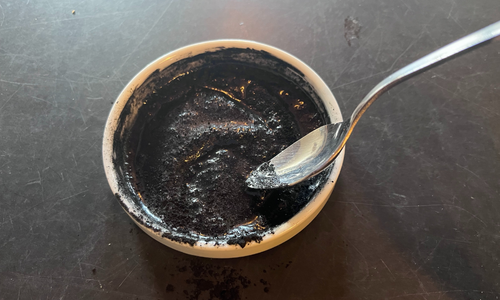
4. In the meantime, cleanse the injured area with clean water.
5. Spread the poultice on a clean cloth or bandage and wrap it around the affected area.
Related: How to Make Cabbage Bandages to Treat Inflammation and Joint Pain
If you don’t have a clean bandage, you can apply the poultice directly onto your skin and allow it to dry in place.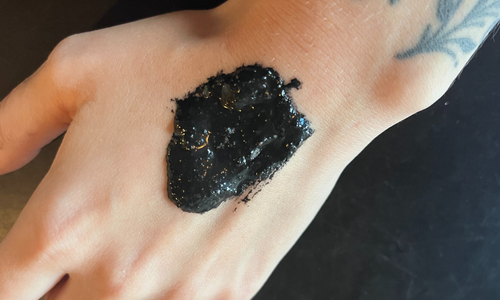
6. Allow the poultice to stay in the affected area for at least 30 minutes.
You can re-apply the poultice as needed, making sure to cleanse the area between each application. This will help draw out any infection or toxins that may be in your wound.
Charcoal Poultice Bandages
The poultice can also be made in advance and placed in the freezer for later use. This is a great option that allows you to have a supply of homemade “charcoal bandages” for emergencies.
However, it’s a good idea to also have activated charcoal on hand, in case there is a power outage and your freezer stops working for a longer period of time.
Here’s how I make charcoal bandages:
1. Follow the steps above to create your charcoal poultice, and make a larger amount while maintaining the same proportions. For example you can use ½ cup charcoal powder and flaxseed and mix water into it until it has the right consistency.
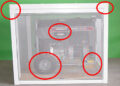
2. Spread the poultice over a large sheet of plastic wrap, about ½ inch thick.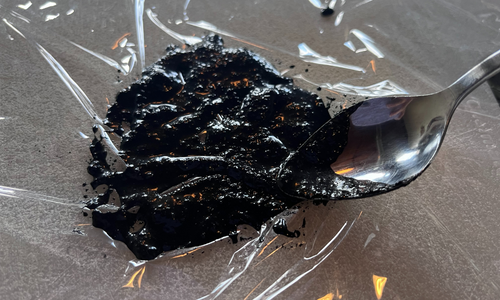
3. Place another sheet of plastic wrap over the poultice and use a roller to flatten the poultice in between the sheets.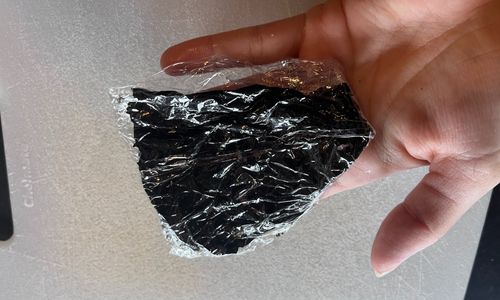
4. Freeze the plastic-wrapped sheet of poultice.
5. When needed, remove it from the freezer and cut off the amount you need to cover the affected area.
Related: Why You Should Put A Coin In A Cup Of Frozen Water In Your Freezer
6. Peel off one side of the plastic and stick the poultice directly onto the skin (the cold temperature will be great for reducing pain, too!). You can leave the other side of the plastic on to prevent things from getting messy.
7. If the poultice moves around, you can secure it in place by wrapping a bandage, tape, or some cloth over it.
8. Remove the poultice after about 30 minutes.
Getting Activated Charcoal
As I mentioned previously, activated charcoal is something I recommend stocking up on as part of your survival inventory. Activated charcoal comes in the form of tablets (great for water purification), capsules, or a bag of loose powder.
Whichever option you choose, you’ll be able to use the charcoal for a variety of purposes. However, if you don’t have any activated charcoal, you can try to make it yourself. This is not a quick and easy process, so it’s best to just buy it in advance.
If you need to make it, you can try the following method.
Making Activated Charcoal Yourself
To make activated charcoal, you’ll need to burn some wood and treat the resulting coals with a calcium chloride solution. If you don’t have access to calcium chloride, you can use lemon juice.
Gather your ingredients:
- a large pile of hardwood, chopped up into small pieces
- metal barrel or large metal pot to burn the wood
- calcium chloride (or lemon juice)
- clean water
- medium clean pot
Once you have everything you need, follow the steps below to create activated charcoal.
Note: This process will take several days.
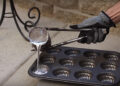
1. Place your hardwood into a large metal container and start a bonfire under the barrel. Allow the hardwood to burn for several hours until the wood turns into blackened coals. This can take 5-8 hours depending on how much wood you have.
2. Allow the coals to cool completely overnight.
3. The next day, grind the coals into a fine powder. You can use a mortar and pestle or a hammer for this.
4. Allow the powder to dry completely. You will likely need to leave it overnight again.
5. While it’s drying, prepare your calcium chloride solution. You will need to use a 1:4 ratio of calcium chloride to water. If you are using lemon juice, adjust the proportions to 1:3 ratio of juice to water.
Related: Survival Uses for Calcium Chloride
6. Place your dried charcoal powder into a medium-sized clean pot.
7. Pour calcium chloride (or lemon) solution over your charcoal powder, until it has a paste-like consistency. Discard any extra solution.
8. Mix up the paste and let it sit for 24 hours.
9. Carefully drain the liquid out as much as you can and boil the remains in a clean pot over a fire for 3 hours. This will eventually evaporate any remaining liquid, leaving you with a dry powder.
10. Voila, now you have activated charcoal.
You can probably see why it’s easier to buy pre-made activated charcoal, but if you ever need to make it yourself – now you know how!
Knowing how to make a quick poultice can buy you some time before you can treat your cuts or inflammation with more tools.
Poultices can be made with a wide variety of herbs and plants, but due to the versatility of activated charcoal, it’s my material of choice. I always have a charcoal tablet or a baggie of powder in my bag so that I can reach for it in case of an injury or a bite.
You may also like:
 Long-Lasting Great Depression Casserole
10 Medical Supplies You Need To Stockpile Before It’s Too Late (Video)


I had looked at this before just in case I was force vaccinated.
Could I suggest for your activated Charcoal Poultice be supercharged by using pure raw Honey, instead of the water.
Not the junk “Professed” stuff they sell it the stores, but use the real thing ya get from your local beekeeper, or farmers market.
My ex wife was a bee keeper
https://www.askaprepper.com/10-most-powerful-medicinal-plants-used-by-cherokees
Activated Charcoal is great for food poisoning. Same thing they use at Hospitals for food poisoning.
I posted instructions at Harvesting and Using Dandelion Roots. I’ll post here too.
Do Not Use Kingsford Charcoal since it has lighter fluid in it.
go buy a 2×4 pine or any wood will do at the local hardware store. yes you can use the kind they sell on corners that say freshly cut fire wood bundle for $5.00
I say that because someone is going to be a smarty pants. scrap wood from the hardware for free. if you have a woodstove use that to burn it.
I have a small Hobo oven that I made from a big can. I use it to make smores with my daughter and keep the charcoal. Hobo oven instructions on youtube
You can use the fireplace. pretty sure you’ve been left with black burnt pieces of wood that didn’t turn to ashes. that’s your charcoal and it’s activated. activated means it’s oxygenated.
1. wood, burn it. light it with paper or cardboard.
2. let it burn till becomes charcoal.
3. put it in a sealed jar. that’s it.
4. once you have those burnt pieces of wood, to re-oxygenate simply put it in and oven and cook them for 2.5 hours at 350 degrees. I like to reactivate / re-oxygenate when making a new batch. to reactivate or not Meh.
You can also burn tortillas on the stove with fire. I gave that to my children when they had upset stomach, diarrhea.
How do you take it is the next question huh ?
You can crush them into powder and drink it like that
( they do sell it like that. I don’t like it)
or encapsulate them. (they do sell it like that at Whole Foods for $14 ? Rite Aid has some but they’re caplets and are coated pink. I don’t like.
I break a piece and swallow it with water.
Worked good for my wife’s bed bug bites on her bottom. She got em at work she’s a massage therapist but I was glad she never brought them back to our bed. One time I used it for poison ivy that I caught from this woman once. Localized rash .but that stuff do work
Son, are you triple vaxed? Or parents related?
Well your family tree is a bush
ANY charcoal is better than none. All will draw out bad things.
Activated just works a little better.
You can buy activated charcoal at your local pet store too.
Helps keep pet odors down.