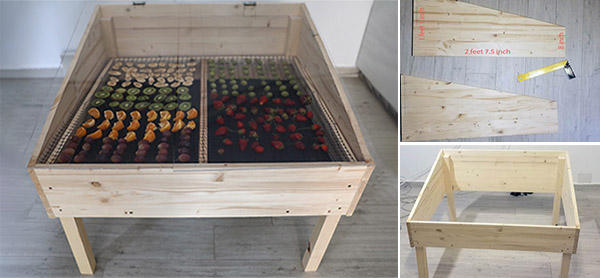
If you want to get the benefits of dried fruit without spending a lot of money at the grocery store, you might want to build your own fruit dryer. A fruit dryer is easy to build if you have the right tools and you use the right materials.
Here is a list of the tools you will need in order to build it easily:
- A drill
- A jig saw (or a manual saw)
- A hammer
- A measuring tape
Here are the materials you will need for this:
- Nails and screws (different sizes, depending on the materials you can find—you don’t need many)
- Wooden beams for the structure – 1.5’’ x 1.5’’ would work fine (20 feet)
- Thicker wooden beams – 0.5’’ x 0.5’’ (25 feet)
Wooden planks (4 pieces):
- Plexiglass (3’ x 3’)
- Two metal corners
- Four hinges
- A black material (3’ x 3’)
- Metal wire (3’ x 3’)
This dryer will be 2’ 7.5” x 2’ 7.5” x 2’ 3”. If you want to make it either larger or smaller, just adjust the sizes and use the same proportions. Now let’s go step by step through the process of building a fruit dryer.
Related: 13 Survival Foods You Should Always Have at Home
#1. Building the structure
For this step, you will need the following:
- 2 wooden beams at 2’1”
- 2 wooden beams at 1’8”
- All 4 wooden planks
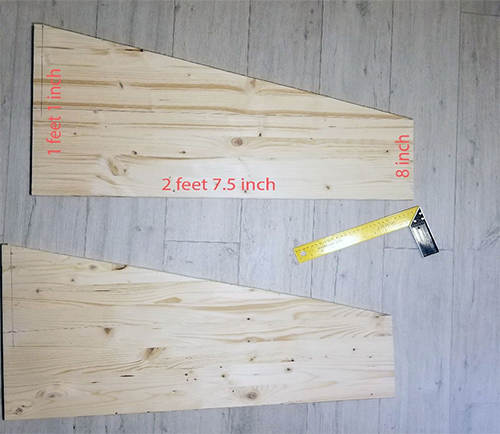
Don’t worry about the thickness of the beams; just use what you can easily find. The shorter beams will be used as the front legs, while the longer beams will be used as the back legs. We are using different sizes in order to get a nice slope so the sunshine has a better chance of permeation.
We also need two different wooden planks, one for the back and one for the front.

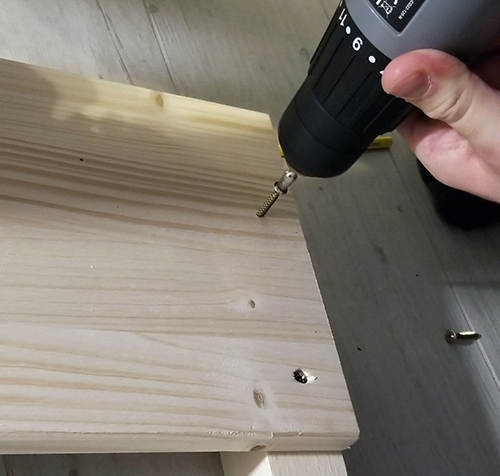
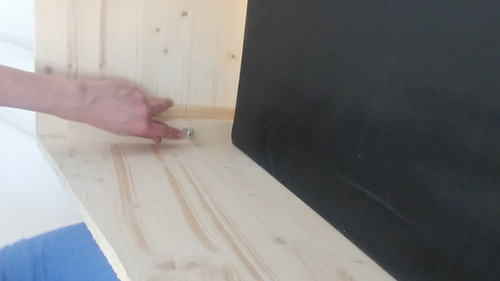
Now, using your drill, you will nail them together. We will nail together the larger wooden plank with the longer feet and the smaller wooden plank with the smaller feet. Make sure you leave some free space at the top; this will be useful later. We left two inches at the top of both pieces, which you can see in the picture below. 
Now that we have nailed together both the front of the dryer and the back of the dryer, let’s nail together the sides. For this, we will use these wooden planks: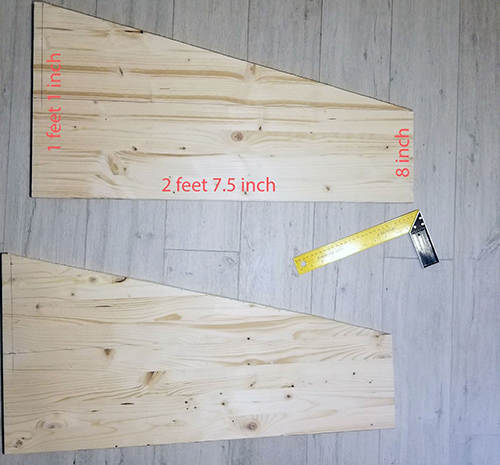
These are the sides of the dryer, and we have to nail them on the front and on the back of the dryer we built earlier. The result must be something similar to what you can see in the picture below.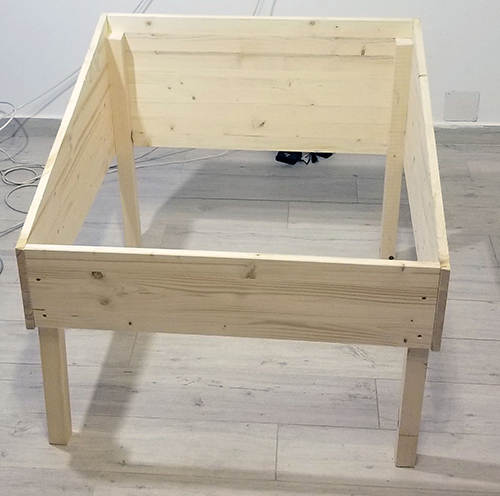
Related: 7 Super Cheap Foods To Stockpile That People Usually Throw Away
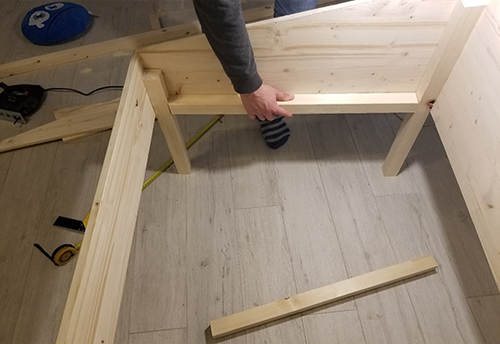
#2. Building the bottom and the drying place
For this step of the building process, we will need the following:
- 4 wooden beams that fit inside like in the picture below (check the size yourself)
- Thicker wooden beams for the structure of the bottom and the drying place (check the size yourself to be sure there is no error)
In the next step, you’ll have to nail the four wooden beams in the bottom part of the box. The beams will be placed inside the dryer, between its legs. These beams will have the job of holding the bottom of the dryer. Because the inside size might differ depending on the thickness of the materials you use, please verify the size yourself.
This is what you should have by now: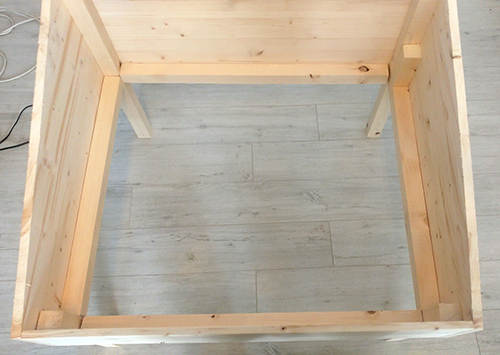
Now that we’ve done this, the next step is to build the bottom of the dryer. For this, we will need some thick wooden beams, some nails, and a dark material that we will be using because it absorbs the sunshine, causing the dryer to get warmer and the fruit to dry faster. The bottom of the dryer will lie on two of the wooden beams that we added before. You can decide whether it’s the sides or the bottom and the front, but we recommend you double check the size before building it to make sure you are building it at the right size for your dryer.
Basically, you need to build a rectangle with a beam in the middle so you can then cover it with the material. The structure should look like this: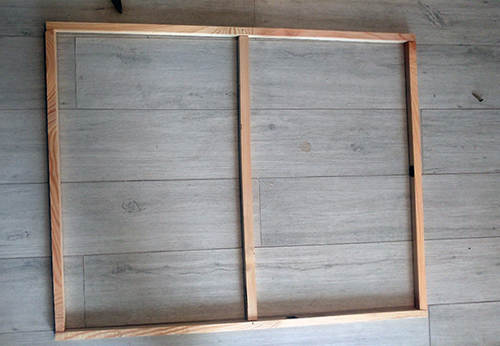
Now stick or nail the material to the structure. We nailed it here, but if you have some glue, you can also glue it. This is what you should get:

Now we can put it inside and continue building the drying area.
The drying area is very similar to building the bottom of the dryer, but the difference is that this one is a little larger, and instead of the dark material, we will use a metal wire. Make sure it is clean because all the fruit will lay on it. Before building the drying area, let’s attach two metal corners on the back legs, at the exact height of the front legs. This way, the drying area will have four support points and no incline.
Now that you have the support points, make sure you double check the size of the actual box because the drying area has to fit in perfectly.
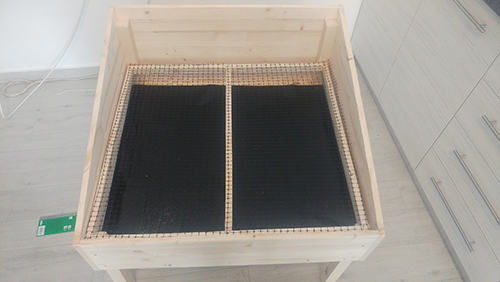
Now build your drying area and add the metal wire to it like shown in the pictures below. 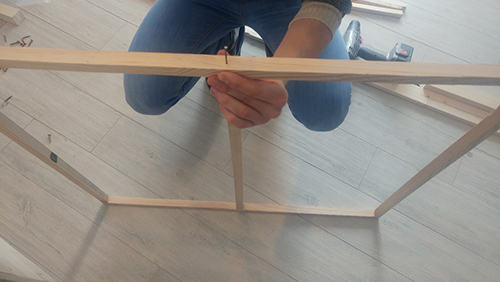
Now that you’ve done this, you already have a functional fruit dryer. However, to get the best results, you will have to add a piece of Plexiglass on top. In order to do this, you will need one or two pieces of Plexiglass, depending on the number of openings you want your dryer to have. Here, we used two Plexiglass pieces because we wanted to get two smaller openings. To attach them, you will have to use one or two hinges for every piece of glass you intend to use, but if you intend to open in frequently, it would be best to use two. Use a drill to drill the plexiglass, and then, after you affix the hinges on the glass, nail them on the wooden plank at the back.
If the plexiglass is not the right size, you can cut it either with the jig saw or using a traditional glass cutting method (see here), but be careful because it might crack.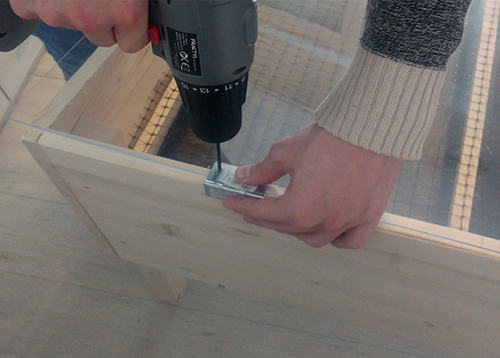
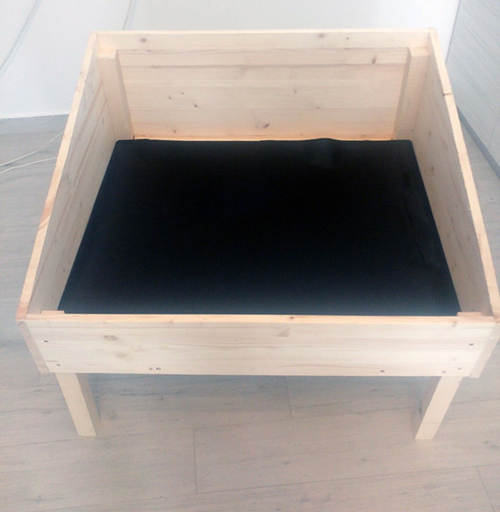
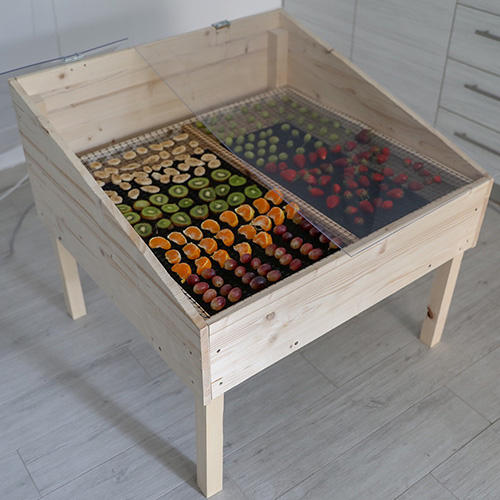
After doing this, your fruit dryer is ready to be used. This is what it should look like:
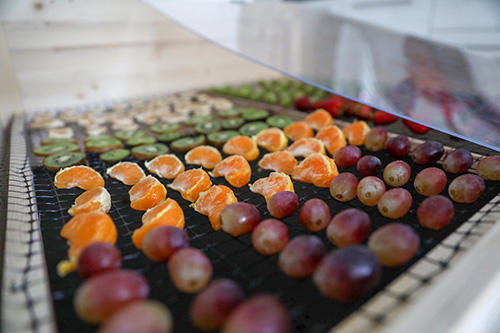
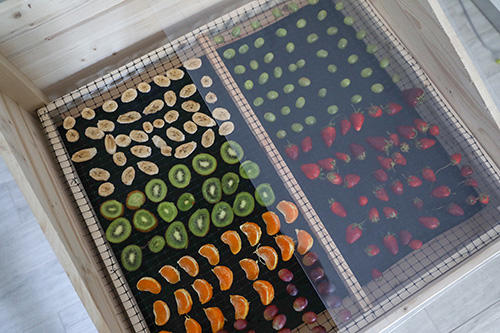
You can organise your fruits like this:
You may also like:
 50 Foods to Dehydrate for Your Stockpile
An Insanely Effective Way to Build a 5 Year Food Stockpile (Video)
The Only 6 Seeds You Need to Stockpile for a Crisis
How to Grow Fruit All Year Round


Please line the entire interior with aluminum. I had not done this and used aged Cedar wood and a slight aroma of cedar with dried food. Also, using plywood or old treated wood could affect the quality and health of your dried products.
Lining with aluminum foil also helps reflect light to undersides and sides of fruit.
Hard to use in humid weather.
Mountain Mike
Wouldn’t that just make this a Solar Oven ??
How long should you leave the fruit in the dehydrator? Are there different times recommended? Love these plans!
Until it’s dry 😉
Most solar dehydrators that I’ve seen require air-circulation. So this fully enclosed unit might not be the best.
Even simpler to build, and less prone to mold, would be a simple wooden frame, the metal wire mesh – or tight chicken wire, then another simple wooden frame with the same wire mesh stacked on top of it, with the fruit in the middle. You could lean it against a south-facing wall for maximum efficiency. It’s important for the moisture to have somewhere to go, otherwise, you’re not really dehydrating it.
How do you keep the insects and birds from getting to your food?
Insects aren’t a problem for about 8 months out of the year up here, so you don’t really have to worry if you live in colder climates, but for elsewhere, add another frame on either side with screen material – same as keeps insects from entering your house through the screen door.
Gee, all I did was buy food tents, three for, I think, $9.99 from some on line store and lay the fruit on some bakery drying racks with small squares, just guessing I would say they are 1/2″ squares. The racks are about 12″ x 12″. I leave them out in the sun during the day and at night I put them in the oven. I don’t turn the oven on, just a place to put them out of the way.
How long I leave them outside depends upon how dry I want them. If I am going to store them I dry them pretty completely. That may take 5 days depending upon how hot the weather is. If I just want to dry them to keep them from spoiling while we eat them right away, about three days, again depending on the weather. Have to remember here in SoCal during the fall when we are drying the fruit the weather is usually quite warm and the humidity can be as low as single digits, so that moves the drying process right along.
Food tents are those gauze, umbrella like objects that one uses to keep flies from food during picnics. I would have preferred all white, but I got them just before some holiday so they came red, white and blue in a set of 3.
We dry a couple hundred persimmons from our trees during the fall.
Persimmons, yummy! Japanese or native? The Japanese trees and fruit like Kaki are gorgeous but I love a stand of black persimmon, and the little Mexican persimmons that grow in the arroyos in the middle of the desert and turn to candy on the tree…Persimmon, most under rated fruit?
That’s a lot of work. Use an old car. Park it in the sun.
LOL! It’s good to start the day with a laugh, cpg! The idea is good, and the comments are helpful.
Having a closed system like that will generate vapor and it will be humid that will affect the drying, it will create longer time to dry and that allows for microbes to grow – not good. It needs an air intake and outlet to create circulation – no water collection. Need to dehydrate, not cooking.
hello
Great idea that will work. However it exposed the food to direct sunlight which can reduce the food value by degrading certain vitamins. A “chimney” type dryer overcomes this problem. See https://www.rootsimple.com/2014/06/whats-the-best-solar-food-dryer/ for an example.
A last ditch dryer when TSHTF can be an old car with non tinted windows. Food can be shaded with a piece of plywood or such so long as it is left a few inches above the food trays so the air will easily circulate.
After the SHTF won’t EVERY car be available for use as a solar dryer? At least on the days it has no gas in it run “errands” in.
I think if you use weed barrier for gardening or just door screen it would still be porous enough to provide some ventilation. The basic idea is using a dark color to attract heat. And if you carefully drilled some holes in the plexiglass and back it with door screen would give circulation as well as insect barrier. Can’t say from experience as I only now saw this article but seems like a simple enough project.