
by C. Giurgi
Earthen ovens have been in use for thousands of years and are made of a clay–sand mixture that is hardened by the wood fire used to heat it. The way they work is that a fire is set, the oven is heated, and then the cooking is done with retained heat after the fire is removed. Foods prepared using this method are cooked slowly and evenly with almost no chance of burning.
The existence of ovens like this can be traced back even further than the 18th century. In fact, just about every ancient culture had a very similar oven. There’s one particular wood cut illustration from medieval times depicting an earthen oven built on a wagon.
There are references in 18th century literature as well as archaeological evidence that you would find ovens like these in private homes and in fort settings. There are also references to communal ovens, where the baker would bake bread for an entire village.
Why an Earthen Oven Is Better Than the Modern Oven
There are some benefits of the traditional earthen ovens:
1. Earthen ovens cook pizza quickly.
2. Earthen ovens save energy.
3. Earthen ovens boost food flavor.
4. They are cheap and easy to build.
If you can build sandcastles, then you can build a clay oven. As for cost, well, if you are handy, you can scavenge or borrow most of the materials for free. Even if you have to buy everything, your total cost is likely to be no more than $50 (depending on the materials chosen and your location).
Supplies You Need
To build your earthen oven, you will need the following:
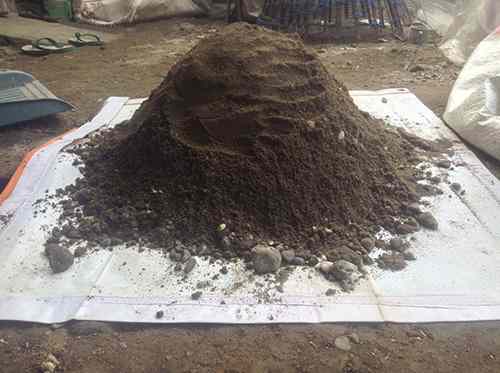
- Building sand
- Cob/clay
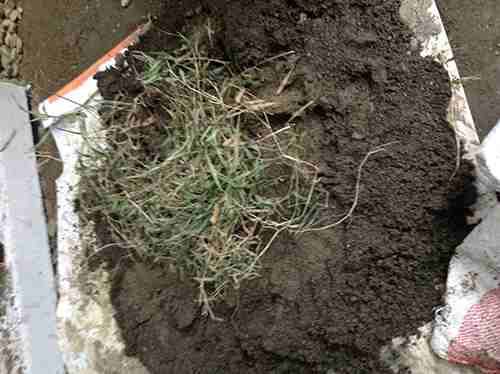
- Straw, dried grass, or hay
- Big paper or newspaper
- Fire bricks
- Water
Building Your Earthen Oven
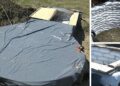
Before you build your oven, you have to consider where you’re going to build it. There are historical examples of ovens built on the ground, tables, bricks, stone plinths, and hearths. You will also need to make sure that your oven is protected from bad weather. It is water soluble, and it will just wash away with the rain, so if you want it to last, you’re going to want to build it under a roof or have it covered. For this tutorial, I used a ground base because it’s the easiest and the ground in my back yard is high enough.
Related: Tools The Early Pioneers Used on A Daily Basis
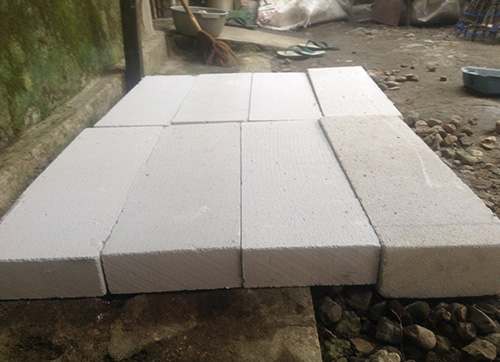
Once you have decided where you are going to put it, lay out a layer of bricks for the oven’s base, and chalk out a design. Mine is about 18 inches across for the inside measurement. The fire bricks that I used are from Asia, and they’re really big. If using normal-sized bricks, you will need about 40–50 bricks.
The walls are going to be about 4 inches. The door is about 8 inches.
Once you have decided on the design of your oven, you should start working on your clay.
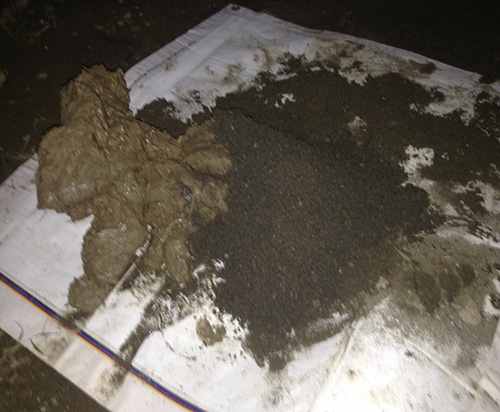
You probably want to make a whole bunch of this cob beforehand. It ages well, so it won’t go bad if you wait overnight. This will ensure that as soon as you’re done with your sand castle core, you can start putting the clay on right away. You don’t have to worry about the sand drying out and blowing away while you’re making your cob.
The inner layer of mud or cob will be made of a mixture of sand and clay with about two parts sand for one part clay. You have to mix these two together well. Make sure it reaches the right consistency—not too sloppy or wet—to allow you to work with it. Also, ensure that the top is dusted with more sand than clay because if there is more clay, your oven will shrink and crack.
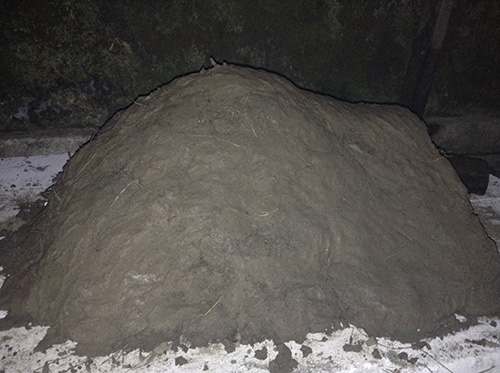
Now you want to go ahead and build the core.
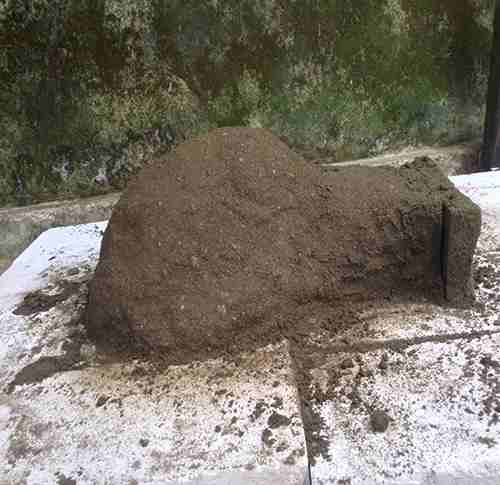
This is going to be like a sand castle—very wet sand piled together—and the form may differ according to your preferences. You will start building your oven around this pile, so make sure the sand stays wet until the first layer is completed (as you will see later). Another method is to use sticks and hay, but using wet sand is going to be much easier and quicker. In order to shape the door, you should place a brick wall to get a nice flat surface to build up against.
There aren’t very many critical things about the shape and the size of your oven, but there is one critical thing: the height of the opening tunnel compared to the height of your dome. This has to be a particular ratio or else the air won’t flow through when you’re burning the wood inside. The tunnel needs to be between 60–65%, or about 63%, of the height of the dome.
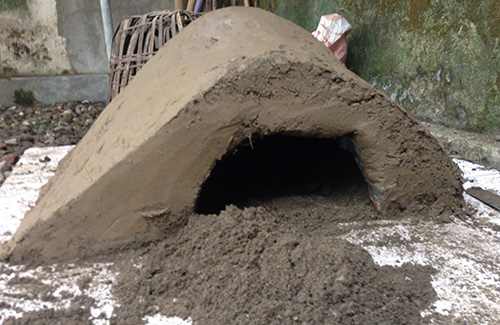
Once your inner core is built, you need to put paper on it.
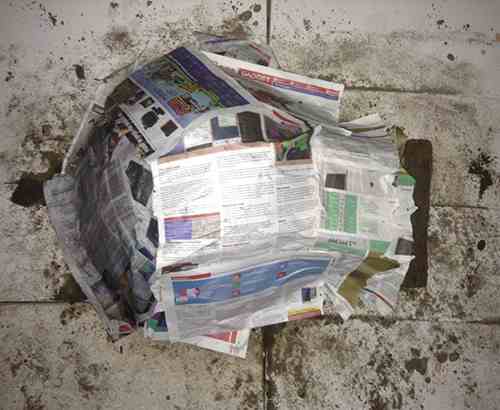
Wet the paper thoroughly, and layer it over the sand. This will allow you to separate the sand from the inner surface once the oven is finished. Now you can start framing the first layer with the previously made mixture of sand and clay or cob.
This first layer needs to be about 3 inches thick and will not have any straw or hay because that will burn up. Start from the very bottom, and work your way up so you can make sure the thickness is the same all around. When you are done with this layer, allow it to set overnight so it will be slightly firmer. Don’t allow it to get too dry or else the next layer won’t adhere properly. Scratch up the layer a little bit so the next layer of cob adheres nicely.
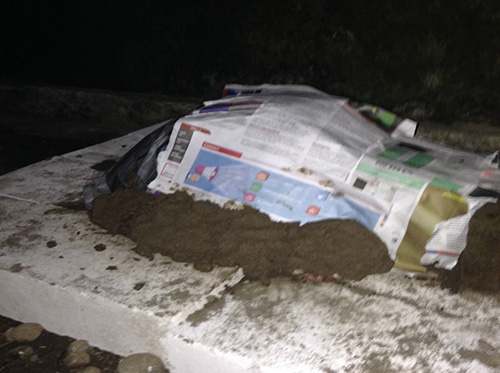
The second layer of cob will contain grass, hay, or straw in order to give it more strength than the inner layer. The first thing you need to do is mix the clay and sand. As soon as that’s close to the right consistency, you’ll add the grass, hay, or straw.
 The outside layer should also be about 3 inches thick. Make sure the second layer butts up well over the inner core so there isn’t a big air space in between. Make sure you put the cob all the way around. You might want to start a little thinner at the bottom because some of the mixture will sag down into position a little bit as you go farther.
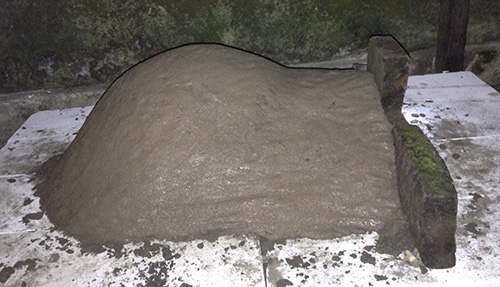
Depending on your location, environment, time of year, and climate (humid, arid, etc.) the drying time could vary from 2 to 4 weeks or even longer. It is essential to let your oven dry for however long is needed.
While it’s drying, you need to protect it from rain and moisture, but don’t cover your oven with plastic materials because it will need to breath in order to dry. Preferably, as stated earlier, it is best to build your oven under an already covered area.
As it starts to get dry enough, you can begin to slowly dig the sand out. Don’t worry too much about the paper because it will burn out anyway. Every few days dig out a little bit more of the sand in order to allow some air inside. This will stimulate the drying process inside of the oven.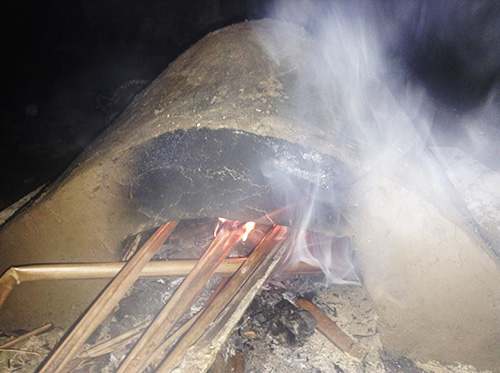
Once the sand core has been removed and your oven is adequately dry, you will be ready to fire it up. If your oven is not completely dry before you fire it, it will cause cracking in the body.
The last part needed is an oven door. An oven door is usually constructed out of wood and should provide a tight fit with your oven body.
You may also like:
The Lost Art of Scratch Cooking
The Awesome DIY Device That Turns Air Into Fresh Water! (video)
7 Primitive Cooking Methods You Still Need to Know Today


This is one of the best videos to watch how one is built. https://www.youtube.com/watch?v=i0foHjPVbP4
@Becky, glad to see you know about James Townsend and Son, do you reenact too?
Why not just carve out a stump to be rounded on top, pour a concrete mixture over the stump after including an opening in front where food would be inserted? Then you allow the concrete to dry and then if there are no cracks or other problems, you set the wood on fire, burning it completely away./
I don’t remember just how the Vietnamese built their ovens but they were outside, uncovered and we’ll used. Smoke didn’t seem to be a problem either, they cooked every thing in them.
heating cooling cycles make regular concrete crack and fall apart relatively quickly. It is why fire bricks are not made of regular concrete and even ovens made of red brick require the bricks mortar be redone if someone uses regular concrete mix instead of fire mix (more sand in mortar that is fire resistant if I remember right). I could be wrong but my experience growing up on a farm and attempting to make different ovens for camping or cooking on growing up outside.
OTOH, why not just make it out of firebricks, especially if you can get ones the size of the bricks in the picture. It seems to me you could make a combo, a rocket stove and an oven by simply closing off the chimney and fitting the door when you are done using the rocket stove.
The early settlers here in australia used termite nests as their ovens! Dig an opening at the base of the nest and hollow it out to whatever size you need. Instant oven and no need to allow to dry as it is already thoroughly dried already. Some even added a piece of pipe at the back for a chimney or removed at piece from the top to take a pan or pot bottom.
A dutch oven in the ground is a much safer and secure option. When I spent 2 months in the Alaskan bush it was by far the best option. You get your fire going at night when you’re concealed and the embers stay hot all day. You can build (dig) a new one at each camp and not have to worry about how to transport anything but a military style camp shovel.