
Winter has always been nature’s pause button – a season meant for slowing down and letting the body recover. But while the outside world sleeps, winter also offers something just as valuable: time. Time to learn, to sharpen practical skills, and to quietly prepare for whatever challenging days may lie ahead.
Within the warmth and security of our homes, winter becomes the perfect classroom. It’s a chance to turn long evenings into productive hours, learning useful, hands-on skills while keeping the boredom that naturally creeps in during cold, dark days at bay.
So, to all my self-sufficient, off-grid fellows, this is your call to action. Put your hands to work: build, fix, learn, and experiment for a healthier mind, a stronger body, and the kind of knowledge that stays with you for life.
No matter what the future holds, the skills you develop now may one day make all the difference.
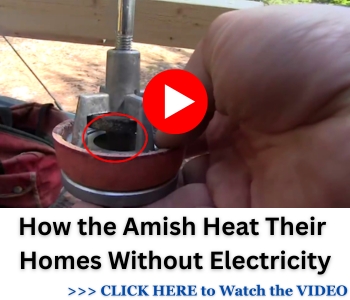
Build a Simple Chicken Coop Heater
 When temperatures drop below freezing, chicken coops can get cold fast. That can affect egg production and even the health of your flock.
Rather than investing in an expensive electric heater, you can build a simple, low-cost heating setup with materials you probably already have around.
Materials needed:
- 1 large terracotta pot
- 3 to 4 bricks or pavers
- 4 to 6 tea light candles (or a low-watt light bulb as an alternative)
- Optional: small metal tray to hold the candles
Instructions:
- Create a base using the bricks or pavers. Arrange them in a square pattern with enough space in the center to place your candles.
- Position the candles in the open space. If you’re using a metal tray, set it on top of the bricks first and place the candles on the tray.
- Light the candles and carefully cover them with the terracotta pot turned upside down. The pot will absorb the heat and radiate it outward slowly and evenly.
- Ventilate properly. Make sure your coop has some airflow to prevent moisture buildup or fumes from the candles.
- Monitor the setup. A single terracotta pot heater won’t make the coop hot, but it will raise the temperature just enough to keep water from freezing and the hens more comfortable.
If you prefer not to use open flames, a small bulb plugged into a solar power source can provide steady warmth. Either version works well for keeping your chickens safe and cozy without driving up your electric bill. In fact, you could save much more if you have THIS in your backyard – we tried it and finally said goodbye to bills for good.
Build an Indoor Vertical Garden
 Many people have their share of indoor, potted plants by a windowsill, but there are only so many windowsills.
With a few simple tools and some wood, you can build a hanging, vertical garden for a wall to grow anything from herbs to salad greens to flowers to vegetables.
The size is up to you. It depends on the size of your wall space and ideally it should be located where it gets some amount of sunlight.
We’ll indicate some sizes for a basic vertical garden, but you can scale it up once you understand the basic concept.
Direct sunlight is best for at least a couple of hours a day, but ambient sunlight will work as well.
Tools:
- Drill and drill bits.
- Drill screw bits.
- Jigsaw or table saw.
Materials:
- Three 4×36 inch 1/2-inch pieces of wood (one piece will be used to cut angled side supports and the other two for the main frame)
- Two 4×18 inch 1/2-inch pieces of wood (Also for the main frame)
- Six 3×14 inch boards (To build the pot boxes)
- Three 4×16 inch 1/2-inch pieces of wood (Also to build the pot boxes)
- A box of 2-inch wood screws
Instructions:
- Cut a 45 degree angle on both ends of two lengths of wood that are 36-inches long, and on two lengths of wood that are 18-inches long. This is the basic framework for the hanging planter.
- Drill two holes into each corner of the frame and screw the frame together.
- Cut the third 36-inch board into 4-inch squares and then cut from one corner of the 4-inch board up to the top at 3-inches. These are the angled braces that you will use to support the bottom and front of the pot boxes. Attach them to the frame at the top, bottom and middle of the frame drilling and screwing from the back of the frame into the supports. They should be 14-inches apart on the frame.
- Attach the 3-inch by 14-inch boards to the bottom of the side braces to support the pots and then attach the 4-inch by 14-inch boards to the front of the braces.
- Seal and stain the vertical hanger if you like.
- Attach to the wall ensuring you are screwing it into studs that should be 16” on center. Screw both the top and bottom of the frame into the studs on both sides. The planter will get heavy especially after watering.
- Make sure you have pot dishes under your pots, so water does not leak onto the wood.
But, even if this DIY project could be a lot of fun, for real results you should check out this survival garden system that grows food without watering, digging, fertilizing, or weeding. Once it’s set up, it runs on auto-pilot, producing fresh, organic, calorie-dense food year after year, even when everything else fails.
This hidden permaculture farm can yield up to 8x more produce than a traditional garden, thrives in extreme climates, from deserts to Alaska, and stays completely invisible to outsiders. It’s designed so fruit trees, vegetables, medicinal plants, insects, and soil organisms all work together, protecting and feeding each other without human intervention.
And to make sure nothing goes to waste and you’re prepared for real-world scenarios, it also includes powerful bonus guides, covering:
- How to secure, store, and purify water when modern systems fail
- How to preserve and can your excess harvest safely
- How to turn surplus produce into barter goods or extra income
- Plus a complete survival blueprint every family should have when the world goes dark
👉Let Mother Nature Do the Work – CLICK HERE to Claim Your Discount & 5 FREE GIFTS now!
This isn’t gardening as you know it. It’s a proven, regenerative survival system that gives you a permanent food stockpile, without chemicals, electricity, daily labor, or reliance on fragile supply chains. Exactly what families need when stores are empty, systems collapse, and food becomes power.
Cook Outdoors on a Canadian Candle
A Canadian Candle is a surprising way to create a fire and a perfect cooking fire with just one, large log. Ideally the log should be at least 12-inches in diameter and 2 feet long.
- Cut a groove across the top of the log with a chainsaw about 4 to 6-inches deep.
- Make a crisscross cut on the top of the log to the same depth.
- Start a small fire on top of the cut log. A small teepee fire works well.
- As the coals drop into the cut crevices the close surfaces of the grooves radiate heat back and forth creating intense heat that will keep the whole log burning.
It may come as a surprise but the flame shooting up out of the grooves will be both hot and intense. On a certain level it’s the concept of a rocket stove as the air enters the bottom of the groove to fuel the fire. The top of the log makes a great platform for a pot or pan for cooking or just heat on a cold winter day and it all happens with just one log.
Make Candles
Candle making is a very easy process. All you need is a spool of wicking string, some metal wick rings to weigh down the wick and hold it in place in the wax, and the wax. You can buy beeswax, paraffin and other waxes at hobby stores or online.
There are also candle molds you can buy. We’re going to keep it simple and inexpensive and use a paper cup.

Make a Pinecone Bird Feeder
Who needs a bird feeder when you have pinecones? The concept is simple. All you need is a pinecone, floral wire, peanut butter and bird seed. If the pinecone is not fully open, place it on a heating vent overnight and in the morning it will be wide open.
Instructions:
- Wrap a 3 foot length of floral wire around the base of the pinecone a few times. Pull it down into the pinecone base on opposite sides.
- Smear peanut butter all over the pinecone making sure you fill all of the crevices and cracks.
- Drop the peanut butter smeared pinecone into a small bucket of birdseed and press it down and around. Shake the cup a bit to cover all of the peanut butter.
- Attach the pinecone bird feeder to the top of a branch and twist the wire under the branch to secure the pinecone to the branch. If you just let it hang down the birds will have nowhere to perch to feed. Wiring it to the top of a branch gives them a comfortable place to feed on the seed and the peanut butter.
Build a Fire in Winter Snow
When the ground is frozen or covered in snow a fire is hard to sustain. Fortunately, our ancestors have discovered ways to start and keep a fire in the harshest conditions. Here are a few simple fire techniques that could save your life in a crisis:
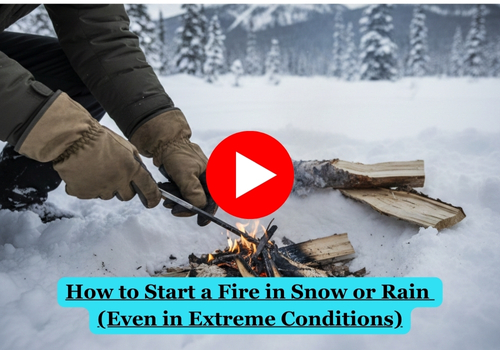
For example, the Scandinavians figured out a solution. It’s sometimes called the “Swedish Upside Down Fire.”
It is literally a fire built upside down:
- The first step is to put down your largest logs at the bottom of the fire. Line them up next to each other. 4 to 5 logs should do the trick.
- Your next step is to stack more logs at a 90 degree angle to your first row of logs. Split wood helps make for a good platform.
- Pile tinder on top of the second tier of logs.
- Build a teepee fire around the tinder.
- Light the teepee fire.
- As the fire burns it will travel from the top down as the coals begin to burn through the top logs and down into the base.
- By the time the fire reaches the ground, any ice or snow will have evaporated, so the fire won’t go out.
- Continue to toss wood on the fire as you would with a traditional fire. The ground underneath is now dry, and the fire will continue to burn.
Here’s the deal.
You can keep relying on stores, the grid, and “everything working like it always has”… or you can make sure your family is covered no matter what happens.
No Grid Survival is the perfect guide for you – the 70+ projects in the book are things you can actually build – on your own property – with clear costs, clear steps, and no guesswork. You’ll know exactly what to do, what to buy, and how long it takes before you even start.
Once you have them, you don’t lose them. Power outage? You still have the book. No internet? You still know what to do. Every project you build makes you less dependent and saves you money. Over time, that adds up. Fast.
If being prepared matters to you, get No Grid Survival now and start while it’s easy. Use THIS 76% coupon and put this book where it belongs – on your coffee table, not in your browser history!
Final Thoughts
We tried to keep these projects simple and inexpensive, and most can easily be done in a day or less. Try making a pinecone bird feeder with the kids or impress your friends when you want to put a Top Sirloin over that log blast-furnace called a Canadian candle. All of them give you the chance to beat the cabin fever of winter and give you practical solutions to some things you may have never considered.
This article was originally published on Self Sufficient Projects.
You may also like:
 This Is How One Pig Can Feed Your Family for 3 Whole Months
The Legal “Narcotic” You Can Find in Your Backyard (VIDEO)


I would be cautious about candle/open flame in a chicken coop, the bedding is quite flammable. Instead, I would recommend a cold hardy breed like Barred Rocks (works for us) for continued winter season egg production.
Another easy project if you’re already making candles, is to use the ubiquitous Altoids or other tin to make a contained, multi wick emergency candle. These can be placed in a bug out bag, or even a vehicle’s glove compartment for emergency use. An altoids tin has the plus of a tinned reflective lid.
I was just thinking the same thing
Who actually writes your articles or do you just take from other web sites? I linked this one about 2 months ago supposedly by Steve Nubie and it was posted on Self Sufficient Projects https://selfsufficientprojects.com/7-low-budget-projects-you-should-make-this-winter/
I link prepping articles daily on my website and it seems like I run across this a lot in this particular area that some sights don’t give tribute to the actual author and act if it’s their own article. I always try to give credit where credit is due. You should as well.
THe link to the original is literally at the end of the article. We have permission from Self-Sufficient Projects to post it and credit was given.
Para is right !
Place your fire pot in the coop and DONT LITE IT
3 days later take a look at it, I bet LOTS of little flammable things are touching it.
They are chickens, not brain surgeons.
about 4 layers thick of fireproof materials, too big for chickens to move, no gaps big enough for chicken tossed material to get near flame, it will take time for the item to start radiating heat, but its in the coop the heat will still warm the coop. might be better to have a vent pipe ( screened off) into or thru the coop from a warmer area. Perhaps, the coop, up against an outside wall of heated living space, for winter, with a small vent, warm chickens without fire risk. move them away when it warms up.
PS, maybe, just maybe, staff should ask for submissions from the readers, not just topic ideas. Staff can “proof read” before posting
Reader comments provoke some worthy discussion and different ideas and methods, I would be interested in reading these. Many things seem rather mundane or run of the mill, but a repeat in different words may click with folks in a way that a different explanation does not. I am sure there are younger folks who are exploring the preparedness or sufficiency lifestyle who would be eager for a repeat of information.
Hi Old Para .., I did a dive into the Barred Rocks and chicken keeping in general yesterday . As a suburban person i will definitely keep them in mind if somekind of a long term TEOTWAWKI happens.. Thanks….I know if i was a kid i would like to have one or two .Fun winter project .Chick’s for Easter. I have some x-laws that take their chicken when they bug out for a while .