The grocery stores have been closed for weeks. Your premade survival meals and food storage are beginning to dwindle. You are looking at those buckets of rice, beans, and flour. You know that soon, if nothing changes, you are going to have to break into those buckets to eat. How do you feel about that? Do you know how to use these ingredients to their fullest? Or are you going to be learning how to cook rice the first time you open those buckets and are depending on those calories? Below we have 5 recipes based on long-lasting ingredients that will make food storage life a much more enjoyable experience.
Bread Dough
From a basic bread dough, you can make all kinds of things! You can sweeten it to make leavened desserts or add numerous flavorings to make different types of bread. You can shape it in tons of ways to make rolls, baguettes, and so on.
If you can make bread every couple days or at least once per week you will get really good at it in no time.
Ingredients
- 6 Cups of Flour
- 2 Tbsp of Salt
- 2 Packets of Dry Yeast
- 2 Tbsp of Olive Oil
- 1 Tsp of Sugar
- 1 Cup of Warm Water
Process
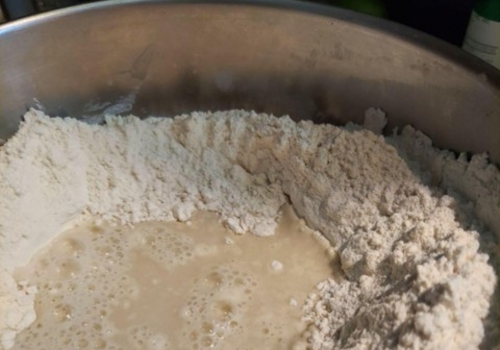
Step 1. In a large bowl, which gives you plenty of room to work, add your flour and salt. Stir in the salt with a fork or whisk.
Step 2. Create a well at the center of the flour and then pour in warm water, dry yeast, and sugar. Allow this about 5 minutes for the yeast to rehydrate and activate.
Step 3. Now add your olive oil into the center and begin to mix the flour into your yeast mixture. Slowly mix the flour into the well until you get a dough that is sticky but something you can grab and get out onto a table for kneading.
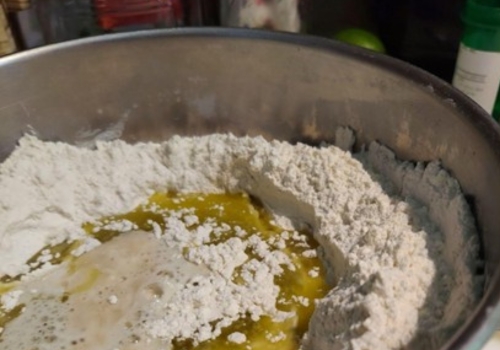
This will not take all of the flour so do not simply try and mix all the flour into the liquid mixture. Instead, take your time and watch the dough come together.
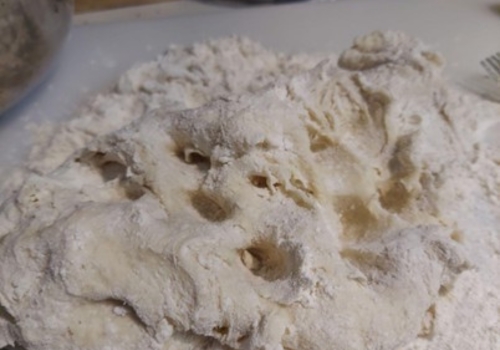
Step 4. Knead your dough until it becomes elastic and smooth. This should take around 10 minutes. You may need to add a little flour at a time, as you need, if the dough becomes sticky during the process.
It should not stick to your hands. It should be smooth.
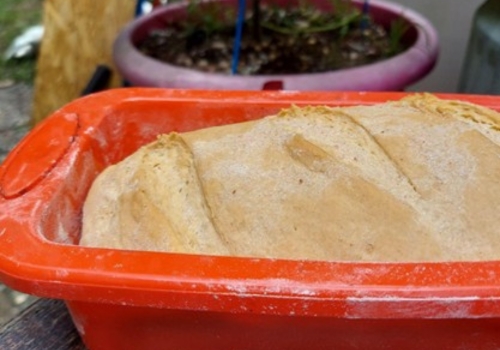
Step 5. Let your dough rest for at least 10 minutes in a dry place. I like to coat my dough with olive oil and put it in a large bowl covered with plastic wrap.
Step 6. Punch the dough down a bit and then shape it into whatever you’d like. Or pour it into a bread pan. Allow it to rise another 10 minutes before baking. You can also divide it up to make smaller things like rolls.
Pro Tip: Water Matters in Any Long-Lasting Recipes
If you want quality dough – whether it’s for bread, pizza, focaccia, or anything else – every single ingredient matters. But one element most people overlook is water. The truth is, water impacts the entire cooking process on a chemical level, and its purity is absolutely essential. After all, water is life.
If you’re serious about preparedness and want to secure up to 40 gallons of pure water per day, ditch the conventional methods and check out a backpack-sized water generator you can rely on – during a crisis or just daily peace of mind. This device pulls clean, drinkable water straight from thin air. Yeah, you read that right.

I’ve already made the switch – no more tap water, no more questionable sources. The investment was small, the payoff huge. God forbid a real crisis hits… but if it does, at least I’ll have clean water.
Now Make Foccacia
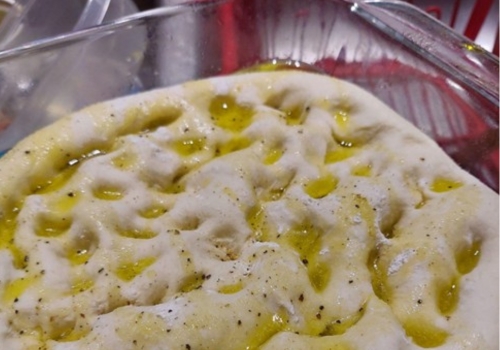
Find a high sided baking pan or a shallow glass baking dish. Coat the bottom of the pan in olive oil. After you punch the dough down you can place it into a glass baking dish or pan. It should be one that is somewhat flat. Dimple the dough with your fingertips as you spread it out across the bottom of the pan.
As you press your fingers into the dough it will fit itself naturally into the pan. Work your way from the center out.
Finally, drizzle olive oil over top the dough and then sprinkle with some fresh herbs like basil and oregano. Bake at 400 degrees for 20 – 30 minutes.
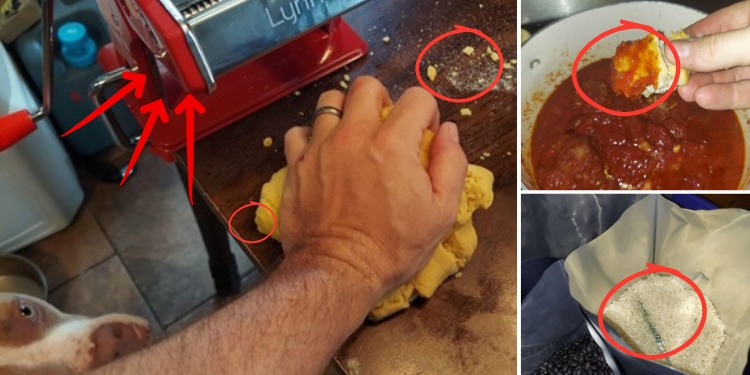
Quick & Easy Long Lasting Recipes: Pasta Dough
While not necessary, I believe that a pasta maker is a great investment for preppers and homesteaders. Making pasta is easy and it’s much easier with one of these.
Ingredients
- 4 Eggs
- 1 Egg Yolk
- 2 Cups of Semolina Flour
- 1 Cup of White Flour
- 4 Tablespoons of Olive Oil
Process
Step 1. Place all your flour into a large bowl and create a well in the center. Add all of your eggs and olive oil to that well.
Step 2. Mix up the eggs, yolks, and olive oil in the well using a whisk or a fork.
Step 3. Slowly start to incorporate the flour into the well. A dough will begin to form as you continue to incorporate the flour.
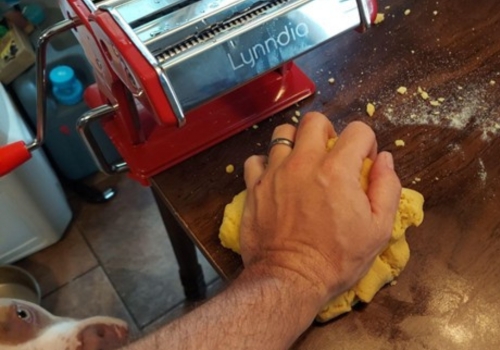
Step 4. Once the dough comes together a bit you can pour the mix out onto a clean table and begin to knead it by hand. This is not bread dough so you will not have to knead it as long. You are just going to continue to bring the excess flour into the dough and knead till it becomes elastic and smooth. (5-8 minutes, something like that)
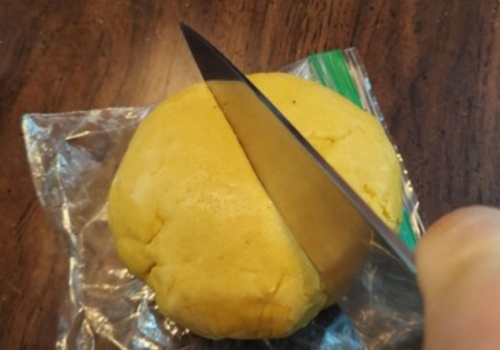
Step 5. Pasta dough must rest in the fridge. I put mine into a large Ziplock and close it. Leave it in the fridge for 20 minutes to an hour to rest before rolling it out.
Step 6. Pasta starts as sheets. Quarter up your dough and roll it out with a rolling pin to start. If you can get it thin enough by hand you can gently fold the pasta onto itself, almost like you are rolling it up, slice thin noodles from one open end to the next.
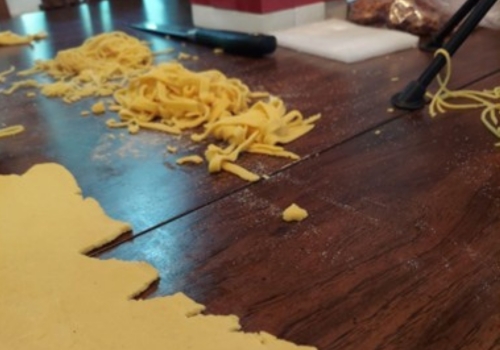
You judge the thickness of your cuts to create spaghetti, linguini or even large ribbons of pasta called pappardelle.
Step 7. A pasta machine rolls dough into thin sheets for you and also comes with several cutting implements that will cut your pasta into a variety of sizes. I use a pasta machine.

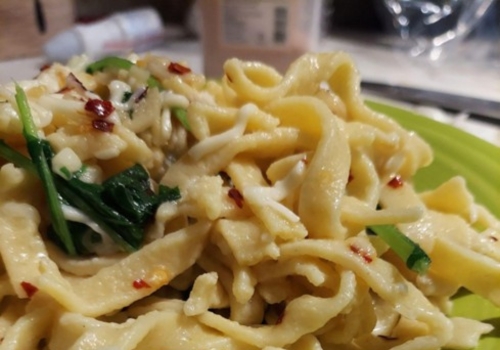
Step 8. As you begin to make noodles you can either hang them from a wooden spoon that is sat on two mason jars or make them into little nests and sprinkle the nests with semolina flour. They will dry a bit after a while but will not be dry like macaroni you buy in a box at the market.
Step 9. Boil the pasta in salted water for 3-5 minutes until it is al dente. Eat with your favorite sauce.
Now Make Ravioli
Instead of cutting your thin sheets of pasta you are going to leave them alone. Using a glass or small coffee much begin cutting out circles of pasta.
On one circle place your favorite ravioli filling. A little sauteed ground meat with Italian flavors like oregano, basil, and garlic, topped with shredded mozzarella is a very simple filling.
Create a simple egg wash by mixing one egg yolk with a little water. Apply the egg wash around the perimeter of your ravioli and then top it with another circle and line them up. Use fork tines to crimp the edges.
These can be frozen as is or boiled and eaten right away.
Pro Tip: You Must Learn How to Make Survival Pasta
Pasta is a staple food in Sardinia, Italy – home to one of the world’s most well-known Blue Zones, where an unusually high number of people live to be over 100. That means we’re not just talking about a reliable survival food, but also a nutritious, well-balanced meal option that supports long-term health.
In a crisis, having access to simple, shelf-stable foods like pasta can keep you going – not just physically, but nutritionally too. It’s one of those rare staples that’s both practical and proven to support longevity.
Pasta is also one of the easiest and most practical recipes you can rely on in a post-SHTF scenario. Of course, it all starts with having access to quality ingredients – and knowing how to properly stockpile and preserve them for the long haul.
 I actually learned this recipe from a book that’s packed with other survival-friendly meal ideas – simple, accessible, and designed for real-life crisis situations.
The book is A Navy SEAL’s Bug-In Guide by Joel Lambert, and it features an entire chapter dedicated to crisis-proof food. If you’re not looking to waste money on overpriced, fancy meals – or if you just want to be prepared when others are falling to hunger – this is one guide you shouldn’t skip.
Here’s what else you’ll find in the food chapter:
- How to Make the Ultimate Survival Food with a 25-Year Shelf Life
- A Day-by-Day and Meal-by-Meal Rationing Plan
- How to Preserve Eggs Without Electricity for Years
- Must-Have Survival Foods You Didn’t Know Existed
- The Under $1 Walmart Canned Goods You Absolutely Need to Add to Your Food Reserves
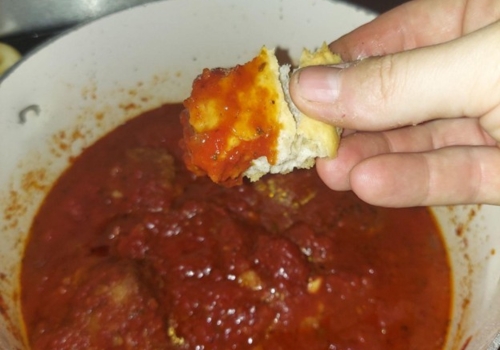
Tomato Sauce
A good tomato sauce is one of the 5 MOTHER SAUCES in culinary arts and classing French cooking. Mother sauces are base sauces from which many things can be made.
Not to mention tomato sauce is very acidic and can be canned long term with only the water bath canning method. Which means anyone can start filling their shelves with tomato sauce. You don’t even need a pressure canner!
Ingredients
- 1 Onion, Diced
- 5 Cloves of Garlic, Minced
- 1 Tsp of Red Chili Flakes
- 1 16oz Can of Tomato Puree
- 2 Cans of Diced Tomatoes
- 1 Tbsp of Each, Basil, Ground Garlic, Italian Seasoning, Sugar
- Olive Oil
Process
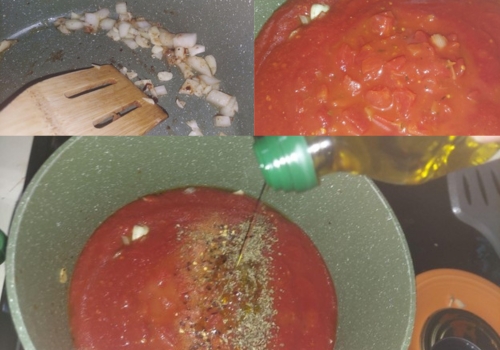
Step 1. In a large pot over medium heat, add a few glugs of olive oil. Allow it a few moments to heat up.
Step 2. Add your onions and garlic to the hot oil and move it around a lot with a wooden spoon. Cook these ingredients, keep them moving, until the onion becomes translucent and the garlic becomes fragrant. Then add the red chili flakes.
Step 3. Next add all your canned tomato products and stir them together with the onions and garlic.
Step 4. Add the rest of your ingredients with a few more glugs of olive oil and stir them to incorporate.
Step 5. Simmer on low heat, covered, for about 20 minutes and then remove the lid and simmer at least another 20 minutes. I am of the belief that the longer you cook tomato sauce the better it gets!
Now Make Pizza
You can roll your bread dough out into the shape of a thin pizza and use your homemade sauce and shredded cheese to make pizza! I cook mine in a 450-degree oven.
Long Lasting Recipes: Perfect Rice
Rice is all about ratio. Different types of rice are cooked using different ratios of water to rice. For this recipe, we are going to do long-grain rice because that is the most common.
Ingredients
- 2 Parts Water
- 1 Parts Rice
- Olive Oil
- Salt
Process
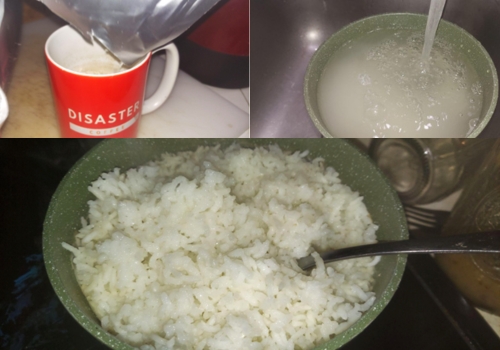
Step 1. We are going to use a simple coffee mug for this recipe to explain the ratio. Start with one coffee cup full of white rice. Dump that into a large enough pot to cook it with plenty of extra room.
Step 2. Under a running sink, wash the rice off. Fill the pot about halfway with water and then pour most of it out carefully, without losing any rice. You will see that the water is cloudy. This removes any grime and excess starch from the rice.
Step 3. Once your rice is clean, at least 3 washes under the sink, then you can fill the same coffee mug with water and dump it into the pot, then dump in another. This gives us our 2 parts water to 1 parts rice ratio.
I like to add a few healthy glugs of olive oil and about 2 healthy pinches of salt.
Step 4. Bring the water to a boil and then drop it to a simmer until most of the water is gone or absorbed, and what’s left looks like porridge. Then drop your stove to the lowest setting and cover the rice.
Step 5. Cook until the rice is tender and the grains are easy to separate. I like to finish with a little more olive oil and salt before breaking it up gently with a fork.
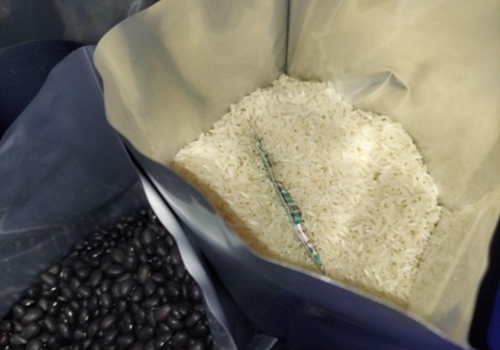
Pro Tip: Store Essential Long-Lasting Ingredients for Survival Recipes Properly
Grid independence and access to basic ingredients for survival food are two of the most critical priorities for any serious prepper. But personally, I go even further – I pay close attention to how and where I store my stockpile. Why? Because the last thing I want is for some so-called “Good Samaritan” to come confiscate or steal my supplies when SHTF.
That’s exactly why I decided to invest in this underground bunker. It cost me less than $400 and gave me the perfect hidden spot to store rice, canned food, gear, and other essentials. Plus, it’s sturdy enough to double as a shelter in case of an earthquake, hurricane, or even an EMP attack when, you know Murphy’s Law… what can go wrong, will.
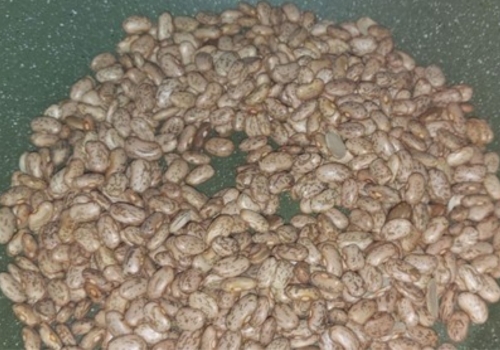
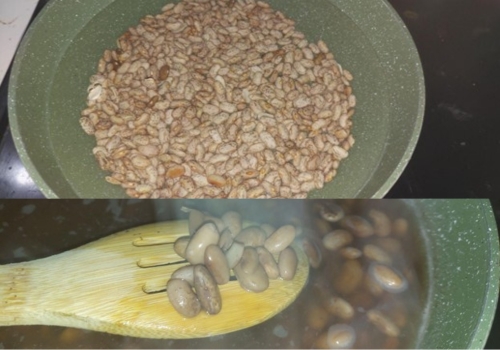
Delicious, Tender Dry Beans
Once a prepper can make rice then they need the complete protein of adding beans to the picture.
Ingredients
- Dry Beans, sorted (look over your beans to make sure there aren’t any small rocks or unwanted items in them)
- Water
Process
Step 1. Everything starts with soaking. Use a container large enough to hold your beans with lots of extra room and soak them overnight, covered with water by at least double the volume.
Step 2. Next dump them out into a colander to drain the liquid. Then put them into a large pot and fill the pot with lots of water before bringing the whole mixture to a simmer.
Step 3. On a slow low simmer cook your beans for about 1 – 1.5 hours before adding any salt or seasonings to the pot. This will ensure they get tender during the cooking process. Stir them regularly, too.
Step 4. Simmer for about 2 hours total or until the beans are tender and tasty. Leave them in the cooking liquid as they cool. Use them with rice, puree them, or in things like ragouts. Beans have tons of great uses.
Pro Tip: Beans Will Always Be Essential for Preppers
Beans have been a valuable survival food since the time of our ancestors. And for good reason. They’re packed with nutrients that can keep you alive when everything else runs out. Plus, they’re cheap, long-lasting, easy to store, and incredibly versatile when it comes to cooking.
You’ll find dozens of bean-based superfood recipes – many of which you can make right now with what’s already in your pantry – in The Lost Super Foods, the book by Claude Davis that’s helped tens of thousands of Americans prepare for the toughest food crises they may ever face.
👉 Help your Family to Stay Afloat in Any Crisis
BONUS: Curing Salt
With this salt you can make things like bacon, smoked ham, or even simple cured country ham. Curing durations will vary but this salt will kill the bacteria in your meat, and you will be able to store meat longer even without refrigeration.
- 1lb of Salt
- 1oz of Pink Salt

You can add different kinds of sugars and flavorings to this, based on what you are curing. Simply mix thoroughly.
Final Thoughts on Recipes Based on Long-Lasting Ingredients
If you are preparing to survive a serious emergency or disaster, and cooking long-lasting recipes is not on your list of preps then you are well behind the eight ball. It’s true that range time, and TacMed classes are a lot of fun but you are gonna have to eat at least 2x a day.
It should be your goal to become a great cook. If for no other reason than the fact that you live a better and healthier life when you are preparing your own meals.
Don’t open that first bucket of rice and beans without ever having tried to cook rice and beans. You will have a very rough time and likely go hungry until you get better at preparing these long-lasting foods.
__________________________________________________________________
If you want to reduce your dependence on the grid as much as possible, it’s time to learn how to take care of your health using unconventional methods. Click here to discover the secret methods Dr. Nicole Apelian uses to manage multiple sclerosis naturally.
You may also like:

Amish Friendship Cinnamon Bread
Why You Should Pour Honey Over Meat (Video)
Canning Myths Debunked by the Amish


Looking at the bread recipe, what is a dry moist place?
Wondering that myself lol
A hard copy of this article is going in a clear sleeve and nailed to the inside of the door of my COOL, DRY, deep pantry. Might add a few more basic recipes so they are right there with the food items. Good article.
Great catch. That phrase is definitely a bit confusing! It sounds like a contradiction. Most likely, it was just a typo or wording slip. The intended instruction was probably to store the bread in a cool, dry place (like a pantry or cupboard), which helps prevent mold and keeps it fresh longer without refrigeration. Thanks for pointing it out!
It appears that the author is counting on having electricity.
If the grid is down and you are lucky enough to have
propane a Coleman stove top oven will bake your bread.
Camp Chef makes an excellent two burner stove with an
oven below the burner.
Insta Fire Co. makes a great oven that works on the
Rocket Stove principle.Sticks and twigs for fuel.How great
Is that.
Then there is the trusty Sun Oven.It will bake and or cook
darn near anything.
My wife can bake til the cows come home but for a quick
and easy bread product we use Jiffy buttermilk biscuit mix.
One small box will make two days worth of biscuits for
the two of us.Water and heat is all that you need.
Two is one and one is none. Just saying.
Howdy from high in the desert swamp,
Interesting article. I am thinking it’s been two years. I’ve been making the state bread of Texas. It’s called pan de Campo. Very versatile. Very easy. No yeast. Basically any kind of flour will do. It’s made with wheat flour. Make it in a cast-iron skillet. A couple years back. I got a Dutch oven with legs and a lipped flat room lid. I also found a tripod. During the summer, I don’t use it outside much but once it cools off, I make Chili sloppy Joe’s all kinds of stuff and use fire outside. Bread can be made very easily outside in a dutch oven. It’s fun for me to do this and causes conversation with people asking me questions. Having known what electricity and a gas stove is and then not having it anymore and relying on fire cooking might get old but for now it’s fun and I know that I have the skill to do it when needed if necessary. All the articles on this site require practice. I do some of this when my granddaughters come to stay. We have a big time cooking like the Cowboys did. I know there are a lot of Boy Scout troops that don’t do a lot of camping. I was blessed enough that our troop did camping and cooking in and the merit badges as designed every month. You can go online and ask for to pocket manuals for camping, hiking, cooking, all sorts of stuff required of Eagle Scouts. Then practice now. Boy Scouts took a major hit going woke. That doesn’t take away from what you can learn through their field manuals or merit badge curriculum you can find online.
If you wait to figure out if you can start a fire when you need one desperately you’re going to wish that you had practiced. Don’t wait until the fan has already come through and spit stuff out of the other side and then start your learning. Just friendly advice. I know it works for me when I make a challenge out of things or just have fun doing it. I am hoping I am never put to the test but…
Pan de campo
2 cups flour
1 tsp salt
1 tbsp baking powder
2 tbsp lard or crisco or what you have. I used bacon drippings and ghee once and it worked fine.
1/3 cup oil
3/4-1 cup milk
Mix dry ingredients well. Add grease
Add oil and mix until it crumbles
Add milk and knead until mixed and dough bounces back when poked
Grease a cast iron skillet or dutch oven and put pressed out dough in with lid
Bake 375 25 minutes
Flip and bake another 5-7 minutes.
I have added cinnamon and sugar with raisins or blueberries. Added some oats. This is very versatile. It rises very little but it is bread. Tastes good! No yeast to depend on.
Howdy from high in the desert swamp,
KDC… Thank you for the link. It is disturbing to see what gets found in our food supply. No one lives forever but I would like to die in a spectacular fashion making the news, not rotting from the inside out from big ag additives to lessen the population. I have been grinding my own meat to make sausage. Buying eggs from locals. Not eating out and stopping a lot of sugar and carbs. Basically high protein carnivore with the occasional oops into the ice cream world. For the first time since I was in my 20’s my cholesterol dropped fifteen points. It wasn’t too high but it did drop when other things I tried didn’t help. Funny thing after I went meat and protein, making pan de campo and not eating bread stuffs after about two weeks my craving quit. I sat at a party and said no to cake. Everyone looked at me. My son said okay, where’s my dad and what did you do with his body? I laughed and was really happy with myself. Changing all kinds of bad habits can be done but it does have to be you (me) that does it. I wish I had this attitude now years ago.
I don’t live to eat. I eat to live. That mindset change made all the difference.
Remember for 120 years Noah was a complete moron until it started to rain
Remember the Alamo
Remember 9-11
Remember North Carolina
Remember to have your soul prepared
Anyone who makes yeast breads much should know to activate dry yeast in a half cup of slightly warm water and a tablespoon or two of sugar to make sure it is actually live before adding to the dough mix. Also in these SHTF situations where are people getting things like Olive oil. Too many of these articals call for things that will not be available from empty store shelves. I do not remember anyone talking about rendering chicken fat for cooking grease when butchering your home raised chickens, nor very little on saving beef tallow and only a little on rendering lard. A set of the old Fox Fire Books contain a wealth of information on real plain living.
Talk to text leaves a lot to be desired.
Great list of recipes! Long-lasting meals are definitely a must-have for preppers. Along with food storage, I’ve also been focusing on home organization and even using trash removal services Kent WA to declutter my space. It makes prepping so much easier!