This past week I had some spare time and I decided to put it to good use. I finished a survival project I had in mind for a while now and I am very happy with the results. This is why I decided to share my project here with you.
I know from experience that any project, however small it can seem to you, might mean a lot to someone else. This article will show you how to build your own wall hanging can rotator.
As you probably know, two of the biggest problems with having a long-term can stockpile are:
1. Keeping track of which cans expire first;
2. Having enough storage space for all your cans.
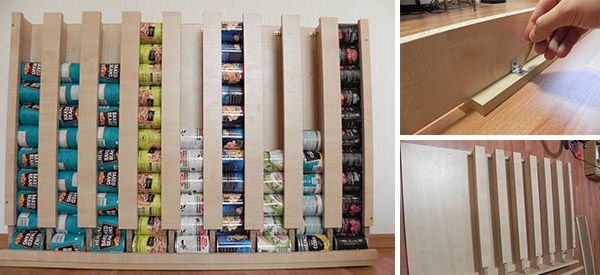
This I think, takes care of both. This is the smaller version of the can rotator that you get as a bonus when you buy The Lost Ways. Here’s how I built my Wall-Hanging Can Rotator that can hold up to 100 cans. First, I gathered the materials. I guess the picture above is self-explanatory.
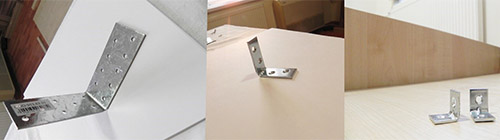 First picture – 3 large metal corners like this one on the backside
Second picture – 10 smaller pieces like this one to “bind” the boards together
Third picture – 10 even smaller pieces to “bind” the boards together First picture – Something like this metal piece to attach my can rotator to the wall (3 of them)
Second picture – Lots and …lots of screws
Third picture – And two corners (white ones)
First, I screwed together board A and board B using the two white corners.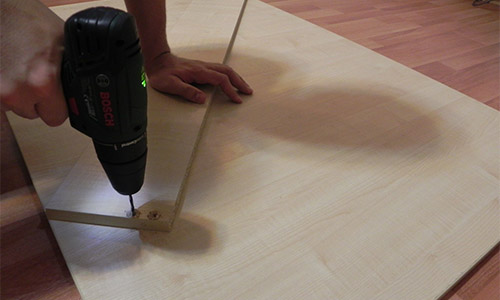 I always remove the sawdust right away.
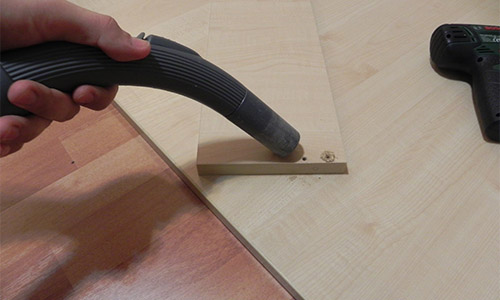 I used the small white corner pieces to secure them together.
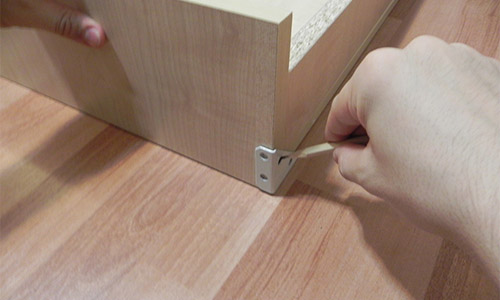
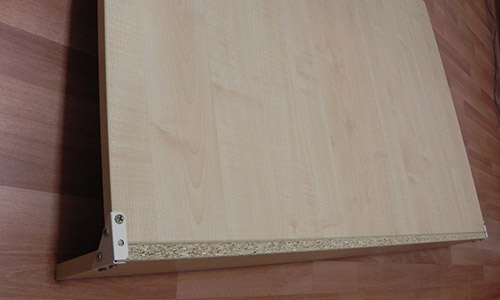 When it’s done it should look something like this. Repeat for the other corner. Now I’ve got the “backbone” of my wall hanging can rotator, but my work is far from over.
So, the next step is to test if what I wrote on paper can actually work. Without gluing the boards together, I placed the cans to see if they would fit. You should get 9 shelves for holding the cans.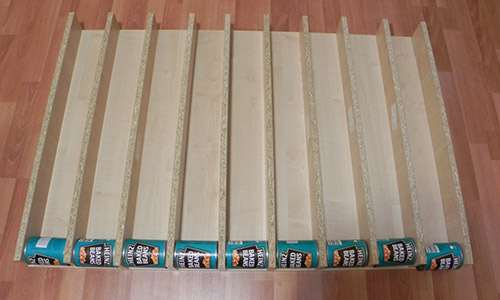 Next, I glued 8 boards C with 8 boards D. And 2 boards C with 2 boards E together using a liquid adhesive.
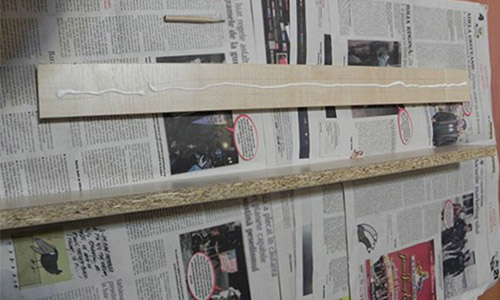 Here they are once they’ve been glued.
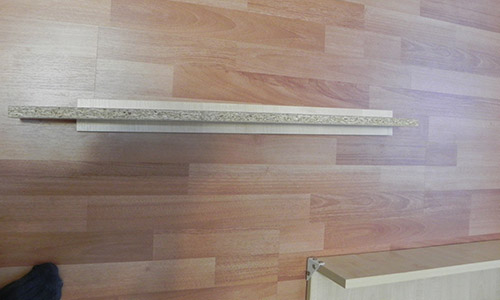 I then used one of the small metal corner pieces to secure them.
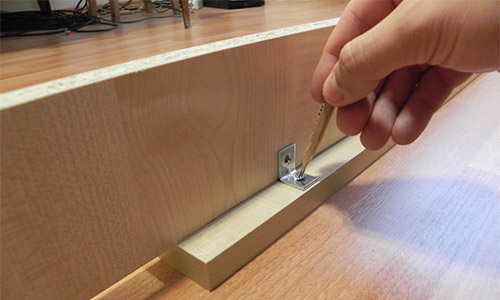 And another slightly larger piece to bind them firmly to board A.
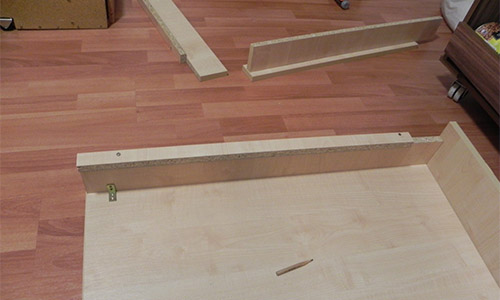 And to board B, as you can see below.
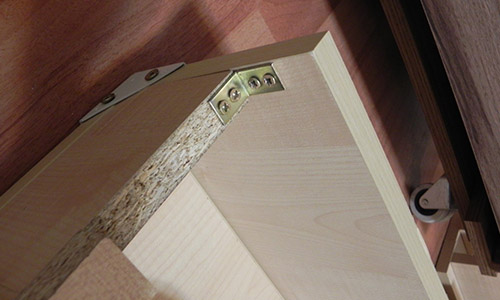 Time for another test to see how the cans would fit. With the last test I had made sure they have place at the bottom, but that would be of absolutely no use if they didn’t fit at the top of my rotator as well.
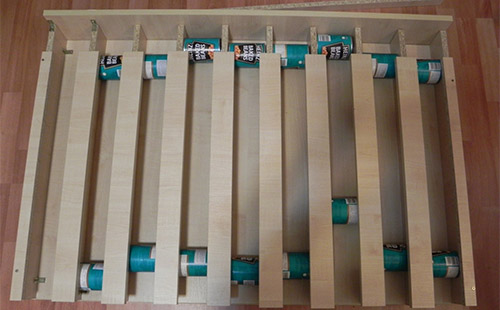 So far, so good it seems. The cans can move unobstructed from top to bottom.
The next step was to glue the C and D boards I had made previously to board A, using the small corner pieces for added strength.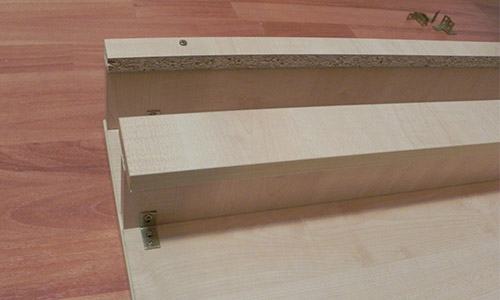 Here it is with all the boards put in place:
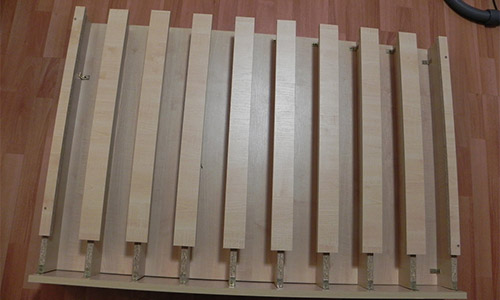 Now it’s time to strengthen the backside some more. Cans aren’t light after all and with so many of them, the weight puts some serious strain on the can rotator.
 While I haven’t yet bought the proper nails to hang my can rotator on the wall, I did add to it the metal pieces needed to do so later on.
 Here’s the finished product:
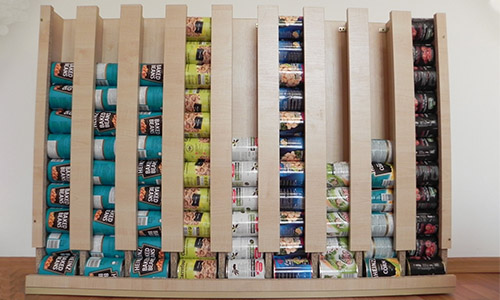 My first wall hanging can rotator.
It did take a bit of planning, and some work too. But the feeling of building something with your own two hands is next to none.
After the task was done, I couldn’t help but think of my grandfather who build most of his own furniture, sheds, root cellar and anything else he needed around the house.
Nowadays many of us have lost the ability to make something with our bare hands and a couple of tools. And we’ll have to pay a price for that I’m sure.
So, what did you make or build for your preps recently? What’s your latest survival project? Please share it down below.
You may also like:
 How to Build a Smokehouse In Your Backyard (with Pictures)
70 Projects You Need to Outlast Any Crisis (Video)


did I miss the measurements for the pieces? There are the number of pieces to cut of “A”, “B”,”C”etc. how do you know the sizes? or did I miss something?
Not sure why you got a thumbs down for asking about measurements. Although cans come in different sizes, the measurements used would have made this an awesome article.
The author doesn’t know what size you are going to make your can holder. He can’t possibly know what size cans you are going to store. Had he listed dimensions, there would have been a plethora of complaints that the cans Prepper XXX was using wouldn’t fit in the holder. So you choose the size of the can and cut the pieces to fit. He describes how many pieces you need of that size to make the can holder he is describing.
Come on, folks, I am certainly not Howie Handyman by any means. This particular unit is well beyond my carpentry skills but even I can figure it out. If you haven’t figured it out for yourself, you should attempt to make it. You will screw it up.
If you are going to survive in the world after it ends, you are going to have to start figuring stuff out for yourself. Nobody is going to have the time to lead you by the hand.
Hmmmmm. Chuck is getting “testy”. LOL *wink*
It’s hot and muggy and we have two fires burning in our county this afternoon. Getting ready to cut a choggi again. Or, as our younger brethren said, didimau.
Wind shifted late this afternoon to an on-shore breeze and the winds for our area this week have been zephyrs compared to the winds two and a half years ago which were gale force. Fire is moving eastward. If I lived in the I-5 corridor, I would not be sleeping tonight but would have somebody on fire watch all night long.
So perhaps I am testy with reason.
Since cans can come in different sizes the measurements would depend on what you want to add in there. But I would really think that #10 cans (Industrial Food Grade kitchens) are too large for a wall hanger I could see them on a slanted roll shelf maybe. But have always seen them on a shelf usually a wire rack.
Hmmmm… I wonder if pallets have the right space to make these… must look into that.
There’s an Idea!
What if you can all your own veggies. Can you make one for Jars???
They’re called “shelves”. LOL!
Don’t jars need to be stored upright?
If you do round jars that would roll, I could see doing a slanted shelf similar to this. Not sure I’d want to do a vertical one for risk of breaking jars when I pulled the bottom one out.
Don’t do jars. Jars could break. Stick with shelves.
I do not think i would do jars like that true the will be the same size but they are glass. Now a rolling pantry that you can pull out if a closet or from in between the fridge and a wall or cabinet or maybe between the washer and dryer in the laundry room would be ideal for jars but letting them fall down like in the rotator I would not trust.
Simple, practical and helpful. thanks!
What are the board measurements??????? Nothing on article ….
The main problem with this can rack is not all cans are the same size. This design would cover may 70-80% though, so it’s ok.
I purchased some heavy-duty industrial wire racks years ago. The big difference is that each can slot width is adjustable to support any can size. They are made to sit on shelving, not hang on a wall.
They aren’t cheap but will last forever.
This Puppy must be real heavy when it’s loaded. Looks like you used some good hangers and corner brackets. You showed good pictures. Thank you
Just finished making a 124 pot hydroponic wall garden hanging on wall brackets in my concealed courtyard wall. Made from Plastic grilled conduit used for in ground drains, some 19mm irrigation fittings and piping, a small submersible pump (Don’t get a big pump as you only need a trickle of water or it will overfill) and a water tank (60l heavy duty plastic crate). You just have to manually top up I with water in a SHTF event. I also have the pump on an electric timer. All I nave to do is top up the tank with water and liquid nutrients ie. (water from my worm farm compost bin) once a fortnight maybe a month… total cost was A$1,000 so about $600USD which included everything including the pots and silicon used to seal end caps and joins. Made from 4 x 3m lengths on double width 350mm wall racks and another 4 x 1m single 200mm racks for courtyard short end wall. Electrical timer and external waterproof power points I already had for my existing hydroponic wall garden.
You will also need Perlite to fill pots with which costs A$38 per 100l bag. That will do about 400 100mm and 125mm pots
You will also need a hole saw to drill out the holes for the pots in the plastic grill. I have a set already, used 95 and 120mm holes for the pots I bought.
You need to consider a sunny position for most veggies, which is north facing in Australia.
Agree working with your own hands is Extremely satisfying and this project takes about 3 days allowing for silicon drying time ect…
Do you have pics of this garden on Pinterest or some such website? Sounds great!
Sorry Mike no pics however this link shows you what the commercial ones look like… https://www.hydrocentre.com.au I used this drain from Bunnings.. https://www.bunnings.com.au/everhard-1m-black-easydrain-compact-channel-with-grate_p4770222 Essentially the pots sit in water, plants are planted in Perlite which sucks up the date and the pump is used to top it up which only needs 15mins run time to refresh the water. I add nutrients either commercial or from the worm farm water to feed the plants. Works well for lettuce, herbs, spinach etc.. I use bigger pots for tomatoes ect but that is a slightly different system.
. . . looks a bit heavy to me also . . . but, if you sit it on a “book shelf”, (still mounted on the wall), then you have some shelves for your home canned stuff! also . . . there are lots of can sizes . . . if you are thinking of making one of these, add a tape measure to your shopping list.
Looks good, except it needs to be edited to add in the missing measurements. I don’t have the requisite wall space, but I do have a suitable pantry, so I’m considering a sloped shelf type…similar to those plastic soft drink dispensers you can get for the fridge, but bigger. Thinking it may need drawer pulls so I can load from the back. Any thoughts?
I guess we have to buy the book?
or wait for the movie
What the article says
This I think, takes care of both. This is the smaller version of the can rotator that you get as a bonus when you buy The Lost Ways.
What are the dimensions on the various sized pieces, please?
Cool. Have to post this. niio
Measurements custom to fit the cans you’ll be storing.
Thank you, Clergylady. I can tell you will be one of the few making it after the world ends.
He shows you how it’s done. You figure measuring so it fits what you’re storing.
Your can storage should have a couple of spots for toilet paper.
At least a couple. At least toilet paper doesn’t have a use by date, although we had an article a while back about creepy crawly critters gnawing on your t.p. Just my opinion, but in an EOTW situation, lacy t.p. is going to be the least of our worries.
I do have some tp in a sealed plastic bin, but that’s mostly to avoid water. I missed the article about bugs, more worried about keeping them out of food. That’s definitely more important to me than tp.