When I purchased my AR15, I never really considered painting it and I loved the nice black finish. Over the years though I have come to realize that this beautiful black rifle really sticks out in the woods or anywhere else for that matter. All black has a habit of doing that unless it is dark. I finally came to the conclusion that it only made sense for me to paint my AR15 after considering a number of factors. For starters, I wear camouflage when I am hunting to blend in with the surrounding trees, brush and vegetation, so why shouldn’t my rifle? Secondly, professional soldiers who are trying to blend in go to great lengths to camouflage their location so giving your rifle the same treatment only makes sense. Why spend so much time on getting into a nice hiding spot, possibly with a ghillie suit and not have your rifle dressed for the occasion?
I know why I hesitated in the first place. When you pay that much for something, the last thing on your mind is to take a can of spray paint to it. I started researching how to camo paint your AR15 probably 6 months ago and knew I would try this out on my rifle eventually, but I was still a little hesitant to pull the (spray can) trigger and change the stock color of my beautiful black rifle. Maybe one of the things in the back of my mind was that if I ever paint my rifle, I will never be able to sell it. I don’t know why I considered that a problem because as of right now, there is no way I am going to part with my rifle. You can read into that what you like but it is one thing to take into consideration if you are thinking about a camo paint job for your little rifle.
 I went online and read a lot about the painting process which if you have ever spray painted anything is ridiculously simple. Krylon has a line of paint that is specifically made for camouflage. Their camo paint works great on Ceramic, Glass, Hard Vinyl Plastic, Wrought Iron, Wicker, Metal, Wood and Plaster. That covered all the bases I needed and the colors perfectly matched all the cammo patterns I would use. As an added bonus, they have good instructions on how to paint camouflage patterns and even provide the camouflage stencils you can download for your own paint job. The stencils look similar to the random designs you would see on multicam patterns. The great part is that this can be used on any weapon out there so if you want to camo paint your hunting rifle (something I plan to do) this paint and the stencils will be perfect.
Rustoleum makes camo paint colors too but I used the Krylon for my rifle.
How to camo paint your AR15
The first thing I did was to remove my sling, scope and light. The reason I removed the scope is that I just purchased it and I want to make sure it will work before I cover it in paint. That is one modification I am sure they wouldn’t take back. The scope is a Nikon P-223 that is designed specifically for the AR platform. I will be reviewing this scope in the future.
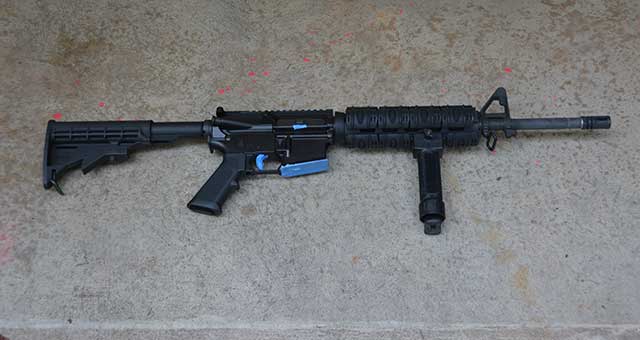
AR Prepped for the camo paint job.
Once I had the extras removed, I used painters tape to cover the magazine well, the trigger and the ejection port cover spring so that no paint would get in these areas. I am sure it would have been fine if I painted them, but I took the precaution just in case. Then as everything was wrapped up and ready, I hung the AR up and sprayed it down with brake cleaner. You can buy this at any auto store. The Krylon instructions said you didn’t need any primer but I wanted to make sure I removed the extra oils so the paint would adhere as well as possible. Once the rifle had been sprayed with the brake cleaner, I let it sit for about an hour to dry.
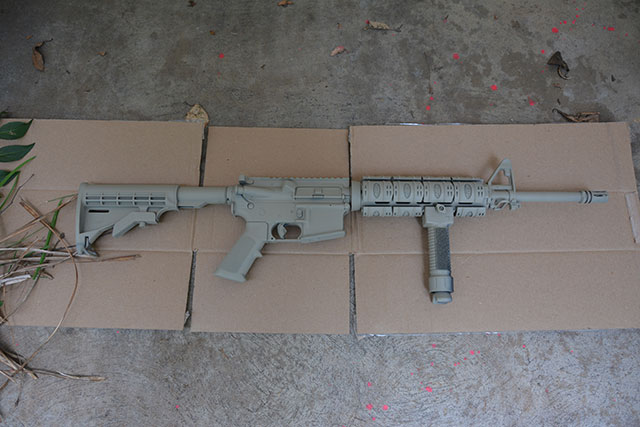
Krylon Khaki as the base coat.
The instructions from Krylon said to work your way from lightest to darkest color. I used three colors (Kahki, Olive and Brown) and I think these are a great match for this time of year and the vegetation we have around our home. The great thing about this camo paint job is that you can repaint the rifle when the seasons change or if you make a mistake. The Krylon went on beautifully and had a great smooth finish that covered nicely. I don’t even think I used a half can on the whole rifle and it looked so good I half considered just leaving it like this.
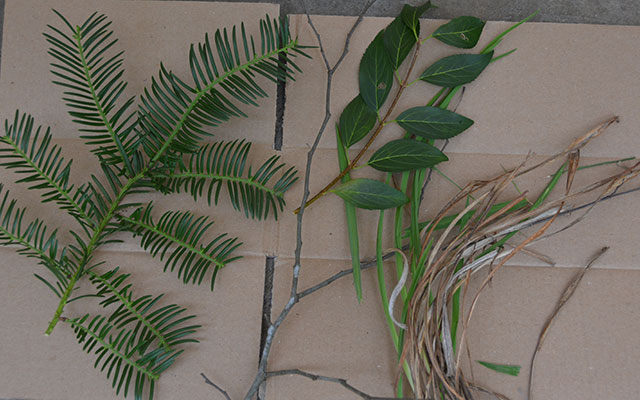
Camo stencils from nature.
I did consider cutting out the stencils from the Krylon site. I know there are sites that you can download the ACU digital patterns and cut these shapes up for stencils, but I wanted to try something more natural. And, I didn’t want to sit there with scissors all day… So I walked out into the yard and grabbed some various leaves, grass and sticks to use for my own natural stencils. This will work great regardless of where you live because your camouflage will match your local vegetation or it will in shapes anyway.
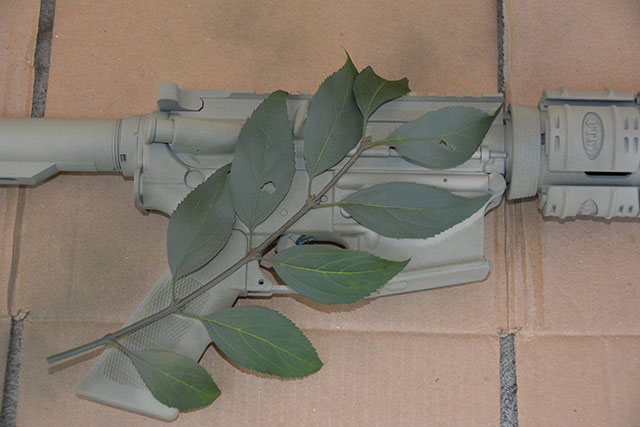
Place your stencils on the AR15 and over spray with a darker color.
This next part isn’t really scientific and you can’t do this the wrong way unless you spray too much paint I think. For my first stencil I laid a branch with some leaves on the main part of my lower receiver and sprayed with my Olive green. I then repositioned the leaves in other locations and used other elements like the grass to lay down different patterns. The Olive shapes lets the Khaki come through and begins to break up the shape of the AR15. Once I had a nice pattern on the first side I moved the the other side. After both sides had been painted, I started using the brown with these stencils to add additional camo pattern.
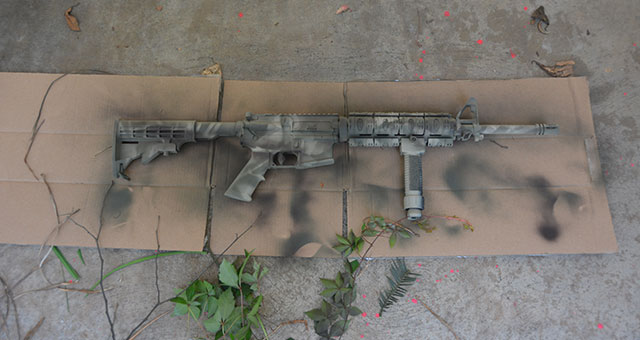
Finished product on side one.
The process is so easy and I was really pleased with the results. I plan to do the same thing to my Hunting rifle next since I have so much paint left. You can see the difference a little spray paint makes. In the winter if needed I can tone down the green and just just more Khaki and brown. This is a simple project that anyone can do for less than $20 and it only takes a few hours max from start to finish.
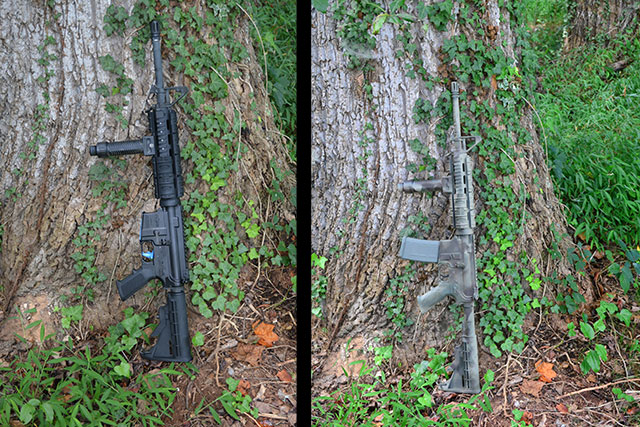
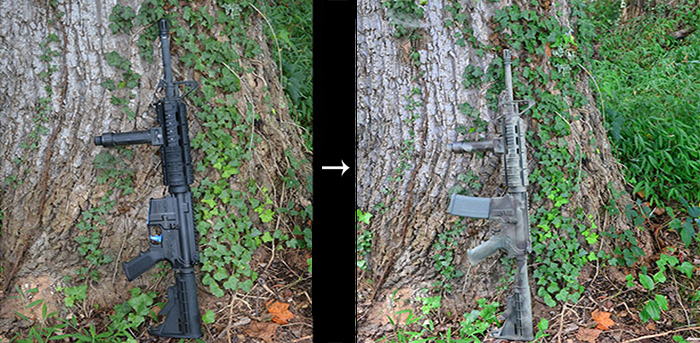
Before and after shot of the Camo paint job on my AR15.
The new paint job works well with the multicam pattern too I think and blends so much better now with the rest of my gear. It’s not perfect, but I think it is so much closer. This is a great project you can try with your rifles too. That is if you don’t plan on getting rid of them. You don’t do you?
This article was first published on The Prepper Journal
Similar Articles:


How does the camo job hold up under sustained fire? When hot does it get “tacky” or does it stay set?
A good pattern for camo can be made from a piece of chicken wire. Take some masking tape and cover every few holes in random patterns. It makes a nice digital camo.
Nice one! I am gonna copy your idea of using the local vegetation as stencils!
Beautiful job man just love it, just one concern however; what happens to the paint on the barrel when it gets hot? Great example on how adapt, improvise, and overcome.
Great article I gained some good ideas from it, thanks! I also did a camo job for an M1A. I went to Fred’s M-14 stocks and bought some Military issue fiberglass sets from him. They are a lot better than wood stocks for many reasons. I cut my own patterns using an Army camo shirt and started spraying. They turned out really well and I would post some photos here but they are in storage. Thanks again for the article, will get busy on my AR ASAP!