Making your own solar water heater is a great way to save some money on your electricity bill with the help of the sun. It’s an easy and efficient way for anybody to create their own water heater using simple materials that can be found in most stores. With the endless possibilities of designs and ideas for the solar heater, I will show three different ways you can make it out of (mostly) used materials. I built a water heater out of PVC piping, a radiator, and an old boiler (which will be connected to the pipe system to hold more water and keep it warm).
Related: How to Make Your Own Semi-Automatic Off the Grid Washing Machine (No Electricity)
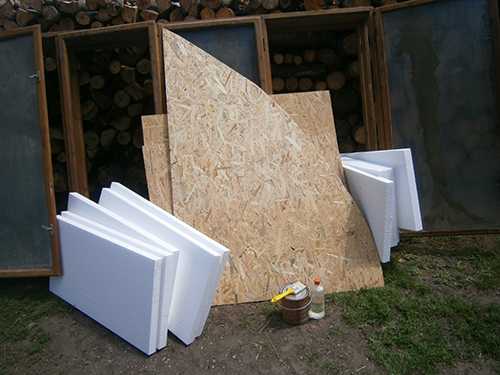
First, here are the materials I will be building the frame with:
- A window frame (or something else that can be used as a container for the pipes or the radiator)
- OSB planks (Leftover pieces are fine to use; we won’t be using too much of it )
- Plastic foam
- Black paint
- A paint brush
- Acetone
- Tape
- Silicone sealant and a sealant dispenser gun
 Step One: Preparing the Window Frame
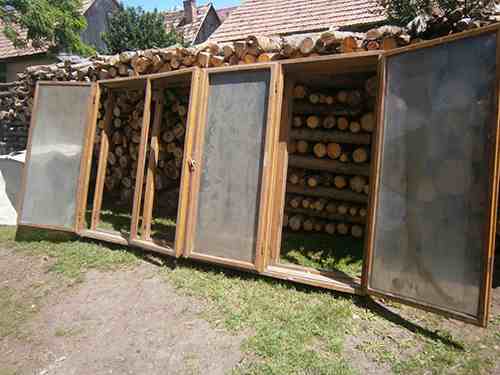
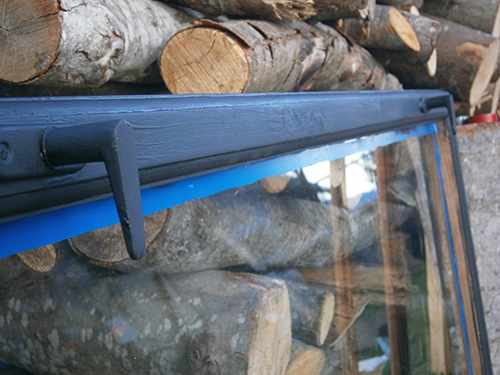
The first thing I did was lean the frame up against my wood stack. This put it in a better position to work on it later. One of the windows was missing, which was quite a shame. This meant that I would need to buy a window glass. I needed all my windows intact; they would be crucial to my design.
I took the three window frames off carefully and cleaned them well.
Step Two: Putting in the Insulation and Protecting It
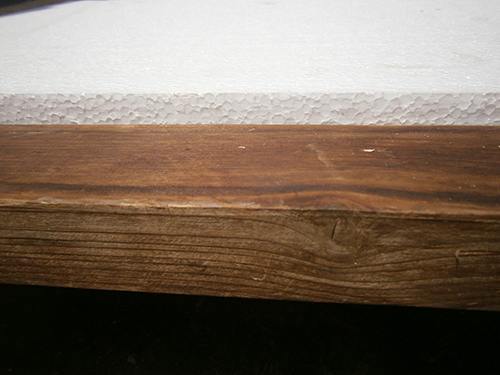
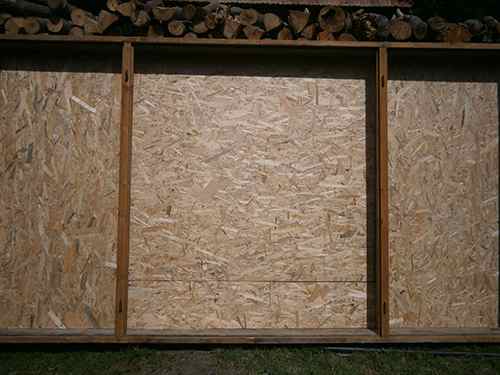
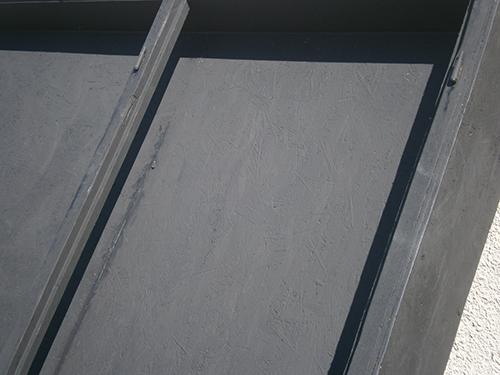
I wanted a good way to keep in the heat. The cheapest and best way to do that was foam plastic. I first covered the back side of the window frame with OSB in such a way that I would have a pocket to put my plastic foam in.
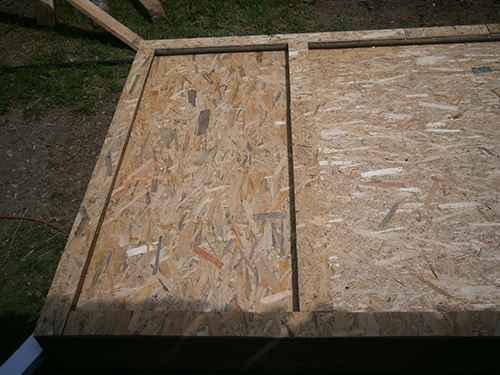
I then grabbed my plastic foam and started cutting it to size so it would fit inside the pockets at the back.

The foam was a little taller than the window frame, so in order to fix the height difference, I covered the sides with OSB as well.
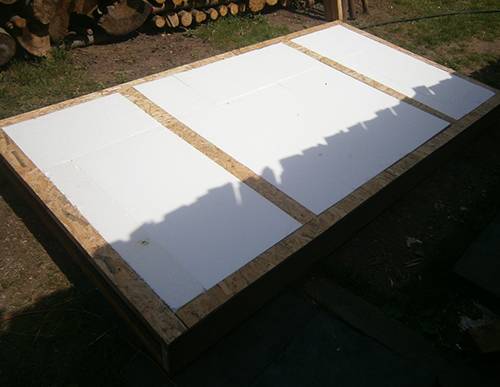
After that, I was done with the plastic foam. To finish it off, all I did was cover the back side with another layer of OSB to keep the foam in place.
Step Three: Painting It and Sealing Any Holes That Are Left Between The Planks
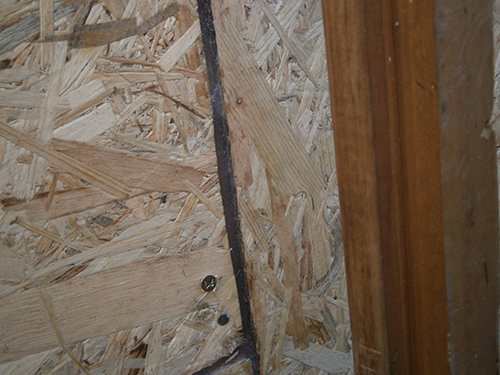
I once again placed the window frame up against the log stack to get a better angle. I prepared my sealant dispenser gun by placing the silicone sealant into it and started looking for any places where the OSB planks didn’t connect tightly. If you can, buy black silicone sealant because it will be painted black. I simply went around all the cracks I found and filled them up.
I then grabbed my paint can, my paint brush, and my acetone (to clean the paint off my hands afterwards).
I first started with small window frames. The glass was already clear after cleaning it properly earlier, so I didn’t have to worry. To make sure the paint wouldn’t drip onto the frames, I put tape along the inner side of the wooden framing where the window glass and the framing meet.
When I was done painting, I ripped the tape off to finish it off.

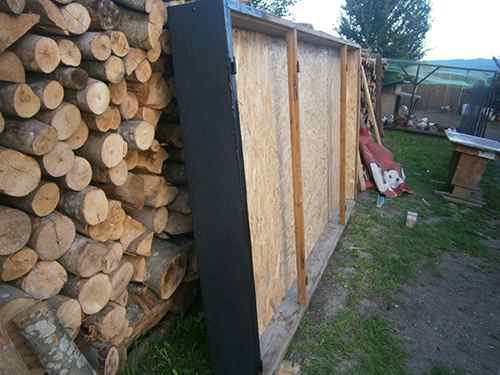
I grabbed my paint bucket and my brush and moved over to the big window frame. First I worked on the back side as that was the trickiest side to do. I asked for some help and had someone hold the frame up while I finished the back side.
I then moved over to the sides, the top, and the bottom (which required me to flip the whole thing to paint it).
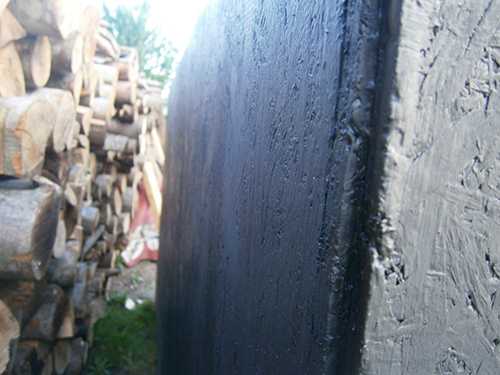
I finished it all up by finishing the front side and made sure the whole thing was pitch black.
Step Four: Preparing the Boiler
I had an old electrical boiler that was out of use because of the high electricity bills I had when using it. It might be useless on its own, but with the solar heater, I can use it for its original purpose without the need for electricity.
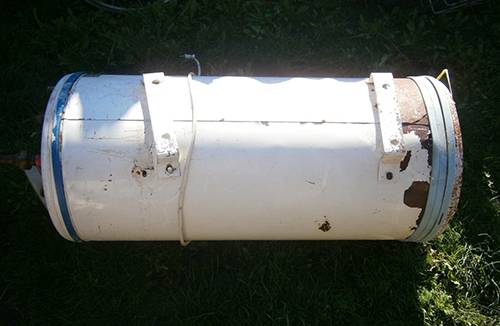
I took out the insides that heated the water with electricity since I wouldn’t need them.
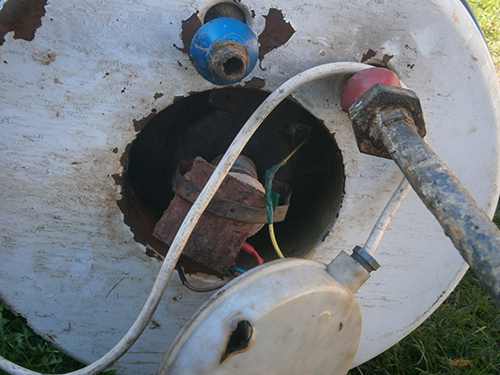
Using an electric grinder, I cut the outer layer off and took the insulation out that was between the outer layer and the inner layer that contains the water. (I used a similar technique when building the window frame).
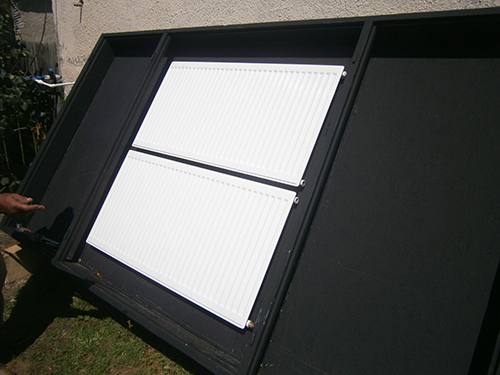
Step Five: Setting Up the Radiator System
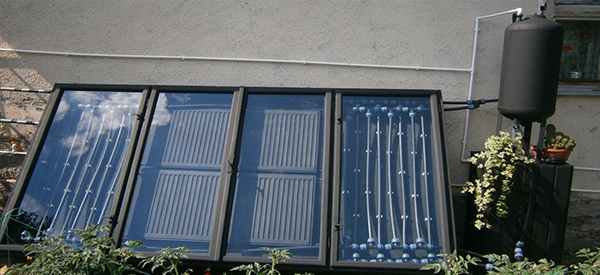
I grabbed my two radiators and placed them in the middle of the window frame. They were held up by their own supports. The piping system would go around the radiators on both sides. Both piping systems connected to each other at the top and bottom.
Next I connected the pipes using copper piping. The top radiator’s two top entries were connected to the same pipe; this will bring the water into the house. The top radiator’s two bottom entries connected to the bottom radiator’s top entries. Finally, the bottom radiator’s bottom holes were connected to the same piping that went inside the house and was brought out.
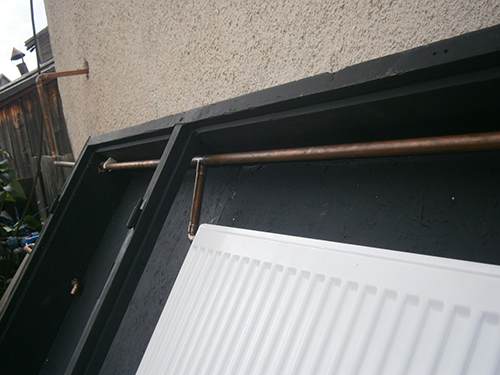
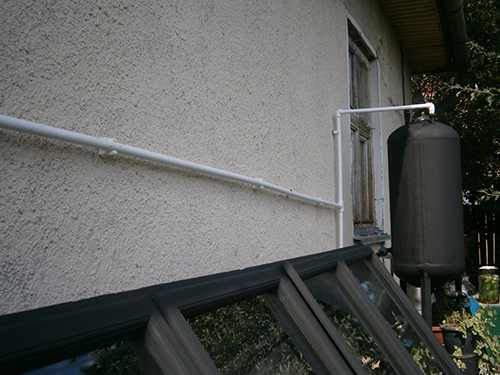
We drilled a hole through the window frame and the wall of our house and connected it to the boiler we have inside the house.
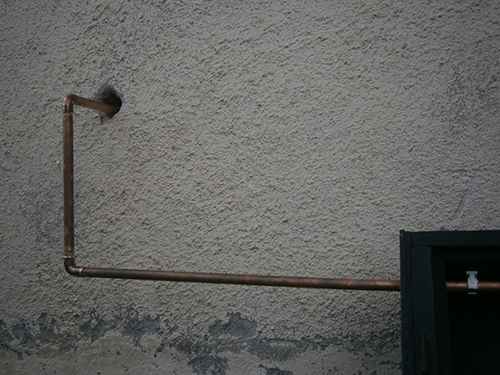
This is how it looked after all the pipes were in.
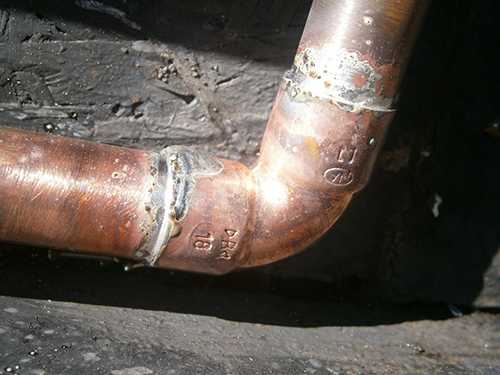
To make sure that there will be no water leaks in the future, I used solder and my soldering gun and went over every single joint.
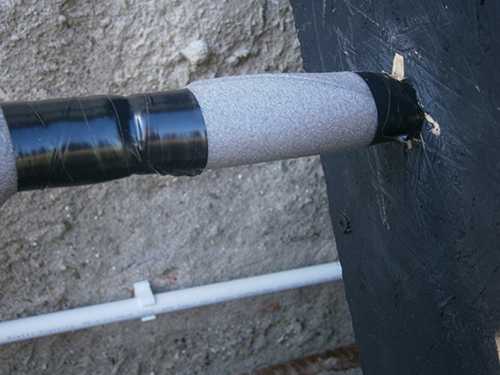
To finish off the system, I covered the part of the piping that will be out in the open with pipe insulation. This will keep the warmth inside. The rest of the piping will be inside the frame, under closed windows, creating a greenhouse effect that will keep the heat in.
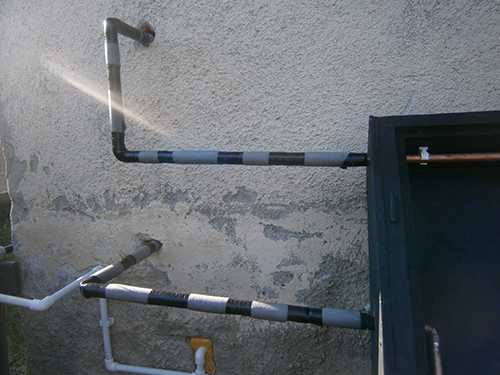
I taped the insulation onto it at different points, making sure to cover the corners well.
Step Six: Setting Up the Piping System
As I said before, the idea was that this system would be connected to the boiler system. This was my backup water, and it would also provide warm water to my tap outside.
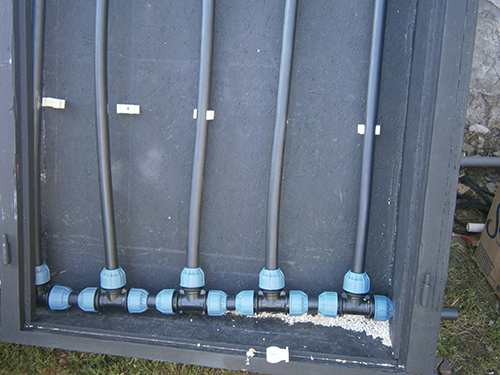
I used black piping to save on paint. I first started out on the right side, placing the pipes down and connecting them to each other, going in vertical lines until I couldn’t connect any more. To hold the piping in place, I used PVC pipe holders and drilled them into the back of the solar heater.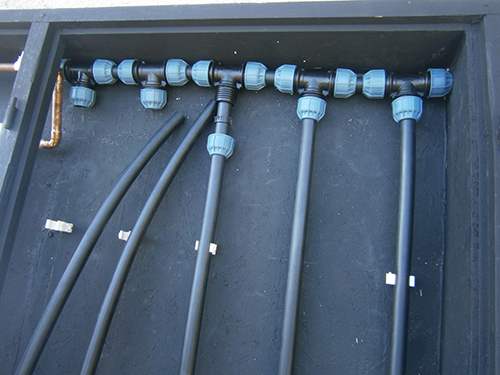
Of course, to cut the pipes, I used a PVC pipe cutter.

At the right side of the window frame, where I had already set up the piping system, I drilled two holes at the top and bottom for the piping system to lead out of the window frame.
With a pipe running to the left at both the top and the bottom of the frame, I went over to the left side of the window frame and, with the same style, continued working on the piping system.
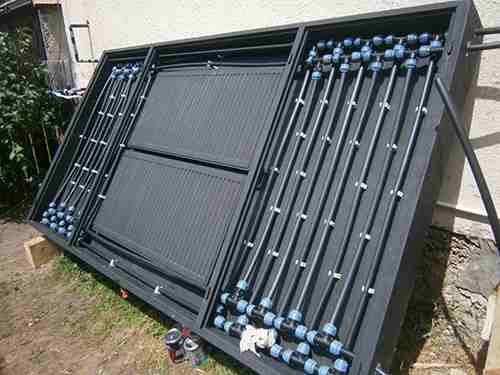
After I finished up both, I started the second row of piping on top of it. There were a lot of places where I could have put more piping and pipe holders in. I made two new holes at the top and the bottom and started on my second row of piping. I also put the first layer of paint onto the radiators and the copper piping.
With a corner piece and a T piece, I connected the two systems on the outside so they would run on the same system.
During the next few days, I kept working on connecting the pipes to each other, placing down the holders and painting new layers of paint onto the radiators and the copper piping.
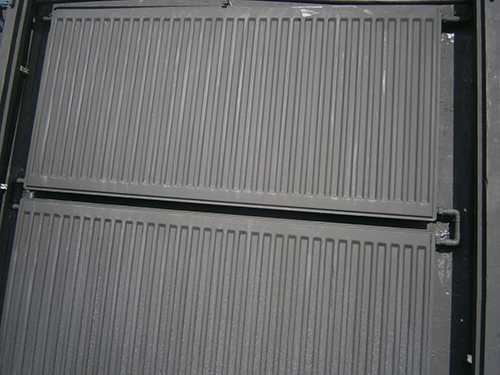
This was after three coats of paint, but it was still not good enough. I would have to paint it until the shine disappeared and it didn’t reflect the light anymore.
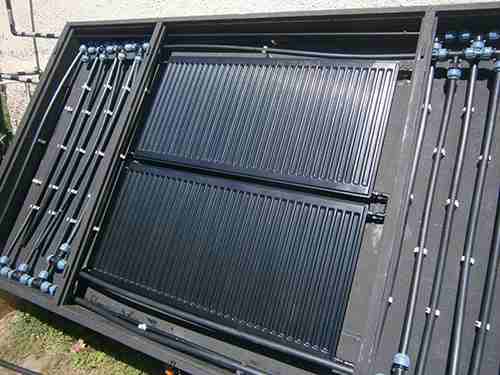
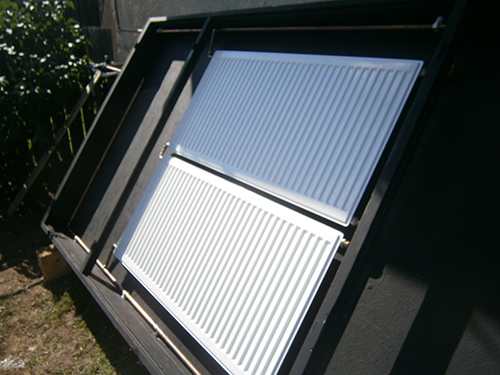
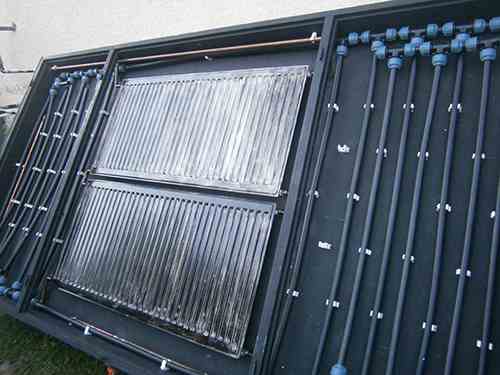
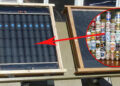
This is how it looked when I finished the piping and painting the radiator system. It took four coats of paint.
Painting the radiator system is crucial to it working; otherwise, it won’t be able to heat up as much as it needs to. The greenhouse effect does give it some help but not enough if the radiators aren’t painted black. You can see that it lost its shine that it had before.
And the piping did the same.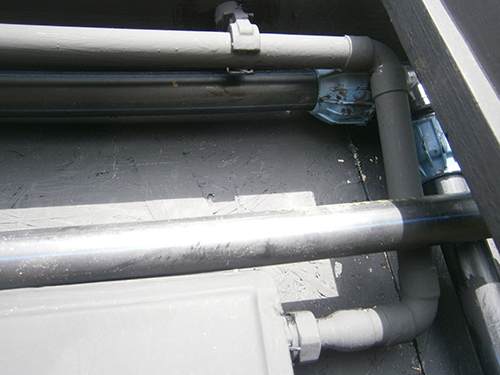
Step Seven: Making the Water Storage System and Finishing Up the Solar Heater
After peeling away the outer layer of my boiler, I welded three legs onto it, making sure that I wore protective equipment. I started painting the whole boiler, doing the same thing I did with the radiators—painting it until it lost its shine.
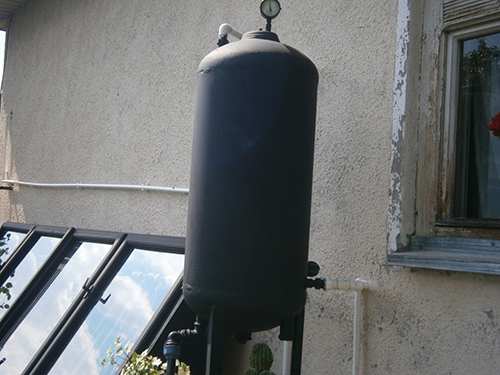
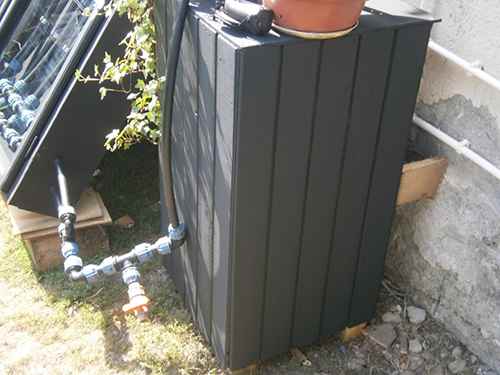
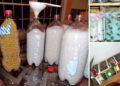
When I was done with that, I made a stand for my water storage. This way, when I open the tap on my outside tap, the water freefalls for the most part. By letting gravity do its work, I save the electricity that a pump would use.
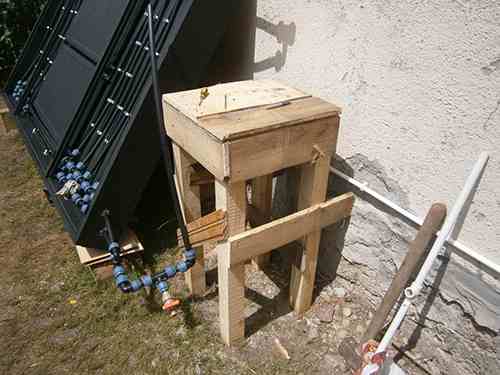
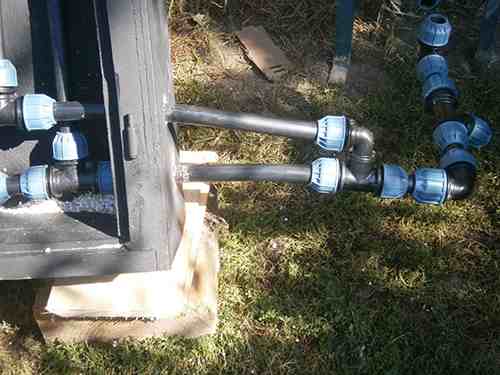
At the bottom of the pipes that run the radiator system, I set up an insulated PVC pipe (this pipe isn’t necessary to be insulated as it will only deliver cold water) that connected to the water piping running into my house, which connected (at the bottom) to the boiler I placed on the stand I made. The piping split into two parts, with one of them providing water to the boiler and the other side connecting to the outside tap.
Then I made another piping system that was connected to the boiler at the top. This will deliver the already heated water into my boiler inside the house and to the outside tap.
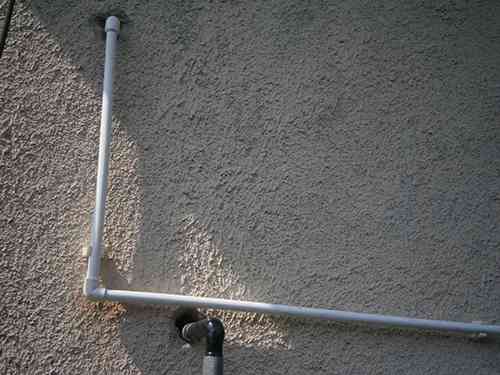
The whole piping was made so it would slant downward a little to let gravity do its work with the water.
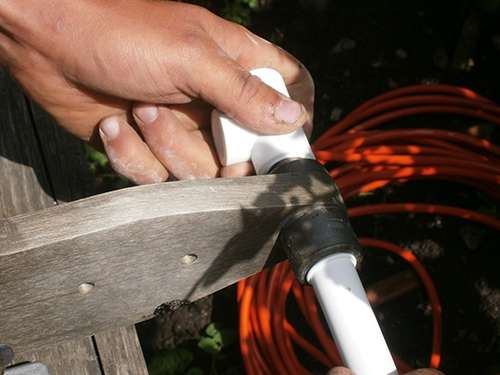
Of course, the PVC pipes were connected to each other with a PVC pipe welder.
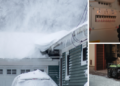
After that, I was done. Everything worked perfectly, so I thought I’d pretty the whole thing up a little. I covered the boiler stand with wood planks and painted it to make it look a little neater. I added a few plants under the boiler and took a hot shower with my naturally heated water that requires no electricity to heat.
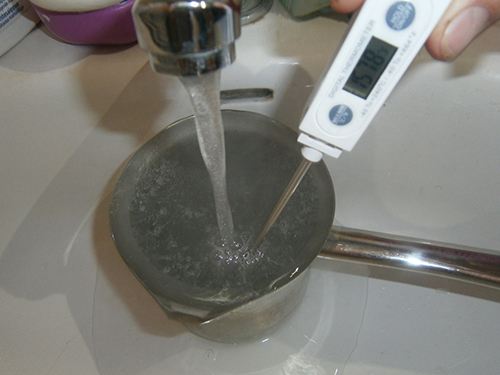
Last, I needed to try out what it could reach. On a regular summer day, it was able to reach around 150–160° Fahrenheit.
You may also like:
 How To Make Money From Your Homestead
You Will Not Survive An EMP Strike Without This (video)


Thats very cool. You must live in the mid west. I dont beleive it would be a 4 season heater here in Central Pa. though.
Tas: It works in PA. If they can use them in Canada, it’ll work for you. A sister’s sister-in-law in central PA loves hers.
what kind and where do I get those radiators from,
I found some at http://www.ecomfort.com or you can simply search Central Heating Radiators.
Exellent idea my neighbor ran 1in black pipe off his pool pump on his garage roof which his pool pump pushed through to heat his pool , worked very well
I’m guessing you’re in a place that doesn’t get a hard freeze ?
Have seen similar designs used to heat in ground pools, works well.
I don’t understand how you get water to travel through the piping outside and into your house. At first this looked like a really great idea, but I got lost with the instructions. Sad
I agree with you I got lost in the instruction too
And what did the building inspector say about your installation?
Or was it, “Code inspection? We don’t need no stinkin’ code inspection”?
Seriously? This is a great idea and would never be “approved” by any building inspector since it does not meet any type of codes in his book. He would shake his head and walk away. Who cares. Wanker!
I used to design and build solar hot water heating systems and I wouldn’t use PVC anywhere in a system. If exposed to UV light it will get brittle and break.
Also, I’d use silver solder (95/5) as it gives a more durable solder joint.
..imma wif wats-up-chuck
imma wif LcC…
had a flash back 2 the last wHole earTH bible…
Thanks for the Excellent detailed Article.
Now, where can I get some of that Solar Water for my Solar Water Heater?
>;0)
searching Central Heating Radiators returns 179 results.
How does the water travel through the system?
If your local hardware store does not carry black silicone, go to the local Autozone. Parts suppliers usually carry it in quantities from a small tube to ones that you put into a caulk gun. If they do not have it check the phone book for the local transmission parts supplier, Transstar, WIT, Capital Core, etc. They will sell it by the case.
It also seems that using a flat “tubing” rather than round would be more efficient. The flat tubing will increase the surface area so it seems that a shallow broad surface area would heat better than a round one.
As the us government is still tackling the anger of the public as a result of inflation rates in numerous
products, it’s did not raise the diesel rates since now.
These channels not merely discuss the Indian economy but provide specifics of
the globe economy also. With a $16 trillion deficit just around the corner for
that United States, because the debt limit has been raised, where there has never been a debt limit government entities hasn’t reached, many economists are predicting this bubble to
burst by no later than 2014.
Back during the :”Great Depression” although looing back it wasn’t so great. In Arizona many folk had a simple reedy to use “Solar” water heater. It was called the water tank of a discarded water heater. We simply went to the dump and got one cleaned it out, put it on the roof and hooked it up. The sun did the rest. We had hot water year round..
Does this work in the winter when it’s below 20 degrees?
Ched: In that case, the tank belongs in the house. You would need to look up in te archives for one that works in your area. but, yes, they can be made for where it gets 20 below zero. niio