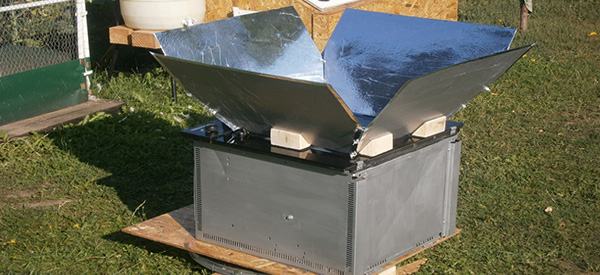
Making yourself a solar stove is an easy way to save money on your electricity bill. It uses the heat from the sun and locks it up inside itself.
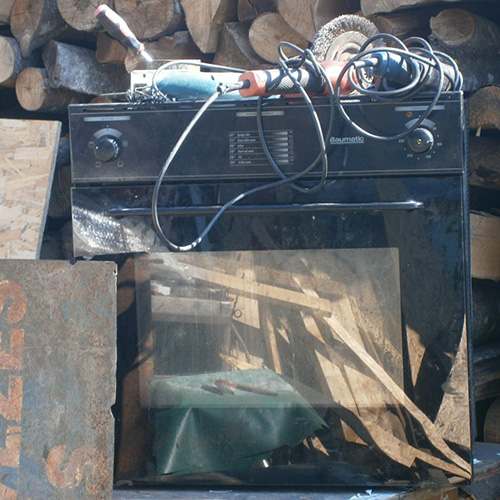
I had an old electric stove that was out of use, mostly due to how high it raised my electricity bills. It was the perfect candidate to be the base of my solar stove. I started out by measuring the size of the stove and then thought about how this would all work. I knew what I wanted—a solar stove that could cook food at any time of the day and could follow the movement of the sun without me needing to lift it up.
Related: How to Make A Cool Rocket Stove For Free
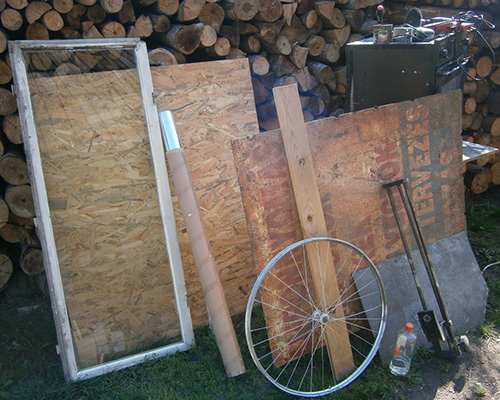
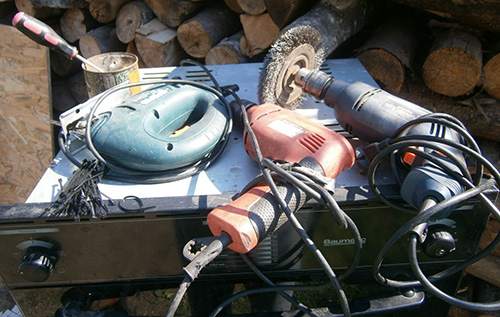
First, I gathered everything that I would be using (Of course, most of these items can be changed out for others; this is just how I built it.):
- A bike wheel (with both the tire and the wheel itself)
- A window glass
- Mirror foil
- An OSB plank
- Metal sheets
- Acetone
- A photo enlarger stand
- Wooden planks
- Gray paint
- Gray heat-resistant spray paint
- Black heat-resistant spray paint
- Acetone
- Transparent wood varnish
- A Phillips screwdriver
- Screws
- Nuts, bolts, and washers (that match each other)
- A jigsaw
- A drill
- A couple of cable ties
- A wire grinder
- A grinder
- One or two clamps
- A rivet gun and rivets
- Metal corner braces
- Metal plate braces
- Wire
- A glass cutter (to provide one more layer of insulation)
- Velcro
- Glue
- And, of course, the old electric stove
Step One: Cutting the Metal Plates to Size
I first cut the metal sheets into four 18×24-inch pieces. I measured out two triangles at the bottom left and right sides at the size of 8×4 inches, which would get cut off. That left me with 16 inches at the bottom and 24 inches at the top.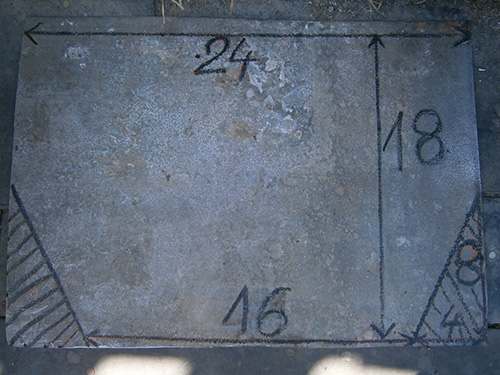
I used a really old manual metal sheet cutter that my grandfather had (but a simple electric grinder would have done the job too).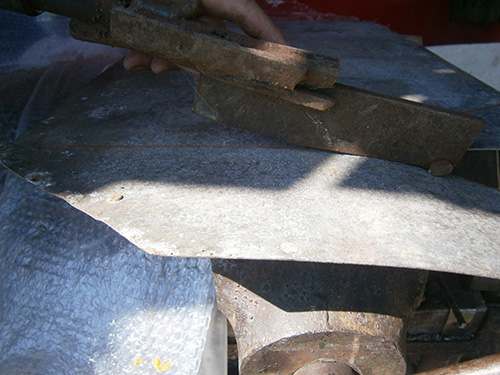
I ended up with this shape.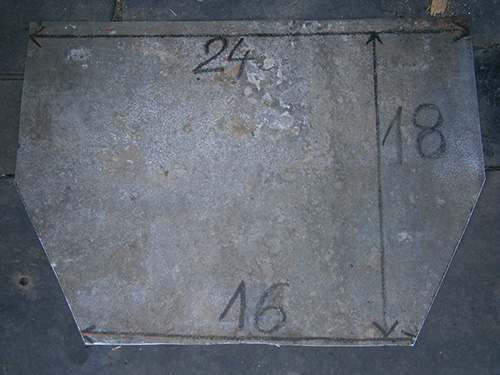
I placed the metal sheets on top of each other and held them in place with clamps.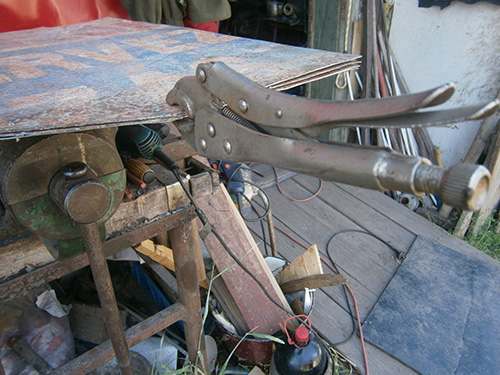
I grabbed my drill and made a hole along the bottom side where I cut out the triangles. The first hole was at the bottom of the slanted line. I placed a bolt through the hole and secured it with a nut. The bolt helped me hold the four plates in place, which was necessary to make all the holes at the same place on both the left and right sides of the metal sheets.
I then drilled another hole on the same side at the very middle of the slanted side. Once again, I placed a bolt through it then did the same at the top of the line. I did this for both sides of the plate, making sure to place the holes at the exact same height as I did on the other side.
Step Two: Preparing the Base of the Solar Stove
I started out by unscrewing the glass of the stove. The outer glass isn’t necessary as the black paint covering the outside would just block our view.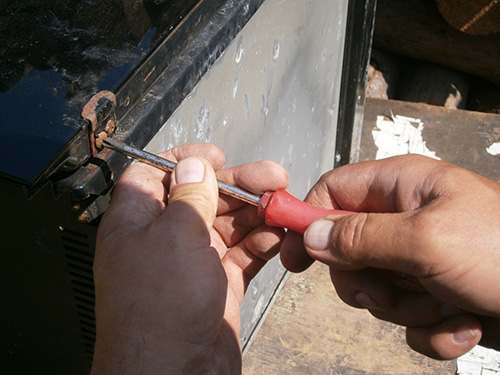
The glass frame under that is the one we will need; this is a smaller frame.
Next I grabbed my bike wheel frame and a plank that overhung on both sides of the wheel by about half an inch. I took apart the bike wheels (the axle, the cones, the spacers, and the locknuts) and attached the plank to it. I added two small pieces of wood onto the ends of the planks.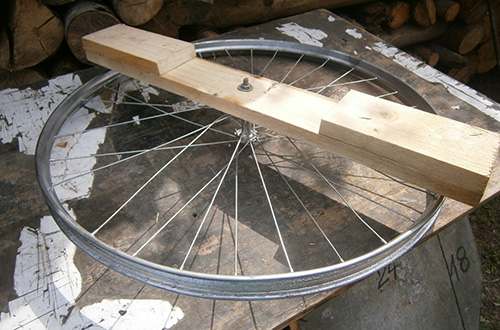
I made another piece that was the same size as the one made before (once again, slightly hanging over the bike) and made a hole in the middle of it.
I hit four nails halfway into it. These would connect this plank and the one that’s already on the bike.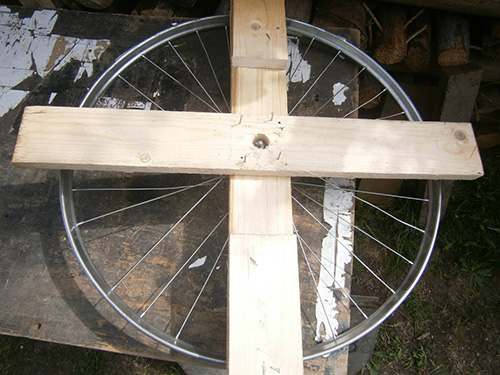
I then added two planks onto both ends of it like the other one, but this time the smaller planks were on the inside.
Make sure that when you do it, the wood doesn’t interfere with the turning of the bike wheel, since you only want the wheel to hover over it.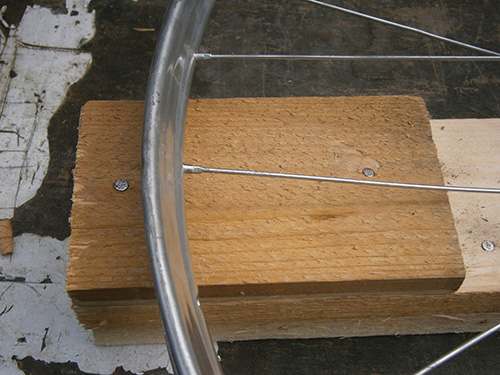
The hole in the middle served to keep the bolt on the end of the wheels from sticking out. This would be the bottom of the solar stove, so I needed it as flat as I could get it.
I then grabbed the wheel’s tire and stuffed it with wood pieces to give it some sturdiness.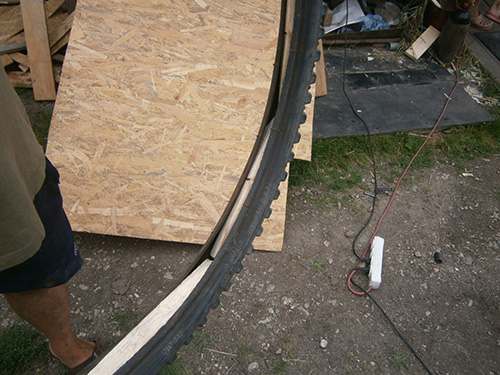
I then placed it on top of the contraption that I had made.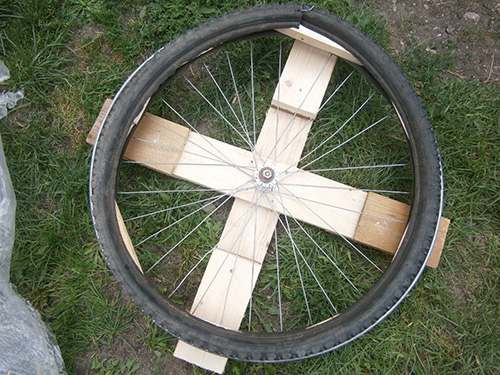
I lifted the electric stove and placed it face down so that the back side of the stove was facing upward. I then grabbed my drill, two hinges, my rivet gun, and some rivets.
I first placed the hinges onto the side of the stove then drilled the three holes located on the hinge. After that, I grabbed my rivet gun and my rivets and attached the hinges to the stove.
I cut out a piece of OSB plank that was a little larger than the electrical stove, with one side of it being 9 inches larger than the rest. I drilled a hole in the middle of it (not counting the 9-inch overhang) so the bike wheel contraption would lay flat.
I attached this to the hinges and put the overhang on the opposite side of the hinges.
I first grabbed the bike tire and placed it on top of the OSB plank. I drilled eight holes in groups of two on four different points of the rubber tire to hold the contraption in place with the help of a few wire pieces.
I placed the whole thing on top.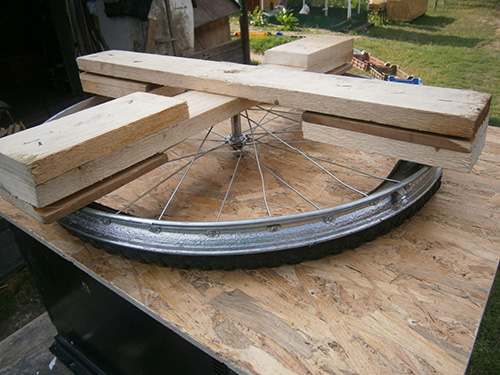
I grabbed a long piece of wire and bent it into two then attached one end onto a screwdriver and the other onto a nail. I grabbed the screwdriver and started rotating it to twist the two pieces of wires into one stronger piece.
I then cut the wire into four smaller pieces and locked the base of the solar stove onto the OSB plank. Now my stove was able to turn both left and right.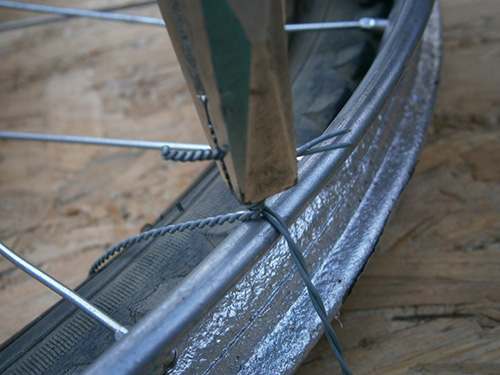
I grabbed the stove and flipped it upward so that the opening was facing up. This was the position it was going to stay in.
Step Three: Making the Tilting System
I grabbed two corner braces and two plate braces. I first attached a corner brace onto the back side of the solar stove with my rivet gun (the side with the 9-inch overhang). I connected a plate brace onto it with two nuts and two bolts.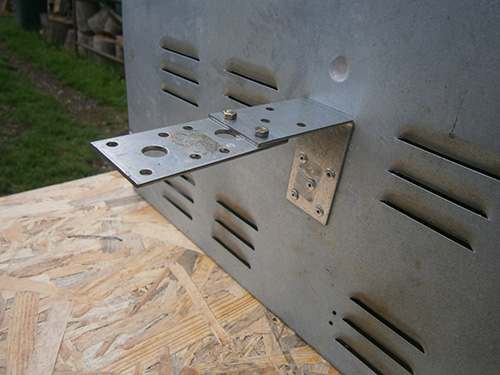
After that, I grabbed the photo enlarger stand. This has a function that lets me slowly turn a wheel, which brings a piece of the stand upward. By connecting this to the braces at the back, I will be able to bring it up and down as I please.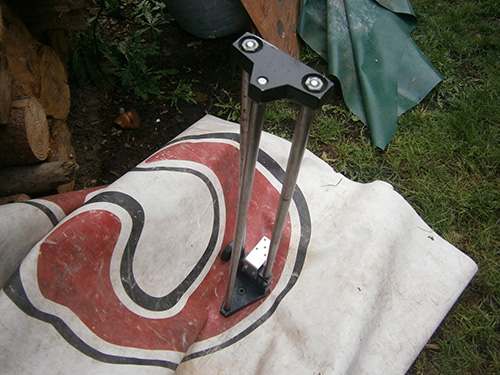
I first attached the stand to a corner brace.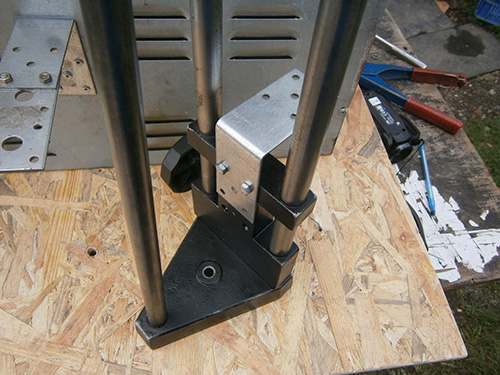
This was already up quite a distance, but I knew I could do much more.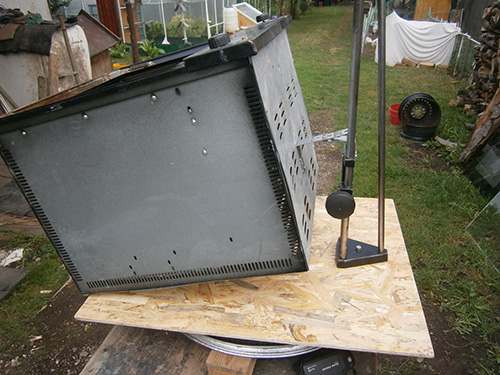
I grabbed the second piece of plate brace and attached it to the corner brace that was connected to the stand. This gave it greater length.
After extending it out, I knew this was going to be high enough for me to even cook in the morning sun if I wanted to.
I could also turn the plate brace under the corner brace, which was a neat trick to get it out of the way.
Step Four: Making a Stabilizer System
I had a black cast iron pot (which also helped with keeping the heat in) , and it fortunately fit perfectly inside my oven. I was worried about what would happen to my stew (or any other meal) inside the pot when I needed to tilt the stove to follow the sun. To fix this, I came up with something that lets me tilt the whole thing freely.
I grabbed a piece of metal and cut it to a size that could fit inside the stove then cut off the corners to create this shape.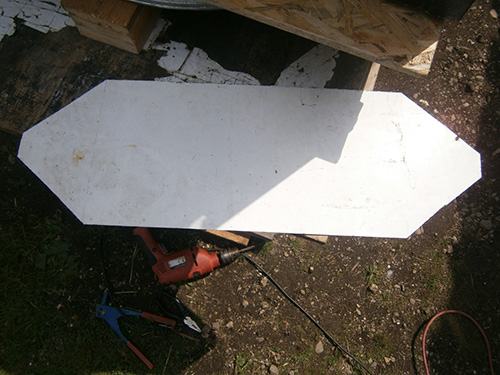
I grabbed a wooden hammer and started hitting the two ends down, bending them into a corner and making sure the inside part that remained straight could fit into the cover easily.
After bending it down, I drilled two holes into both of the bent-up sides and did the same inside the stove. I then attached two bolts and two nuts into it, and I was ready. If the stabilizer doesn’t turn too easily, you can loosen the nut or make the hole bigger so it rotates more easily.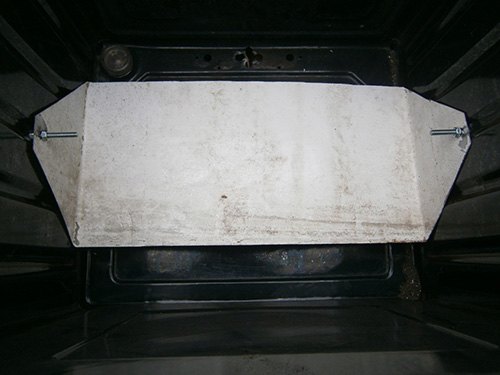
Step Five: Painting the Stove and Cutting out the Glass Pieces
First I grabbed some tape and made two lines on the inside of the stove: one at the middle point and another right at the top. These separated my two painted lines.
The top part was painted with the gray heat-resistant spray, while the bottom was painted with the black heat-resistant spray. Using actual paint will be easier than spraying it down, but the spray version I bought had higher heat resistance, so I decided on spray paint. If the spray goes anywhere unnecessary, just use a piece of cloth and some acetone to get it off in no time.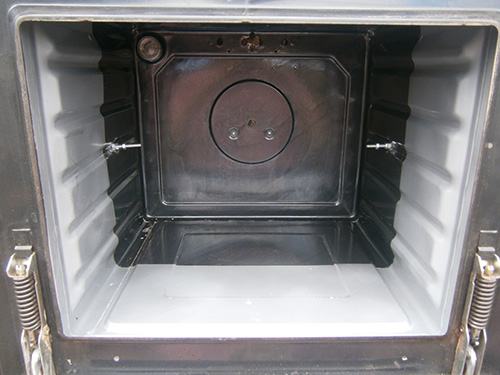
While this was drying, I applied my coat of wood varnish onto the OSB plank to make sure the weather would break the plank down.
I grabbed the stabilizer, and with the rest of the heat-resistant gray paint, I painted it and let it dry.
Then I grabbed the metal sheets I cut out at the start and painted them with my gray paint. You can also use the rest of the heat-resistant spray.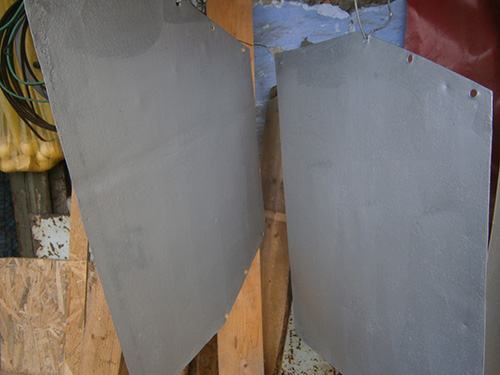
When all the paint was dry, I grabbed my mirror foil and laid it out on a table, placing the metal sheets on it. Then I traced around the shape of it with a utility knife to get the same size.
After cutting it out, I pulled down the paper on the back of the mirror foil and attached it to the sheet.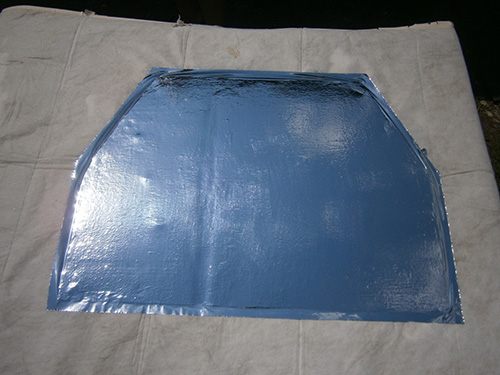
To make it clearer, I got a piece of wood and wrapped a sock around it. I gently pushed against the mirror foil from the middle to the sides and did my best to push the air bubbles out while pushing the foil down against the sheet so it would stick evenly.
Step Six: Cutting the Glass and Doing the Finishing Touches
I grabbed the piece of glass that was originally inside the stove and put it onto my window glass. With the help of a crayon, I traced the size of the glass to make an exact replica of it.
After I got the form, I grabbed my glass cutter and pushed down on it hard while pulling it toward myself, creating a straight line.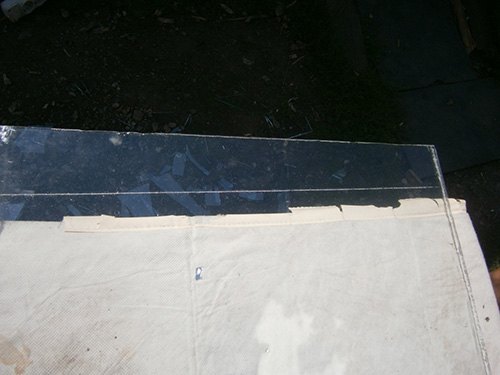
I gently tapped the bottom of the glass, going from one side to the other along the line. After a while, the glass piece broke off smoothly.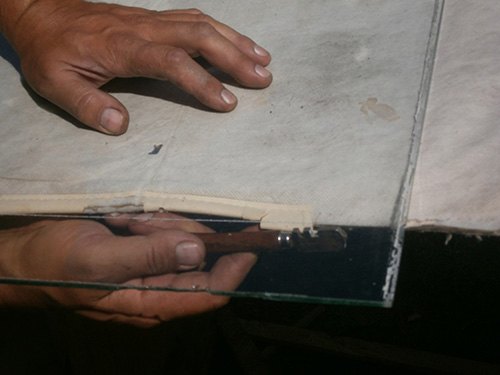
I first put the original glass piece in, and on top of this, I laid the newly cut piece of glass.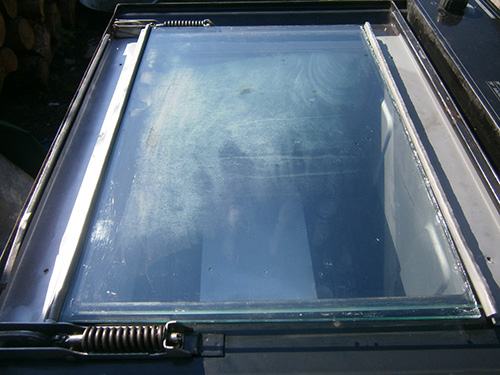
And on top of that, I put the original stove door frame.
To hold it in place, I put back the original holders that I took off at the start.
I grabbed the metal sheets once again and connected them to each other with the cable ties.
I slowly made the cable ties tighter, first finishing up everything and then tightening it.
After connecting them all, I was left with this form.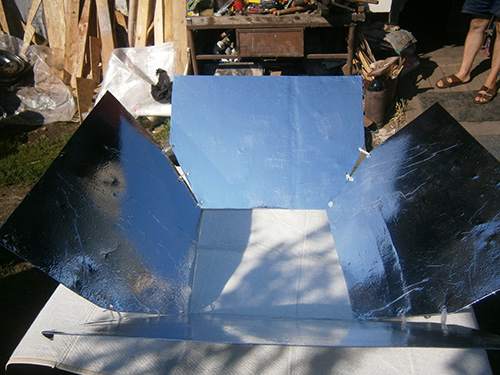
The best part of this design is that I can store it easily by simply pushing two ends of it together.
If I push the two sheets onto each other, I can make it even smaller.
I cut out some prism-shaped wood pieces and covered the bottom with glue; then I attached a piece of Velcro to it.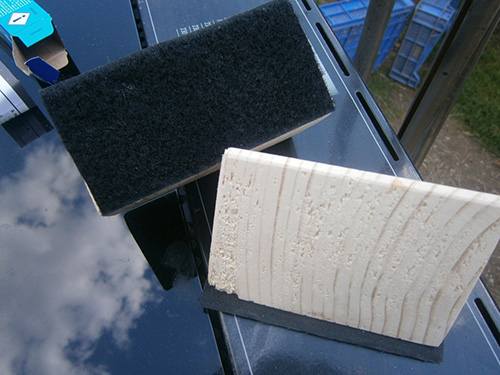
At four different points on the stove, I attached the other side of the Velcro. These will hold the metal sheets in place.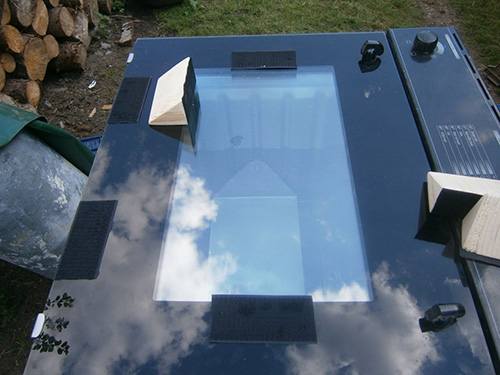
At this point, I was completely done with my solar oven. All I needed to do was try it out.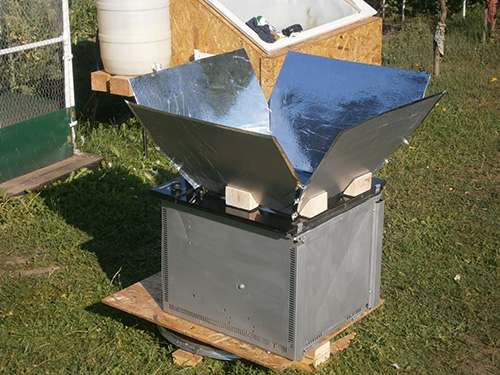
Step Seven: Cooking and Drying
I first wanted to see if I could make multiple types of food inside the oven at the same time, creating a full meal.
I prepared everything that I wanted to try out. I wanted to make something simple for my soup, something that everybody knows, so the best idea was to make chicken soup. I placed all the vegetables I wanted inside and added my homemade chicken soup mixture. Next I made a bread dough and cut up some chicken into small pieces, adding a few vegetables.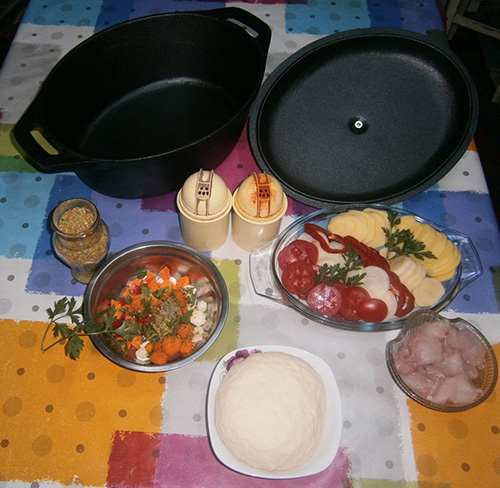
I placed the bread dough on top of the lid while I placed the soup and the chicken and vegetable mix inside some cooking plastic.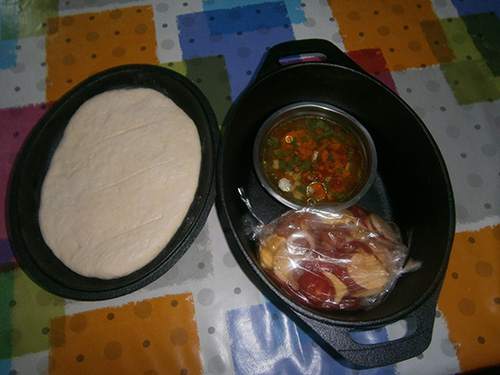
I placed the lid on top, upside down, and I was ready to put it inside.
After placing it inside, I put a thermometer inside too.
After around four hours, I saw the bread was ready, so I opened the solar stove up and checked to see how things looked.
In the end, it was cooking at around 230–250° Fahrenheit.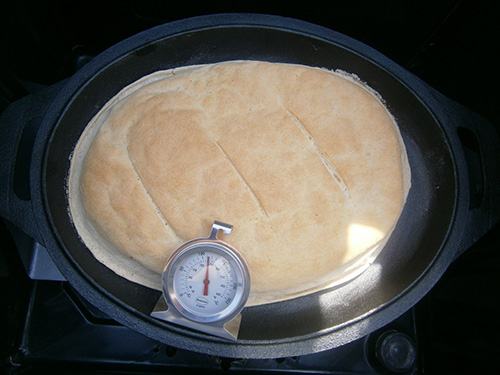
It needed about two hours to heat up and two more hours to cook the food itself. Unfortunately, the soup boiled over a little and made a mess.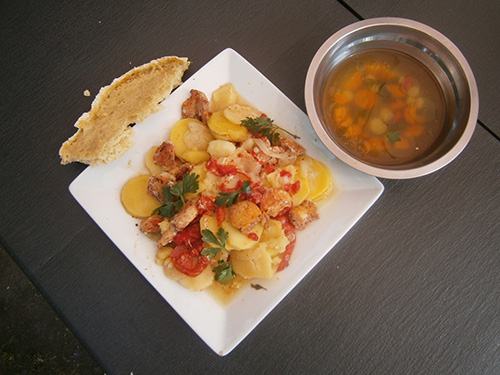
In the end, it not only looked tasty but really was super delicious and the best part is that cooking in the solar stove is one of the healthiest cooking methods out there.
You may also like:
What Happens When You Bury a Shipping Container (video)
12 Essential Things You Can Scavenge from Cars when SHTF


We used to make solar ovens with layers of cardboard, black heat resistant paint a piece or two of glass and aluminum foil. They worked. Pretty good.
I do like the ability to turn it an adjust to the sun but we just did it manually and stacked things under a side or a corner to catch the sun compensating the same inside under the pot.
For my science class I helped students make a parabolic shape with cut cardboard, glued on very shinny aluminium foil, made two small holes and put the ends of a metal coat hanger through on either side of the “point” of the parabolic reflector. Bend the ends of the coat hanger to hold a heat resistant mat black painted can with two holes near the rim of the can. Push or pull the length of the wire until the sun if focused on the can. By hanging the can it is able to self level as you aim the reflector at the sun. We were able to boil water in 1.3 minutes from 38 degree well water. Of course while adjusting the reflector I got enough sun to look like a boiled lobster. After that I was more careful. Focusing down to one focus point like that is really intense.
Your oven, like our cardboard and foil ones has a larger focus area. The parabolic shape really created a small, intense focus area. The kids all took turns without the can but using a hot dog hung in the focus area. It “grilled” them quickly. It was a fun lesson.
I just want to know how cooking solar makes it more healthy???
Food cooks in its own juices (meat, veggies). Moisture is trapped so meat is moist, flavorful. (Turkey and chicken stay moist and cook through) Basically a perfect combination of radiant even moist heat with no “hot spots” from the heat source coming from the bottom of the pan/appliance. The healthy vitamins are not boiled off and food is not scorched. Although I do love a good barbecue. You can start a roast by searing it and finishing in the sun oven.
I have a solar sport oven and it works great, I’d like to try this one as well as I feel I need a second oven. One thing I’ve learned with chicken (not sure about beef or venison) when you take it out it will be fall off the bone with a ton of juice that makes great gravy. Sadly, the next day the chicken will be bone dry. We usually bake two whole chickens in our oven, one for dinner and one for the next day when my wife makes a big batch of chicken salad which my son and I take to school and work.
Hi there. Interesting article and the stove looks great. In my situation, I live in an apartment. I would love to build a sun oven that is a much smaller version of yours. I need something that I can fold up and stash in a closet. Does anyone out there have plans for a different and easier to build sun oven?
there is alot simpler way and not as much work nor al the tools — 2 cardboard boxes one smaller and top removed from the smaller one put inside the lager and stuff news paper around the make a tight fit put foil inside smaller box and use black marker to color it black and the top on the bigger box cut a squar in center for the window glass and clue and duck tape glass in and it is ready to use
I would like some pictures if you can. This sounds nice. Thanks. Larry
I am an elderly woman. I find you simpler made oven interesting and want to try this summer. What confuses me is, your oven with the glass on top in my image, it is totally sealed. So, where is the opening to the oven to place and remove foods? Also, is it possible to include picture model. Nothing fancy, just the two boxes with glass as visual for opening
Thanks
https://www.amazon.com/s/ref=nb_sb_noss?url=search-alias%3Daps&field-keywords=portable+solar+oven
This is commercial but I think it’s right up your alley.
why buy it when you can make it in a few mins ??
What I have is a reflector like you use on a windshield, taped together with Velcro. Place a cookiecooling rack inside to keep the pot elevated so heat can get under the pot. Use your black cookware for your dish you’re making and place it in an oven bag to help hold in the heat. All of this you can get at dollar tree for about $5-6.
GOSUN makes a backpack solar oven.
Best ones are all sold out right now.
July 2022
when katrina hit i was in east tx and power was out for 3 weeks and we cooked and baked cakes and bread in the cardboard solar oven and it worked fine and did not use all the tools or wood or the wheel and we baked ham and i like the easy way if i am going to bug out
https://www.youtube.com/watch?v=eNkBranK7JQ
The 2-hr heat-up should be reduced by using a stainless steel, aluminum, or thin non-stick pot. Heat used to heat cast iron should be used to cook the stew.
we did not take pics we were sorta in survival mode and eating wild hog and deer meat and baking what we needed in the cardboard solar oven but i posted a vid from youtube about as close as i can find but ours was bigger but katrina put us to figureing out how to cook and that oven was a boy scout thing and we smoked and cured our meat so it lasted
If you’re using stainless steel or aluminum, you don’t want it shiny; enameled cookware works well. If you use cast iron, yes it’ll take longer for the pot to heat up, but it also retains heat longer, so if you’re letting it cook for several hours and won’t be back for an hour or two later, the cast iron would keep the food warmer.
I have a solar oven and find if I allow the oven to preheat first, the cast iron doesn’t take as long to heat up.
This guy sure “grabbed’ a lot.
Another good way to cook is underground cooking. Dig a hole about three feet deep, (like a fire pit). line it with rocks or bricks. Make a starter fire for first time burn and then it’s ready to use. This is good for use with cast iron Dutch ovens. Prepare your meal while Fire is burning. Set the Dutch oven inside, cover with steel sheet and then cover with dirt to prevent the heat from escaping. Go back two hours later and it’s done. Depends on what you are cooking may take a little longer.
I have an old 10-gallon aquarium I was thinking about lining three or all four sides with reflective aluminum foil, leave the glass bottom as is, then turn it upside down on top of a mirror with the reflective side up and a Pyrex container with water on it and see how hot it will get, has anyone tried this? My first concern would be melting the adhesive holding the glass panes to the aquarium frame, but if that happened, then I would consider making a wooden frame from 1×1’s or 2×2’s, with slots cut to fit and slide the glass panes into.