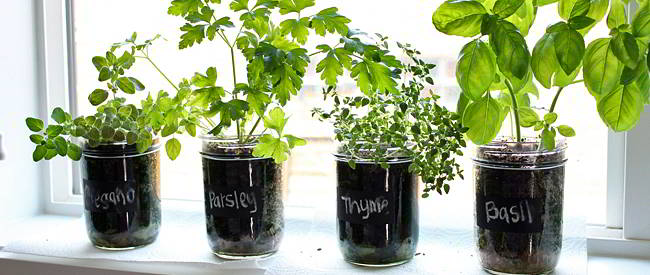
Fresh herbs should be a priority for every survivalist. They are great for flavoring foods but they are also packed with vitamins and some have medicinal uses. Herbs grow like weeds outdoors in average to sandy garden soil but conditions might not always be conducive to outdoor growing. Animals might eat them, other people may help themselves to them or maybe you just like the convenience of having them indoors. As long as you can provide enough light, growing herbs indoors is easy to do. You can buy seedlings or start them from seed.
What you will need:
 Seed-starting container (flats, pots or even re-purposed plastic containers)
- Houseplant potting soil (average garden soil does not drain quickly enough for container plants)
- Coarse builder’s sand or vermiculite
- Herb seeds
- Pots with drain holes in the bottom
- Fluorescent lights for low-light conditions
- 24-hour plug-in timer
How to start seeds:
- Prepare the container. Soak used containers in disinfectant for 10 minutes after washing them with hot, soapy water. Soak new, porous terra cotta or clay pots in fresh, clean water for 6 to 8 hours so that they don’t suck the moisture out of the seed-starting mix.
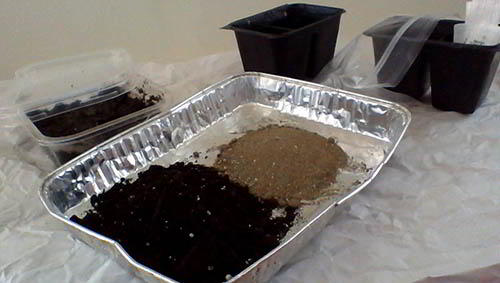
- Mix course builder’s sand or vermiculite with houseplant potting soil for a half and half mixture.
- Pour the seed-starting mix into the container. It should be about 2 inches deep.
- Moisten the mix with water. Use distilled water or tap water that has been aged for 24 hours in an open container.
- Sow the seeds 2 to 4 inches apart in the pre-moistened mix. Planting depth varies, depending on the herb. Most should be covered with no more than 1/4 inch of mix.
My Sow Seeds - Put the container in a zipper-close, clear plastic bag and seal it shut or seal the container with a lid. Use a clear lid so you can easily see the new sprouts. Set the container in bright, indirect light.
- Check the mix daily. Spray it with aged or distilled water from a spray bottle if it begins to dry. The seeds must be kept moist and warm. About 75 degrees F. or 24 degrees C. is best.
- Remove the cover as soon as you see the little green sprouts emerging. Set the container where they will get 1 to 2 hours of direct sunlight after the sprouts are about 1/2 inch tall.
- Continue to keep them moist and warm.
Related: The 5 Seeds That You Need to Stockpile in Your Pantry
How to Care for Herbs Indoors:
The biggest challenge you will face when growing herbs indoors will be providing enough light. Outdoor light is much brighter than indoor light. Windows that face south will give herbs plenty of light and they might do fine with a western exposure. Windows that face east will not provide enough natural sunlight and, of course, windows that face north provide no direct sunlight at all. Herbs growing in an eastern or northern exposure will have to get supplemental light. Otherwise, they will grow slowly, if at all, and become pale and spindly. There’s no need for concern, though, if you only have an eastern or northern window. As long as you have full-spectrum fluorescent lights and electricity, you can give your herbs the light they need.
- Pot up the new herb seedlings as soon as they are big enough to handle or when they are 2 to 4 inches tall. Each herb should have a 4- to 6-inch diameter pot or you can put multiple plants in larger containers.
- Pour 1 to 2 inches of houseplant potting soil into containers with drain holes. Most herbs grow best in a mix consisting of 2/3 to 3/4 potting soil and 1/3 to 1/4 vermiculite or coarse builder’s sand.
- Gently work the seedlings up out of the seed-starting mix. Use a small spoon or butter knife to push them up out of the soil. Handle them gently by the rootball. Do not try to pick them up by the stem.
- Set each seedling in its new container and gently hold the stem upright while you fill in around the roots with more potting soil.
- Water newly planted herbs until the water drains from the drain hole in the bottom of the pot. Water carefully, though, so you don’t wash the plant right up out of the soil.
- Set the newly-potted herbs where they will get 1 to 2 hours of direct sunlight. Increase the direct sunlight exposure by 1 to 2 hours every few days to gradually get them used to at least 6 hours of direct sunlight.
If you are growing herbs in an eastern or northern window, set up fluorescent lights so they are 4 to 6 inches above the plants. Use a 2- to 4-bulb fixture with a reflector hood. You can use 1 to 2 full-spectrum plant grow bulbs and 1 to 2 cool-white 20- to 40-watt bulbs. The cool white bulbs are cheaper. Make sure the lamp fixture is adjustable so you can raise the bulbs as the herbs grow.
Plug the fluorescent light fixture into a 24-hour timer. Set the timer to turn the lights on around sunrise. The lights must remain on as follows:
- 12 to 14 hours for plants in an east-facing window.
- 16 to 18 hours for plants in a north-facing window.
Monitor herbs growing in front of a west-facing window. If they seem to grow slowly or become pale and spindly, set up fluorescent lights and set the timer so they stay on for 12 to 14 hours each day.
Remember, the fluorescent light is meant to supplement natural light. It is important to maintain the day/night schedule so the herbs get 8 to 10 hours of dark at night. Newly-potted seedlings can be set beneath the fluorescent lights right away but start out with the lights suspended 8 to 10 inches above them so they are not overwhelmed.

Related:Top 27 Medicinal Plants to Learn For Survival
Water and Fertilizer
Rule of thumb is – water when the top inch of potting soil becomes dry. However, some herbs like their soil to stay moist while others prefer dryer conditions. Rosemary, oregano and parsley, for example, grow best when the potting soil is kept uniformly moist. Water them when the top of the potting soil just begins to dry. Basil, on the other hand, grows best if it is kept a little dryer. You can let the top 1 to 2 inches of potting soil become dry before watering basil. Pour the water evenly over the soil until it begins to drain from the bottom of the pot.
Use water that has been “aged” or left in an open container for 24 hours, if you are using tap water. This allows the chlorine to dissipate. You can also use rain water or distilled water and should do so if your tap water is high in sodium. Lots of water purification systems will cause tap water to have high sodium levels. Just reducing the sodium levels by mixing tap with distilled or rain water may be enough. If the potting soil develops a white residue, sodium levels are too high. Either repot the herbs in fresh potting soil or drench the existing soil with rain or distilled water to remove the excess sodium.
Feed herbs with fertilizer diluted to half strength. A balanced fertilizer ratio of 10-10-10 is good for most herbs, although some, like basil, prefer a high-nitrogen fertilizer. High-nitrogen fertilizer will have a higher number listed first in the ratio listing. For example, fertilizer with a ratio of 10-3-3 is a high-nitrogen fertilizer.
Give the herbs fertilizer every third or fourth watering. Always give them fertilizer right after a regular watering. Never give herbs fertilizer before watering them.
You may also like:
 10 Beautiful Plants That Are Secretly Killing Your Garden
The Real Reason Why Walmart’s are Closing all Over America (Video)
Top 10 Foods to Grow for Survival
Post Apocalypse Gardening: Living From a Small Piece of Land in Tough Conditions


If a person wants to add moisture holding material to the plant mix, use the absorbent found in diapers, if nothing else is available.
As an aid to defense, know those deadly plants, but if they are such as to be mistaken for a food plant, plant some, anyway. If people mistake them for an edible, and pick them, thinking they have made off with your food plants, that is their fault, not yours. This for any situation, but may be useful for a SHTF event.
good ideas. thanks! ;-P
~~ join the resistance. “Ohm……….” ~~
love the article. thank you for writing it. It will be a big help for the winter. Thank you again.