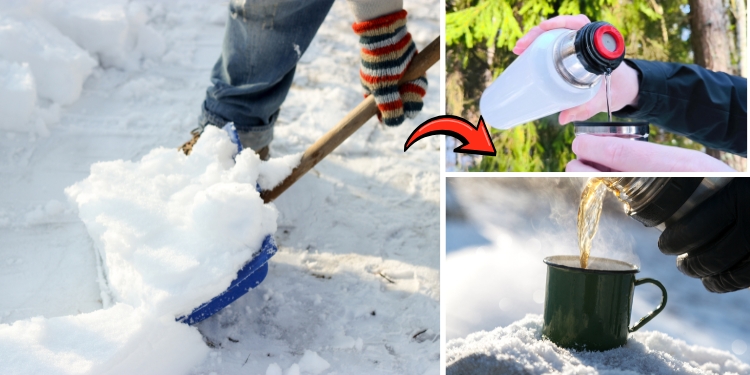
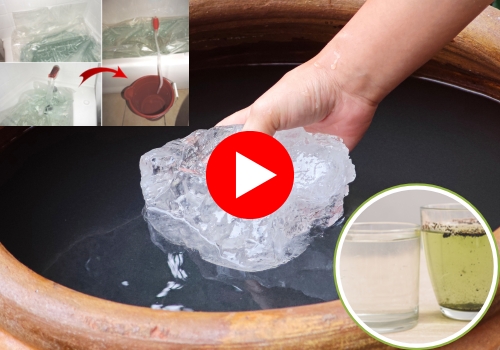
When I was a kid, I used to eat fresh snow right off the ground, thinking it was safe. Evidently, growing up I learned that this was pretty unhygienic. Snow can pick up dirt, dust, chemicals, and other impurities, making it risky to drink without treating it first.
The good news is that, with a few simple steps and minimal gear, you can turn snow into water that’s safe to drink. I’ve tested this method myself, and the resulting water meets safe drinking standards, with a neutral pH and impurity levels well within acceptable limits.
What “Contaminated” Really Means
 Snow becomes dangerous after a chemical spill for several reasons. Vapor clouds settle on it and vehicles roll through and kick up residue.
Even if the spill is miles away, wind can ferry microscopic particles across wide distances. The top layer of snow is the most exposed, but deeper layers may also be compromised depending on how long the spill has been active.
The trick in winter survival is shifting to never scoop a handful and melt it the easy way. Nowadays, every bit of snow should be treated like it’s suspect.
Supplies You Need (Low-Budget Setup)
You can pull this off with minimal gear. Most items cost under $20 and last for years.
- A stainless steel pot or kettle.
- A metal spoon or stick to skim debris (practically free).
- A coffee filter or cotton T-shirt.
- A DIY charcoal filter made from crushed hardwood charcoal (free if you produce your own.
- A camp stove, wood stove, or homemade rocket stove (free–$25 depending on what you already own).
- A covered container for clean water.
In this situation, charcoal and heat are your two best friends. Charcoal adsorbs (not absorbs!) certain chemicals, while heat renders pathogens harmless. These two alone cannot neutralize all chemical contaminants, but paired with careful snow selection, they help make snow safer for microbial consumption.
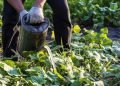
STEP 1 – Collect Snow From the Safest Possible Zone
After a spill, snow right on the surface is the first to collect airborne contaminants. Digging down is your first protective measure.
What You Should Do in the Field:
You should make sure you walk at least 200 feet upwind of the spill zone or any traffic path. Avoid ditches, because chemicals drift downward by gravity or melting runoff.
Look for a drift or bank where the snow is densely packed. With gloves on, brush off the top 2–3 inches and discard it.
For melting, I recommend you to use buried snow, because it’s compacted and less likely to have caught recent fallout.
Why it matters: Even after a spill, deeper layers often retain the purity of earlier snowfall. It’s not guaranteed to be pure, but it gives you a better starting point.
STEP 2 – Pre-Melt Outside the Pot
This is a trick taught by an old trapper I worked with. Scoop snow into a separate container first and let it sit near a heat source, not in the cooking pot. While you follow this step, make sure won’t skip this forgotten trick:

Contaminants often cling to the fluffiest ice crystals. As the snow warms slightly, heavy particles settle at the bottom. You should pour off the top partially melted slush into your melting pot and leave the sediment behind. Mind you, it won’t remove everything. But it cuts out visible grit and windborne residue before you even fire up the stove.
Budget Note: Any metal bowl or even an old coffee can will do. You’re not heating it, just letting it soften.
STEP 3 – Melt Snow to Skim Contaminants
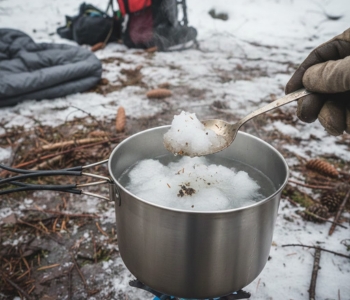 Fast melting just floods all contaminants into solution. Slow melting keeps them somewhat separated so you can skim.
When I conducted this experiment, I made sure to put the slushy snow into a pot and warm it over low heat. As the first layer melted, floating debris rose to the surface.
I used a spoon to remove any suspicious material, including grit, unusual colors, oily sheen, or fine black flecks. These are mostly found in polluted and densely populated areas
Once the snow fully melted, I brought the water just below boiling for a minute to make later filtering easier.
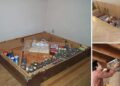
STEP 4 – Make a Gravity Filter
This is the heart of the system. Think of it as using nature’s own purifier.
For this step, you need some materials, such as:
- Crushed hardwood charcoal
- Coffee filter or clean cotton cloth
- A bottle, cut in half, or a makeshift funnel
How to build it:
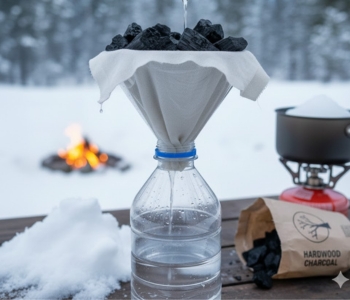 For this step, place the cloth or filter inside your funnel, then pour in a thick layer of charcoal, at least two inches. The charcoal will adsorb many organic contaminants and some chemicals.
While it’s not lab-grade, hardwood charcoal has helped rural communities in countless crises. What you’re doing here is simple: give the water a long pathway through the carbon so unwanted molecules can latch on.
The best part? If you make your own charcoal in a firepit, it costs nothing. Buying a small bag sets you back about ten bucks but will last a very long time.
STEP 5 – Boil for Safety
When it comes to hazardous chemicals, filtering snow alone is not enough. That’s why it also needs boiling. Even though it won’t neutralize all chemicals, it does eliminate microbial threats and helps evaporate some volatile contaminants.
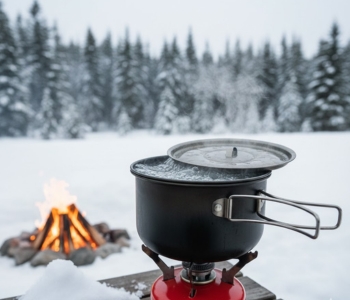 So, to make sure the resulting water is safe to drink, I boiled the filtered water for a full five minutes. I left the lid partially on so rising steam won’t carry contaminants back into the pot.
Why this works
Many airborne spill particulates are hydrophobic or volatile. Filtration reduces the load, and boiling helps remove some of the rest.
It’s not perfect, but in field conditions, the goal is to survive and make it through the day.
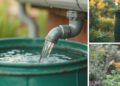
STEP 6 – Store Properly So You Don’t Re-Contaminate It
After filtering and boiling, the next important step is knowing how to store water properly. Always use a clean container, such as metal, glass, or food-grade plastic, with a tight-fitting lid. Never pour water back into a container that has touched snow, gloves, or dirty surfaces.
But even in a sealed container, water can become contaminated over time. Bacteria already present in the water can multiply, and any tiny impurities or leaks can introduce new microbes.
So, to keep it drinkable, it’s necessary to test water before drinking it. The easiest and cheapest way to do it is this:
In freezing conditions, your main challenge is preventing the water from freezing while keeping it safe. Insulate the container by wrapping it in clothing, a jacket, or a sleeping bag inside your pack. This slows freezing and keeps the water accessible.
If you’re staying in one place, you can bury the container in packed snow. Snow is a surprisingly good insulator and helps maintain a stable temperature, preventing the water from freezing solid. Just make sure the container is sealed and protected from dirt or debris.
What This Method CAN and CANNOT Save You From
You need to keep in mind that this is not a guaranteed solution for toxic chemicals. But in real-world survival? This method has kept people alive in compromised winter environments for centuries.
This method CAN:
- Remove particulates from air fallout
- Reduce chemical load through charcoal adsorption
- Eliminate microbes through boiling
- Remove debris and visible contamination
- Turn dangerous snow into usable drinking water in most survival scenarios
It CANNOT:
- Remove heavy industrial solvents
- Purify water contaminated with heavy metals
- Neutralize all chemical agents
Of course, in survival situations, you need to know more than one method to have drinkable water, because it is not practical to store on liters of bottled water if you cannot bug-out with it. In this case, you must try this other method that I tested:

Total Budget Estimate
Here is what you realistically spend if you’re starting from scratch:
- Stainless steel or cast iron pot: $15
- Coffee filters / cloth: $3
- Charcoal: $0 if you DIY / $8–$12 if you buy a small bag.
- Camp stove (homemade rocket stove): $0–$10
- Clean storage container: $5
Total: $23–$45
Final Thoughts
I’ve used this exact process in remote regions where outsiders assumed water was hopelessly compromised. All I can say is that it works. It’s slow, it takes patience, but when it’s you versus dehydration, the method earns its place in every prepper’s toolkit.
But remember, this is a survival method, not a perfecta purification system. It’s designed to help you get through harsh winter conditions when conventional water sources aren’t available. Always stay cautious: if snow smells unusual, has bright colors, or comes from areas near industrial spills, it’s better to look elsewhere.
You may also like:
How to Build a Hydro Generator For Free Electricity (VIDEO)
11 Long-Lasting Foods That Will Probably Outlive You


It’s weird that I’ve noticed that in the winter time my concerns for drinking water really drops fast….leaving me open to dehydration ….
Also… i just remembered that i would put paper towels on top of the water to soak up lighter than water contaminates like….over feeding my pet fish ,and unknown oil sheens .And ya i was considering purchasing a tree tapping tool like for maple syrup to throw into my bug out bag .Articles on water are much appreciated….Thanks
You’re not alone, winter tricks your body in ways most people never notice. The cold tightens your blood vessels and suppresses your natural thirst signal, so you feel hydrated even while the dry air is quietly pulling moisture out of you with every breath. It’s one of the easiest times of year to get dehydrated without realizing it. The key is staying intentional: sipping water regularly, keeping warm drinks that actually hydrate nearby, and remembering that just because you’re not sweating doesn’t mean your body isn’t losing water. Staying ahead of it keeps you sharp, steady, and ready for whatever the season throws your way.
actually hydrate, coffee tea, any caffeine is a diuretic. Which means, it takes more water OUT than it Puts IN.
if your going to drink HOT tea for the heat benefit, drink some plain water with it. make the tea weak will also be a good idea.
If you have good shelter and heat, drink the water separately to keep hydrated