
We often focus on prepping for worst-case scenarios, but it’s just as important to care for our present well-being. In a society that sometimes feels like it’s teetering on the edge, creating a quiet, controlled environment is part of staying sane, productive, and healthy today.
So, if you’ve ever been cornered by one more loud neighbour or a blaring television next door, then you know the value of quiet. Maybe you want to record, create, film, sleep, or just live without your space constantly compromised.
Think of sound infiltration like an invasion. The enemy isn’t soldiers banging on your door, but vibrations, echoes, weak walls, thin doors, and the unrelenting buzz of external noise hacking into your safe‑space.
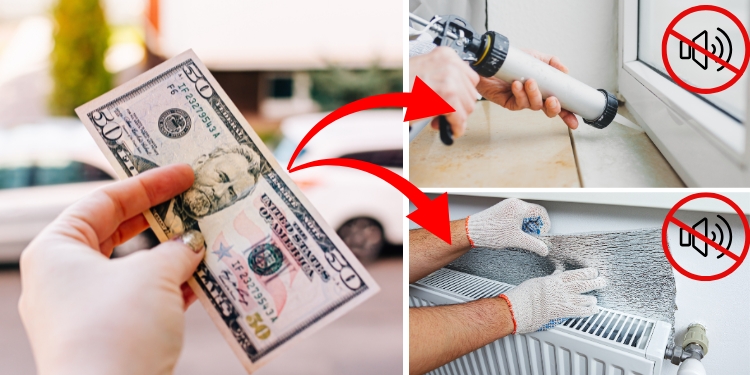
That’s why we found a way to build a basic but effective soundproofing system for under $50, because most people don’t need to spend $1,000 for a bit of peace and quiet. What you need is something real, that works now, to protect your space and your peace of mind.
How You’ll Benefit from This DIY Soundproof System
This DIY soundproofing system gives preppers a practical edge. By blocking, absorbing, and decoupling sound, you reduce unwanted noise from doors, windows, thin walls, and even floors. That means your home becomes a quiet command center where you can rest, strategize, train, or work without interruptions.
For urban preppers, this low-cost system transforms an ordinary room into a semi-secure sanctuary. For those off-grid or in more remote setups, it ensures that your activities, whether storing supplies, recording tutorials, or planning survival strategies, remain private and uninterrupted.
Even with a budget under $50, you’re gaining a real advantage: reclaiming your space, protecting your family’s focus, and practicing techniques that matter for long-term resilience.
Basic Principles (Don’t skip this!)
Soundproofing is pure physics. Professionals rely on a few core principles, so you don’t need fancy tools, just a scaled‑down approach. Skip one, and you’ll still hear the noise.
 So, before starting this DIY project, here’s what you need to understand:
- Blocking: Prevent sound from coming through or going out. Denser, heavier materials help.
- Absorbing: Stuff that catches sound waves so they don’t bounce around.
- Decoupling: Separate surfaces so vibrations don’t carry through.
- Sealing: Gaps are the weak link. Seal cracks, doors, windows where sound leaks.
Strategy & Budget Breakdown
We’ll allocate the under $50 budget roughly like this, but you’ll likely spend even less:
-
Materials for absorption and sealing: $20-30. Think of acoustic foam panels, moving blankets, or thick rugs that absorb sound waves. Add in weather-stripping, draft stoppers, or a tube of sealant to close up small leaks around doors and windows.
-
Materials for blocking and decoupling: $15-25. Dense materials like rubber mats, heavy curtains, or layered cardboard panels can block sound effectively. Old carpets or yoga mats can also be used to reduce vibrations between floors and walls.
-
Misc: $0-5 (DIY labour & tools you already have). You’ll likely use tools already in your home, such as scissors, a utility knife, adhesive strips, or leftover screws. The real cost here is a bit of your time and elbow grease.
What You’re NOT Doing
Let’s be clear: this is a budget-friendly DIY soundproofing system. It is not a professional studio or a full-blown noise elimination setup.
So you won’t achieve absolute silence, and you won’t be stopping every decibel from getting through.
What you will do is take control, block the worst intrusions, and reclaim your space without spending a fortune.
Step‑by‑Step DIY Soundproofing System
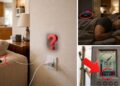
Assess your weak points
Walk around the room, close the door and listen. Are you hearing noise through the door? Or maybe through the window? Through the walls/ceiling/floor? If yes, then write them down.
Block the door
Doors are one of the biggest weak points when it comes to soundproofing. Covering them with a dense or moving blanket can make a noticeable difference, absorbing and blocking noise. You can repurpose a blanket you already have for free, or purchase one for around $10-15.
The bottom of the door is another common leak; a door sweep or even a simple rolled-up towel can help seal it. Adding weather‑stripping around the frame or using inexpensive foam or rubber for roughly $5-10 it further reduces sound transmission and strengthens the overall barrier.
 Seal windows & holes
Windows and tiny cracks are the secret doors sound sneaks through. First, identify every one of them. Then:
- Use inflatable draft stoppers, foam tape, or heavy curtains. A standard heavy curtain panel can work for $10-15.
- If there are holes in the wall (outlets, gaps): use caulk or foam sealant. Cost: $5.
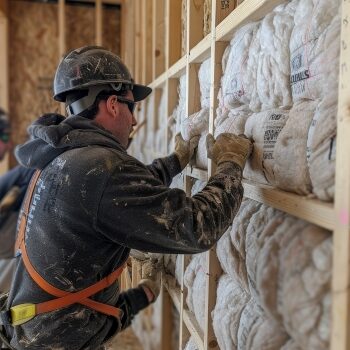
Absorb and decouple the walls/floor/ceiling
You don’t need full studio walls. Just reduce reflections and dampen vibrations.
- Buy acoustic foam panels (the egg‑crate style) or dense mats, maybe 4-6 pieces for $20. Mount them on the wall adjacent to the noise source or where you want silence.
- If you have a bare floor or noisy structure, then lay a heavy rug and a thick under‐pad (even carpet underlay) which you can find used or cheap for $10–15.
👉How You Can Reduce 5G and Wi-Fi Signals in Your Home
- For decoupling: you might build a “floating” DIY shelf or panel using rubber feet or isolation pads under it; but if the budget is tight simply ensure your furniture isn’t rigidly hitting the walls so vibrations don’t transmit.
Final touches
- Move furniture: heavy bookshelves or wardrobes against the noisy wall help. Free resourceful fix.
- Cover door jambs: curtain or blanket over door helps further.
- Use a white‑noise machine or fan to mask remaining noise if you can spare $10-15 later (optional).
- Test at night: when everything’s quiet, listen again. Adjust where needed.
If you want more projects that actually make a difference, check out No Grid Survival.
This book shows you how to build systems that work – quiet your home, secure your property, store water, and stay self-reliant – all without breaking the bank. Each project is tested, practical, and designed for real-world conditions.
 You’ll learn how to do more with less, spot weak points in your home before trouble arrives, and create solutions that pay off long before the lights go out. If you care about safety and living off-grid, this is the prepper book that delivers results you have been looking for.
Why This Works
This DIY project is effective because it targets the main paths through which sound enters: doors, windows, and weak points in walls and floors. By adding mass, absorption, and sealing these routes, even a single layer of barrier can significantly reduce noise, while multiple layers compound the effect.
And the best part is that it can all be done for under $50. Studies and practical reports on home soundproofing confirm that closing gaps and adding density or absorption consistently lowers sound levels by measurable decibels.
Pro Tips (because you might want more later!)
- If the noise source is below you (floor), consider rubber floor pads, under‑lay, or even cheap interlocking foam mats.
- If you have drywall walls and you’re serious: adding a second layer of drywall with green glue between – that’s a higher budget, but higher reward.
- For budget hacks: reused heavy moving blankets, second‑hand rugs, foam panels from used sources.
- If you’re renting / temporary: use removable methods (non‑damage adhesives, blankets) so you don’t worry about permanent modifications.
Every experienced prepper knows that the ultimate skill is knowing how to build anything that works. Tools, furniture, storage, or home systems – all created with your hands and a few simple materials
The Amish Ways reveals these time-tested techniques in full detail.
Inside, you’ll find clever joinery and smart, effective designs that transform ordinary wood into systems you can rely on. It’s the book with DIY projects that really work and the missing link for every builder and prepper!

Final Thoughts
You don’t need to spend a fortune to take control of your space. Under $50, with creativity and sweat, you can build a DIY sound‑proofing system that puts you ahead of many folks who shell out hundreds and still hear everything. Even on a shoestring budget, focusing on the weak points – doors, windows, cracks – makes the difference.
You may also like:

Throw Your Generator in the Trash! (VIDEO)
How to Make Your Home Bulletproof
How to Heat a Greenhouse Without Electricity


Interesting, and one of those topics so far not covered at this site. Good deal!
The need is there.
Some of you, whenever the grid goes down, won’t have the CPAPs to stop your snoring. Kids and babies will cry. People who are injured or recovering will make more noise when painkillers are scarce.
Noise will potentially alert the curious to your trove of resources.
Absolutely, you make a great point! It’s one of those practical topics that often gets overlooked. Noise really is a serious consideration when prepping – CPAPs, kids, pain management, all of it adds up. Even small sounds can attract unwanted attention, so thinking about how to minimize them is just as important as stockpiling supplies. Definitely something everyone should factor into their plans.
If you have any windows, curtains alone will not sound proof your home.
Glass is very conductive of sound.
Fun fact: long also, when Indians were being raided by other tribes, and they had a crying baby, they smothered the baby to death to prevent being discovered.
One baby can get an entire village killed.
Some of the suggestions deface the interior of your home. Others might require remodeling.
Acoustic insulation is not cheap either.
Harbor Freight has moving blankets from $10 to $20. Put grommets in them, and hang from command hooks over windows and doors. Don’t go to Harbor Freight without a coupon (sign-up for email and wait until you get a coupon you can use.
It’s surprising how many good items there are for least expense at Harbor Freight. I buy good hatchets for $12.00. Reshape the handle. I grind the heads to look warlike. Use the dremel to make the sides look like bark. Sand and blue. Looks great and sell for $45.00
I’ve heard it said that you cannot hear outside noises in a good sound booth, but you can clearly hear your own heart beating in a great sound booth.
I’m OK with entry-level deadening for my purposes.
well, sort of.
you can sort of sound proof ONE part of ONE room for $ 50, in glue or nails, to hold up re purposed carpet. As for sound proof YOUR HOME for Under $ 50 – good luck.
I think it was Dan that said HF has moving blankets for $ 10 and up, well Dan, last month I got one free, for being an insider club member. Often, you cant buy the materials for a moving blanket type item as cheap as you can get the item at HF. If you are not an insider member, you better find out about it, the free gifts will pay for the membership ! ! !
Sound proofing-
HANG fabrics, such as on pegs an inch away from the wall. hang them on other walls as well, once the sound gets in, it bounces. Like the article said, get after the nooks and crannies. Interior hollow core doors, HORRIBLE !, but remove the door, hole saw into all four sides and fill it with the spray foam that WONT expand the cavity, re install when dry ( fill the sides one at a time and let dry before you move on.
MORE hanging fabrics, in the interior portions of the room – ever notice things like that in a restaurant, thats why.
If you need to sound proof your sleeping area after SHTF as a Survival method, your in the WRONG place. weather its interior or exterior noise your thinking of.
Build a stud wall, In front of the wall, fill cavity with ground cellulose.